Alright, my fellow sugar fiend, let’s talk about the real star of the Christmas show. Forget the presents for a second—it’s the dessert table that gets the crowd buzzing, right? I mean, who doesn’t sneak a peek (or a finger-full of frosting) the moment they walk in? I’ve spent more December nights than I can count with flour in my hair and a questionable amount of red food coloring on my hands, all in the pursuit of that perfect festive spread.
This isn’t about flawless, magazine-cover desserts. This is about delicious, joyful, and totally doable treats that will make your holiday season sweeter and a whole lot more fun. Whether you’re a baking newbie or a seasoned pro looking for fresh inspiration, I’ve got you covered. So, preheat your oven (or don’t—some of these are no-bake wonders!), and let’s dive into 10 festive Christmas dessert recipe ideas that are guaranteed to spread some cheer.
1. No-Bake Christmas Chocolate Peppermint Bars
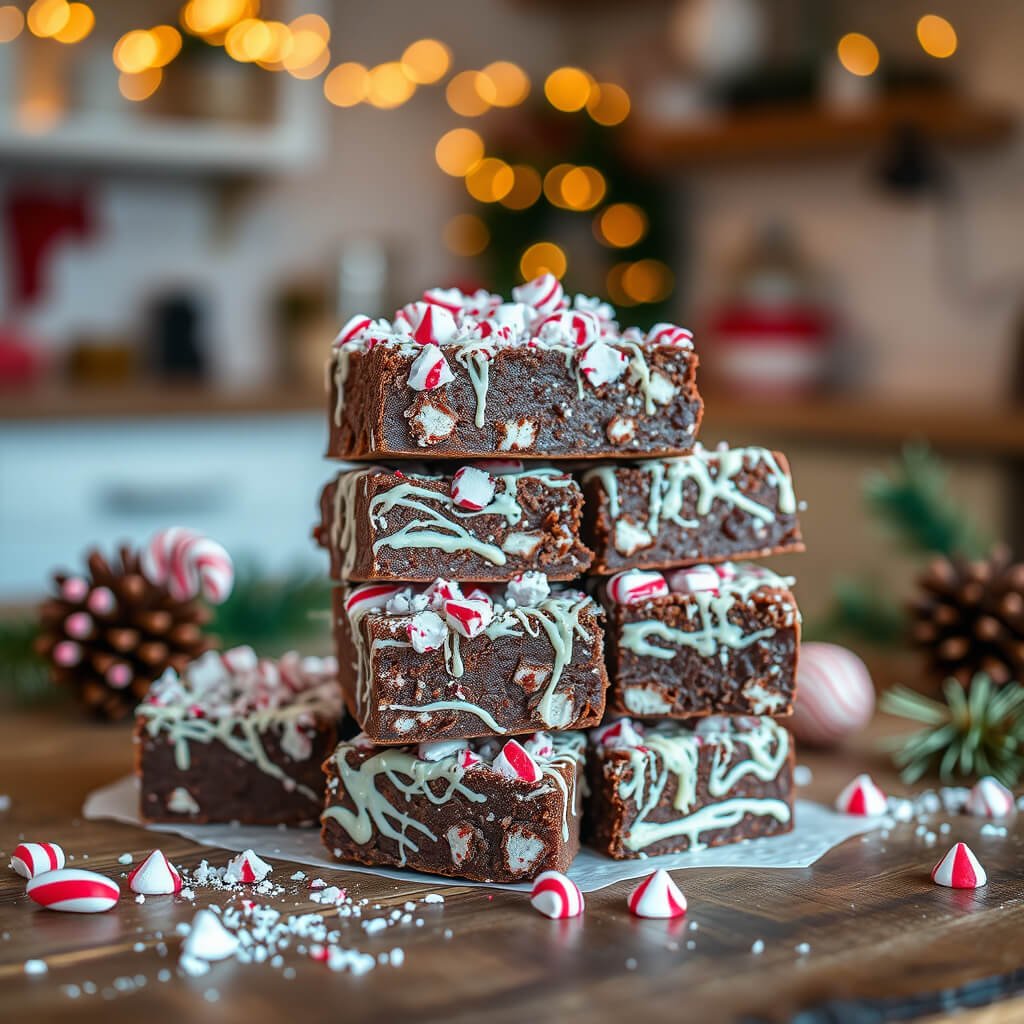
Let’s start with a lifesaver, shall we? These bars are for those moments when you need a stunning dessert, but the thought of turning on the oven makes you want to nap. They’re cool, creamy, and pack that classic holiday punch of chocolate and peppermint.
Why You’ll Love Them: They set in the fridge, require zero baking skills, and taste like a fancy peppermint mocha in solid form. IMO, they’re a total crowd-pleaser.
The Lowdown:
- Prep Time: 20 minutes
- Cook Time: 0 minutes (Chill time: 3 hours)
- Servings: 16 squares
Ingredients:
- For the Base:
- 2 cups chocolate cookie crumbs (like from Oreos, filling removed)
- 1/2 cup unsalted butter, melted
- For the Peppermint Layer:
- 8 oz cream cheese, softened
- 1 cup powdered sugar
- 1 tsp peppermint extract
- 2 cups whipped topping (like Cool Whip)
- 1/2 cup crushed candy canes or peppermint candies
- For the Topping:
- 1 cup semi-sweet chocolate chips
- 2 tbsp coconut oil or vegetable shortening
- Extra crushed candy canes for sprinkling
Equipment Needed:
- 9×13 inch baking pan
- Mixing bowls
- Electric mixer (hand or stand)
- Spatula
- Small saucepan (for melting chocolate)
Instructions:
- Make the Crust: Combine the chocolate cookie crumbs and melted butter until the mixture resembles wet sand. Press it firmly and evenly into the bottom of your pan. Pop it in the fridge to set while you make the filling.
- Create the Filling: Beat the softened cream cheese until smooth. Add the powdered sugar and peppermint extract, mixing well. Gently fold in the whipped topping and the 1/2 cup of crushed candy canes until it’s all combined. Spread this dreamy mixture over your chilled crust.
- Add the Glorious Topping: Melt the chocolate chips and coconut oil together in a double boiler or in 20-second bursts in the microwave, stirring until smooth. Let it cool slightly, then pour it over the peppermint layer, tilting the pan to coat it evenly. Sprinkle with extra crushed candy canes immediately.
- Chill Out: Refrigerate for at least 3 hours, or until firm. Slice into bars and serve cold.
Pro-Tip Notes: Let the melted chocolate cool for a minute before pouring, or it might melt your peppermint layer into a swirl (which, FYI, still tastes amazing but looks less defined). For cleaner cuts, run your knife under hot water and wipe it dry between slices.
2. Festive Red and Green Holiday Cupcake Tower
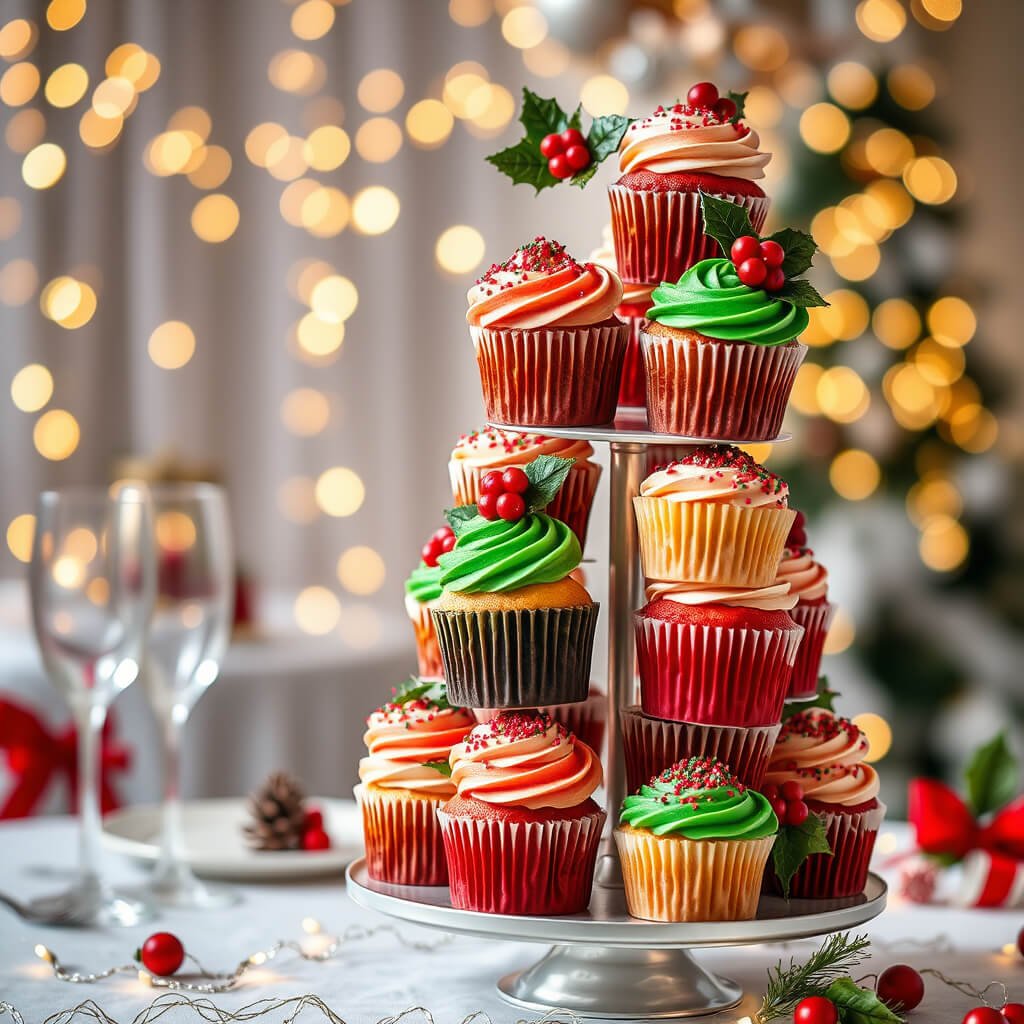
Want a centerpiece that’s edible? A tower of cupcakes decorated in Christmas colors is your answer. It’s interactive, lets people choose their favorite, and looks incredibly festive.
Why You’ll Love Them: They’re customizable! You can use any cupcake and frosting recipe you love. The magic is in the decorations.
The Lowdown:
- Prep Time: 45 minutes
- Cook Time: 20 minutes
- Servings: 24 cupcakes
Ingredients:
- 1 box of your favorite vanilla or chocolate cake mix (plus ingredients on the box) OR your from-scratch recipe
- 2 batches of vanilla buttercream frosting
- Red and green gel food coloring
- Decorations: Sprinkles, mini candy canes, edible glitter, red and green M&Ms
Equipment Needed:
- Cupcake tin & liners
- Mixing bowls
- Piping bags and tips (a large star tip like 1M is great)
- Spatula
- Cupcake tower or stand
Instructions:
- Bake the Cupcakes: Prepare and bake cupcakes according to package or recipe directions. Let them cool completely. This is non-negotiable—unless you want frosting soup.
- Color Your Frosting: Divide the buttercream into two bowls. Tint one a vibrant red and the other a festive green using gel food coloring (liquid dye can make the frosting runny).
- Decorate with Gusto: Fill piping bags fitted with a star tip with each color of frosting. Pipe tall, swirling peaks onto each cupcake. Now, unleash your inner elf! Go wild with sprinkles, top with a single M&M, or add a tiny candy cane.
- Build Your Tower: Arrange the cupcakes on a tiered stand, alternating colors for maximum visual impact.
Pro-Tip Notes: Bake your cupcakes a day ahead and store them unfrosted in an airtight container. Frost them the day of for the freshest taste. If you’re not confident in piping, just spread the frosting with a knife and pile on the sprinkles. No judgment here! 🙂
3. Easy Christmas Tree Brownie Bites
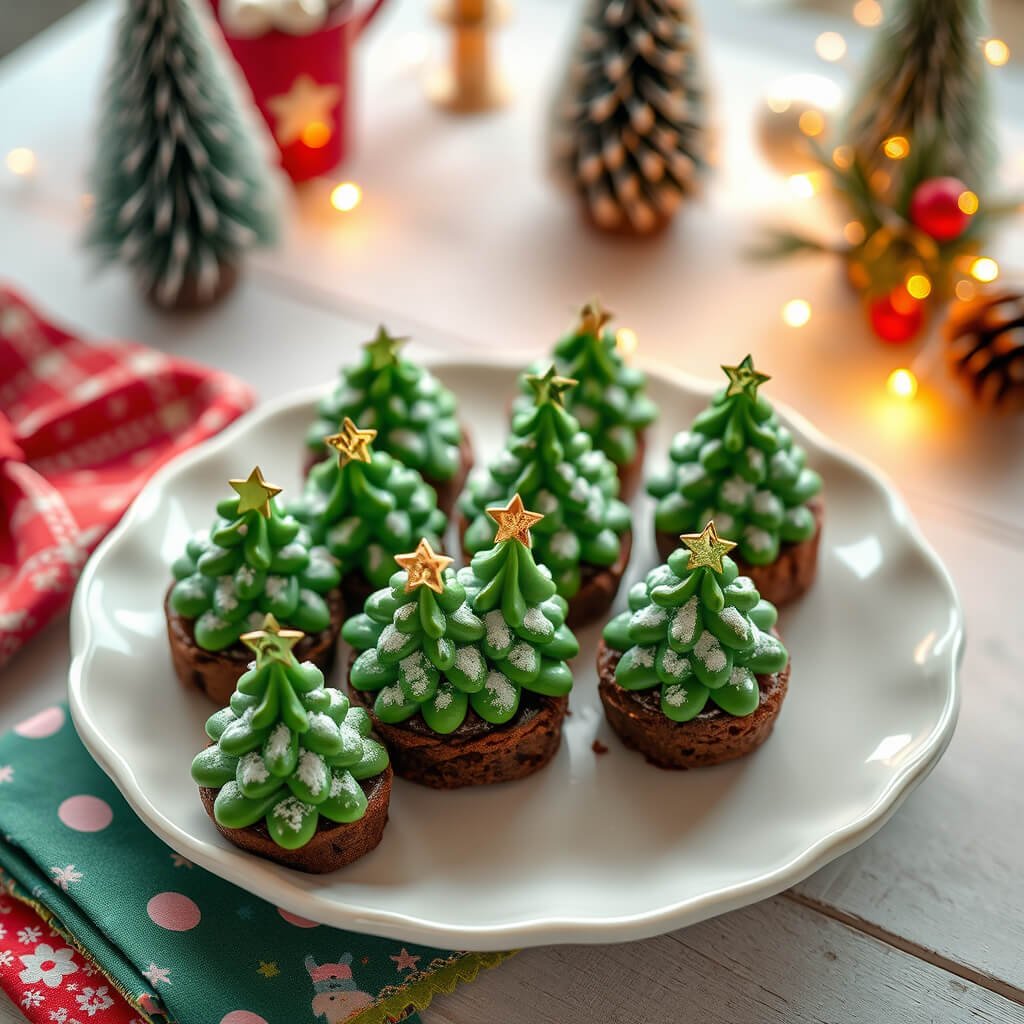
These are ridiculously cute and use a genius shortcut. They’re perfect for a cookie exchange, a kid’s party, or when you just need a little chocolatey joy.
Why You’ll Love Them: They start with a box brownie mix. I know, I know—live a little! The decoration is so simple it feels like cheating.
The Lowdown:
- Prep Time: 15 minutes
- Cook Time: 25 minutes
- Servings: 24-30 bites
Ingredients:
- 1 box fudge brownie mix (plus ingredients on the box)
- 1 cup green frosting (from a tub or homemade)
- Mini M&Ms or small round sprinkles for “ornaments”
- Star-shaped sprinkles or yellow fondant for the tree topper
- Pretzel sticks, broken into small pieces, for the “trunk”
Equipment Needed:
- Mini muffin tin
- Mixing bowl
- Piping bag with a small star tip
- Spatula
Instructions:
- Make Brownie Bites: Prepare brownie batter as directed. Pour into a well-greased mini muffin tin, filling each cup about 2/3 full. Bake as directed (usually around 20-25 mins) until a toothpick comes out with moist crumbs. Let them cool completely.
- Create the Trees: Pipe a swirl of green frosting on top of each brownie bite, starting from the outside and working your way up to a point to form a tree shape.
- Decorate: Gently press mini M&Ms or sprinkles into the frosting as ornaments. Add a star sprinkle to the top. Insert a small piece of pretzel stick into the bottom for the trunk.
- Display: Arrange them on a platter and watch them disappear.
Pro-Tip Notes: Don’t overbake the brownies—they’ll firm up as they cool and stay fudgier. If the frosting is too soft to pipe, chill it for 15 minutes. Let the kids help with the decorating; it’s half the fun!
Read More: 10 Yummy Simple Dessert Recipes Ideas for Stress-Free Baking
4. Creamy Eggnog Cheesecake Squares
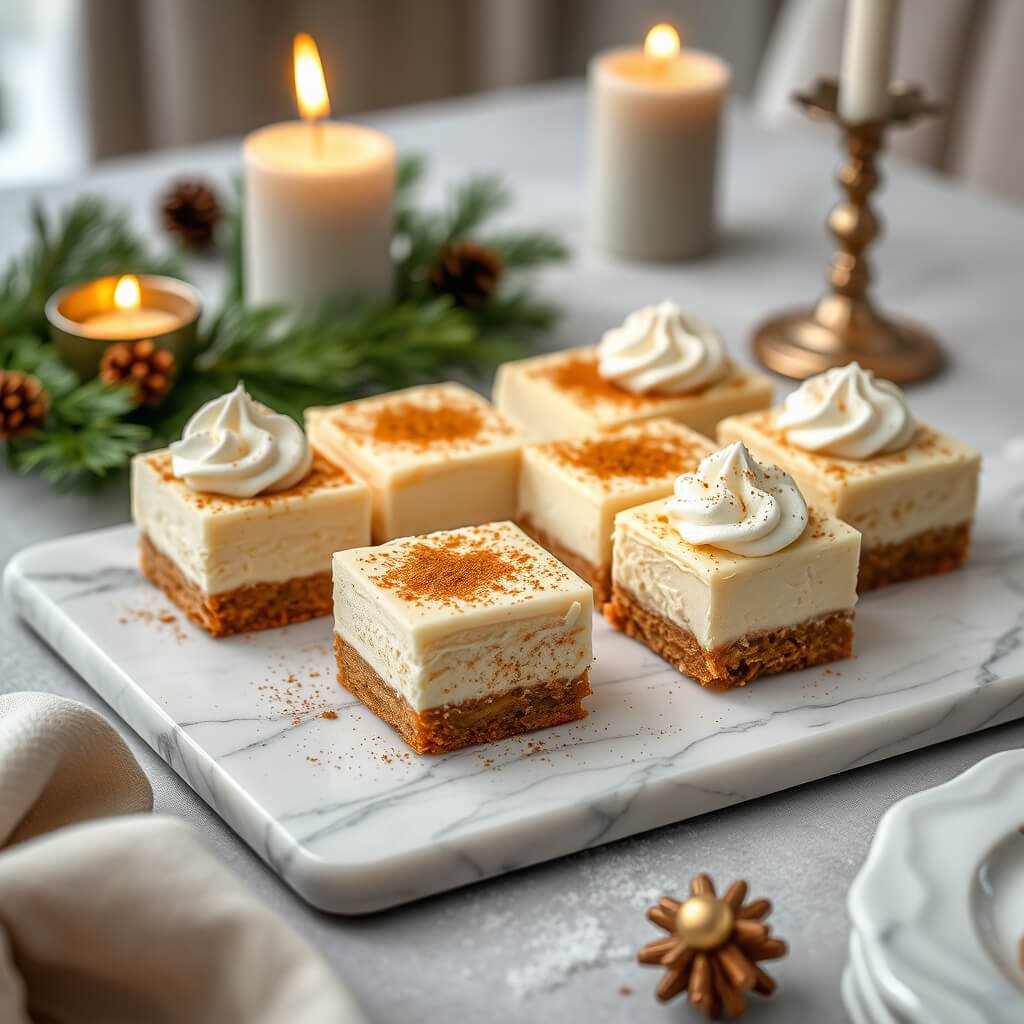
If you love eggnog, this dessert is your destiny. It takes the rich, spiced flavor of the holiday drink and transforms it into a creamy, dreamy cheesecake bar that’s easier to make than a full cheesecake.
Why You’ll Love Them: All the sophisticated flavor of eggnog cheesecake with half the fuss and all the shareability of a bar dessert.
The Lowdown:
- Prep Time: 25 minutes
- Cook Time: 40 minutes
- Servings: 16 squares
Ingredients:
- For the Crust:
- 1 1/2 cups graham cracker crumbs
- 1/4 cup granulated sugar
- 6 tbsp unsalted butter, melted
- For the Filling:
- 16 oz (2 blocks) cream cheese, softened
- 1/2 cup granulated sugar
- 1/2 cup prepared eggnog
- 2 large eggs
- 1 tbsp all-purpose flour
- 1 tsp vanilla extract
- 1/4 tsp ground nutmeg, plus more for garnish
- For the Topping:
- Whipped cream
Equipment Needed:
- 9×9 inch baking pan
- Mixing bowls
- Electric mixer
- Spatula
Instructions:
- Prep & Crust: Preheat oven to 325°F (163°C). Mix crust ingredients and press firmly into the bottom of a greased 9×9 pan. Bake for 10 minutes. Remove and let cool slightly.
- Make the Filling: Beat cream cheese and sugar until smooth. Add eggnog, eggs, flour, vanilla, and nutmeg, mixing on low speed just until combined—don’t overmix! Pour over the pre-baked crust.
- Bake to Perfection: Bake for 35-40 minutes, or until the edges are set and the center has a slight jiggle (it will firm up as it cools). Turn off the oven, crack the door, and let the cheesecake cool inside for 1 hour. This prevents cracks!
- Chill and Serve: Refrigerate for at least 4 hours, preferably overnight. Cut into squares, top with a dollop of whipped cream, and a fresh sprinkle of nutmeg.
Pro-Tip Notes: Room temperature ingredients are key for a smooth, lump-free filling. Real, high-quality eggnog makes a noticeable difference. The slow cooling in the oven is the secret to a crack-free top—science is tasty!
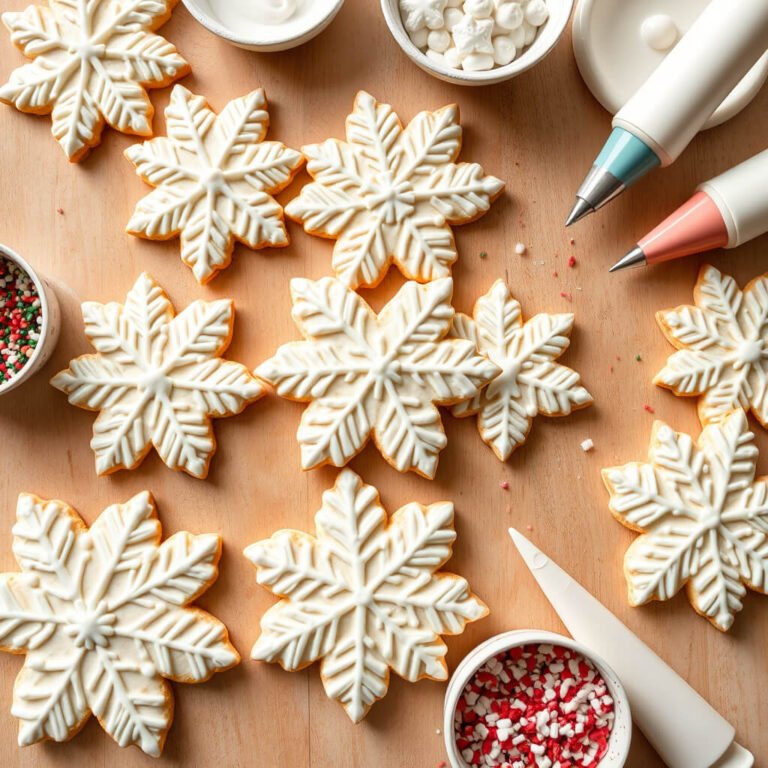
5. Snowflake Sugar Cookie Decorating Set
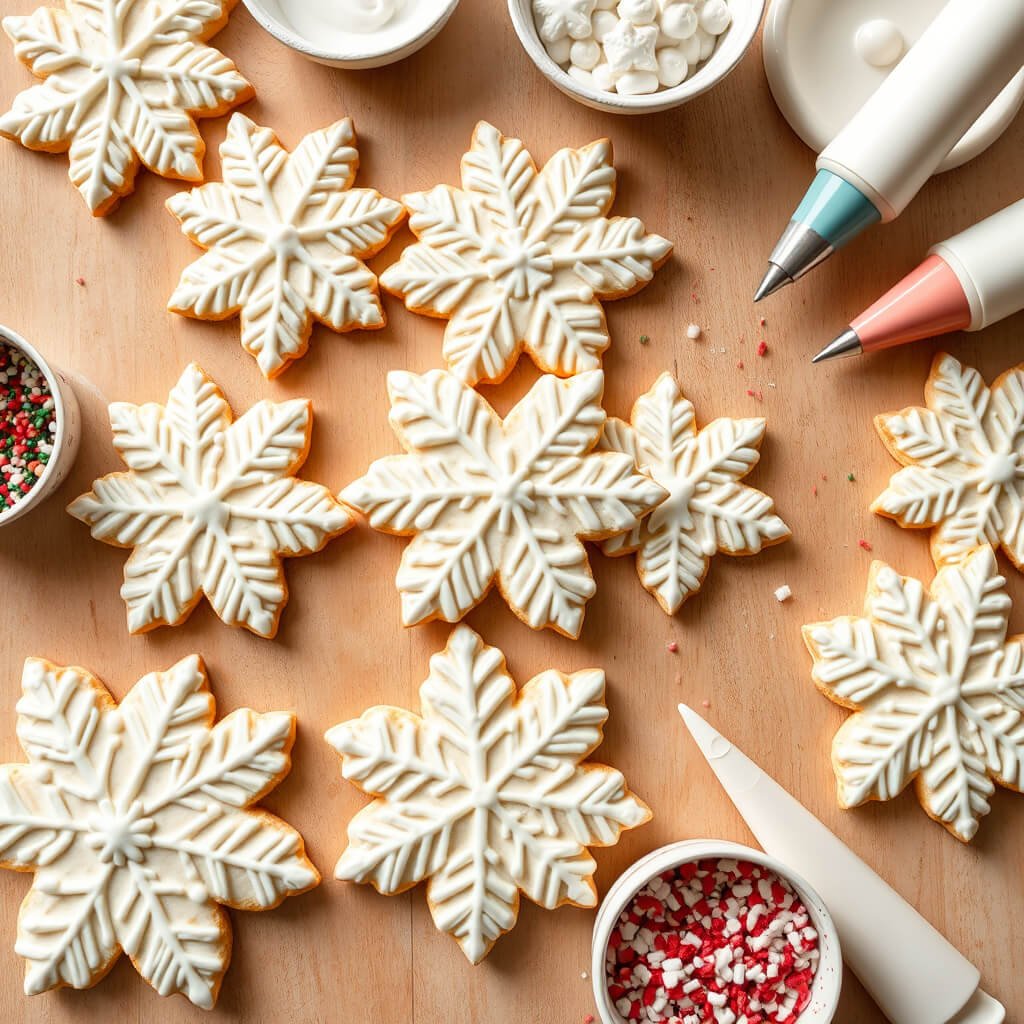
This is less of a strict recipe and more of an activity. It’s the heart of so many Christmas memories! The goal here is a delicious, sturdy cookie that’s a perfect canvas for your artistic endeavors (or happy accidents).
Why You’ll Love Them: It’s an experience. You get to bake, decorate, and then proudly eat your creations. They also make fantastic homemade gifts.
The Lowdown:
- Prep Time: 30 minutes (plus 2 hours chilling)
- Cook Time: 10-12 minutes per batch
- Servings: 2-3 dozen cookies
Ingredients:
- For the Cookies:
- 3 cups all-purpose flour
- 1 1/2 tsp baking powder
- 1/2 tsp salt
- 1 cup unsalted butter, softened
- 1 cup granulated sugar
- 1 large egg
- 2 tsp vanilla extract
- For the Royal Icing:
- 4 cups powdered sugar, sifted
- 3 tbsp meringue powder
- 5-6 tbsp warm water
- Gel food coloring (blue, white, silver)
Equipment Needed:
- Rolling pin
- Snowflake-shaped cookie cutters
- Baking sheets
- Piping bags and tips (or squeeze bottles)
- Toothpicks or a cookie scribe
Instructions:
- Make the Dough: Whisk together flour, baking powder, and salt. In another bowl, cream butter and sugar. Beat in egg and vanilla. Gradually add the dry ingredients. Divide dough in half, wrap in plastic, and chill for at least 2 hours.
- Bake the Cookies: Preheat oven to 350°F (177°C). Roll dough to 1/4-inch thickness on a floured surface. Cut out snowflakes. Bake on parchment-lined sheets for 10-12 minutes until edges are just starting to turn golden. Cool completely.
- Mix the Icing: Beat all icing ingredients on high speed for 7-10 minutes until stiff, glossy peaks form. Divide and color as desired. Outline and “flood” (fill in) your cookies. Use a toothpick to pop air bubbles and guide the icing.
- Decorate & Dry: Let the base coat dry completely (4-6 hours) before adding fine details. Have fun with dots, lines, and extra shimmer!
Pro-Tip Notes: For sharp cookies, chill your cut-out shapes on the baking sheet for 10 minutes before baking. If your icing is too thick, add water one drop at a time. For shiny, white icing, use a tiny dab of violet food coloring to counteract yellow tones—it’s a baker’s trick!
6. Holiday Berry Trifle Dessert Glass Cups
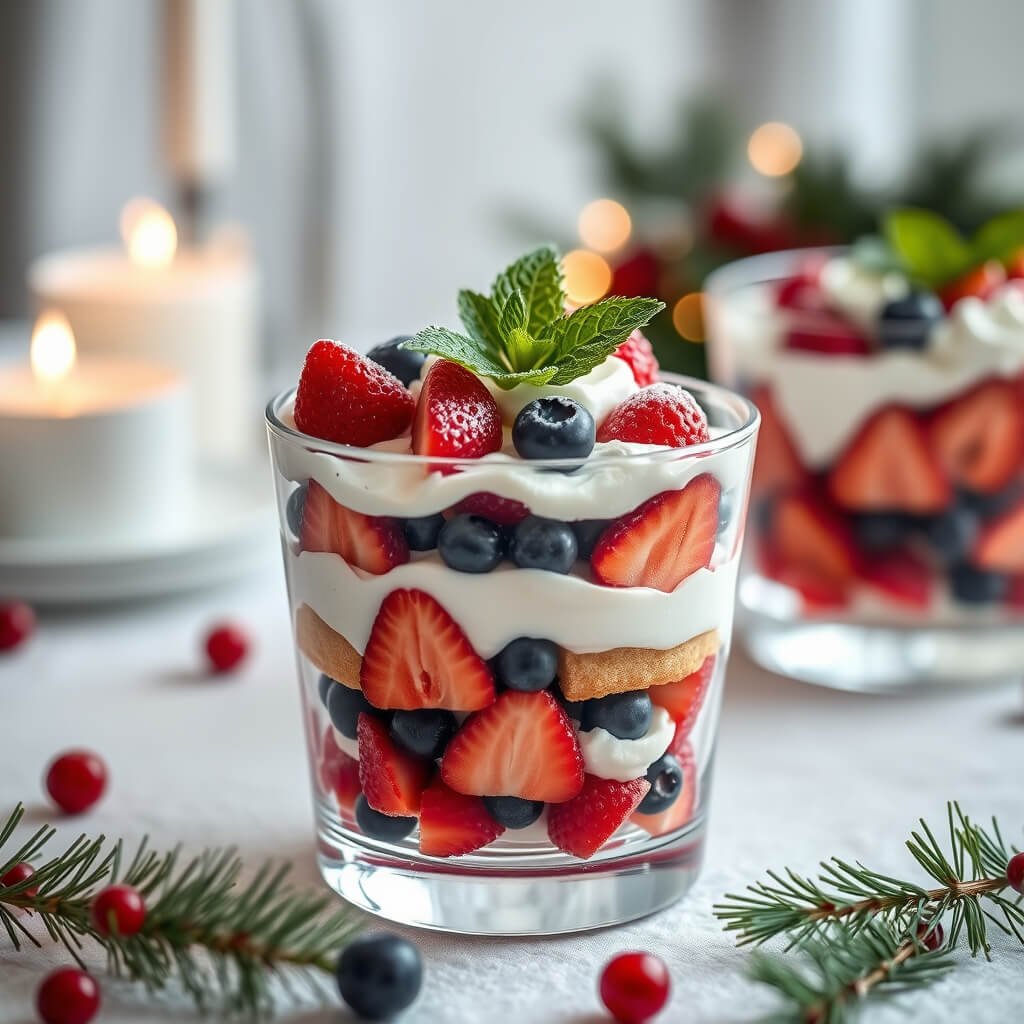
A deconstructed trifle in individual cups is a game-changer. It looks elegant, portion control is built-in (kind of), and you get perfect layers of cake, cream, and fruit in every single bite.
Why You’ll Love Them: They’re stunning, require no precise baking, and can be assembled ahead of time. The berry and cream combo is timeless.
The Lowdown:
- Prep Time: 30 minutes
- Cook Time: 0 minutes
- Servings: 6-8 cups
Ingredients:
- 1 store-bought pound cake or angel food cake, cut into 1-inch cubes
- 3 cups mixed fresh berries (raspberries, blueberries, sliced strawberries)
- 2 cups heavy whipping cream
- 1/4 cup powdered sugar
- 1 tsp vanilla extract
- 1/2 cup berry jam or preserves, warmed slightly
- Fresh mint for garnish
Equipment Needed:
- Clear dessert cups or glasses
- Mixing bowl
- Electric mixer
- Spatula
Instructions:
- Whip the Cream: Beat heavy cream, powdered sugar, and vanilla until stiff peaks form. Be careful not to over-whip, or you’ll make butter (a delicious mistake, but not the goal here :/).
- Layer with Love: Start with a layer of cake cubes in each cup. Drizzle a little warm jam over the cake. Add a layer of mixed berries. Top with a generous dollop of whipped cream.
- Repeat: Repeat the layers once more, ending with a beautiful crown of whipped cream and a few perfect berries on top.
- Chill & Serve: Refrigerate for at least 1 hour (up to 4) before serving to let the flavors meld. Garnish with a mint leaf.
Pro-Tip Notes: The warm jam drizzle is key—it soaks into the cake and creates an incredible, moist flavor base. For a non-alcoholic kick, brush the cake with a little berry juice. Use a piping bag for the cream if you want super neat layers.
Read More: 10 Tasty Mexican Dessert Recipes Ideas Flavor Explosion
7. Christmas Oreo Ornament Cake Pops
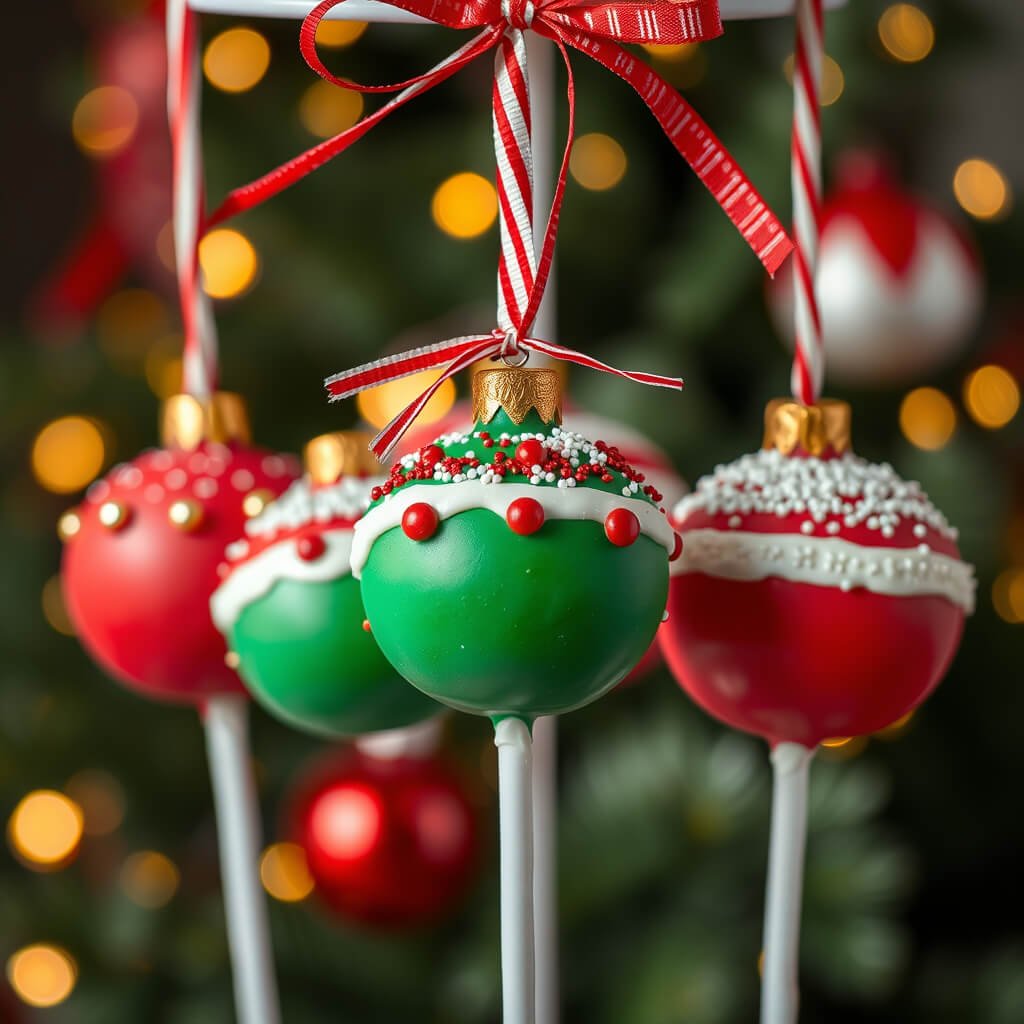
Cake pops are the ultimate party food. These are decorated to look like shiny Christmas ornaments, making them almost too cute to eat. Almost.
Why You’ll Love Them: They’re fun to make, even more fun to eat, and are a guaranteed hit with kids and adults alike. They also use a clever Oreo shortcut.
The Lowdown:
- Prep Time: 45 minutes
- Cook Time: 0 minutes (Chill time: 1 hour)
- Servings: 20-24 cake pops
Ingredients:
- 1 package (8 oz) cream cheese, softened
- 1 package Oreos (about 36 cookies), finely crushed
- 2 cups white chocolate or candy melts
- 1 tbsp coconut oil (for thinning)
- Sprinkles, edible glitter, colored sugar for decorating
- Lollipop sticks
Equipment Needed:
- Food processor
- Mixing bowl
- Baking sheet lined with parchment
- Styrofoam block or cake pop stand
Instructions:
- Make the Dough: Crush Oreos into fine crumbs in a food processor. Mix with softened cream cheese until a uniform, dough-like mixture forms. Roll into 1-inch balls and place on a baking sheet. Chill for 30 minutes.
- Get Dipping: Melt white chocolate and coconut oil together until smooth. Dip the tip of each lollipop stick into the chocolate, then insert it halfway into a chilled Oreo ball. Return to the fridge for 15 minutes to set the “glue.”
- Decorate as Ornaments: Dip each cake pop into the melted chocolate, letting excess drip off. Before the coating sets, decorate! Add a band of colored sprinkles around the middle, or dust with edible glitter. Stand them upright in your styrofoam block to set completely.
- Display Proudly: Arrange them in a vase or block for a show-stopping ornament bouquet.
Pro-Tip Notes: If the coating is too thick, add a bit more coconut oil. Work quickly when decorating—candy melts set fast. For a metallic sheen, use luster dust mixed with a drop of clear extract.
8. Warm Cinnamon Apple Christmas Crumble
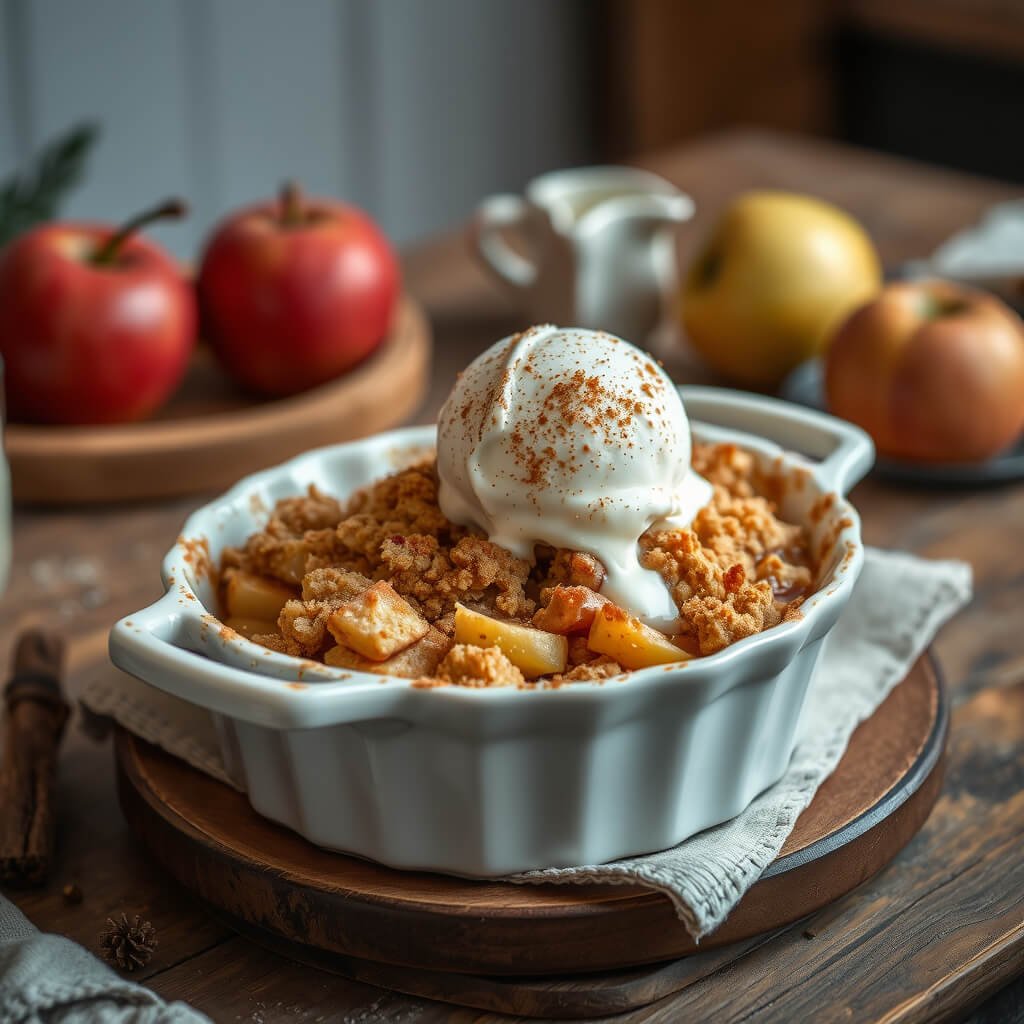
Sometimes, you just need a warm, comforting dessert that makes the whole house smell like Christmas. This apple crumble is that dessert. It’s humble, hearty, and absolutely divine with a scoop of vanilla ice cream.
Why You’ll Love It: It’s practically foolproof. The sweet, spiced apples under a crunchy, buttery topping is pure comfort in a dish.
The Lowdown:
- Prep Time: 20 minutes
- Cook Time: 45 minutes
- Servings: 8
Ingredients:
- For the Filling:
- 6 medium apples (Granny Smith & Honeycrisp mix is great), peeled and sliced
- 1/2 cup granulated sugar
- 1 tbsp lemon juice
- 1 tsp cinnamon
- 1/4 tsp nutmeg
- 2 tbsp all-purpose flour
- For the Topping:
- 1 cup old-fashioned oats
- 1 cup all-purpose flour
- 1 cup brown sugar, packed
- 1 tsp cinnamon
- 1/2 cup cold unsalted butter, cubed
Equipment Needed:
- 9×9 or 8×11 inch baking dish
- Mixing bowls
- Pastry cutter or two forks
Instructions:
- Prep the Fruit: Preheat oven to 350°F (177°C). Toss sliced apples with sugar, lemon juice, spices, and flour. Pour into your baking dish.
- Make the Crumble: In another bowl, combine oats, flour, brown sugar, and cinnamon. Cut in the cold butter using a pastry cutter or your fingers until the mixture resembles coarse crumbs with some pea-sized bits.
- Bake: Sprinkle the crumble topping evenly over the apples. Bake for 40-45 minutes, until the topping is golden brown and the fruit is bubbling around the edges.
- Rest and Serve: Let it sit for 15 minutes before serving—it allows the juices to thicken slightly. Serve warm, preferably with a melting scoop of ice cream.
Pro-Tip Notes: The apple variety mix gives you the best of both worlds—tartness and sweetness. Don’t skip the lemon juice; it brightens everything up. For extra crunch, add 1/2 cup of chopped pecans or walnuts to the topping.
9. Elegant White Chocolate Strawberry Santas
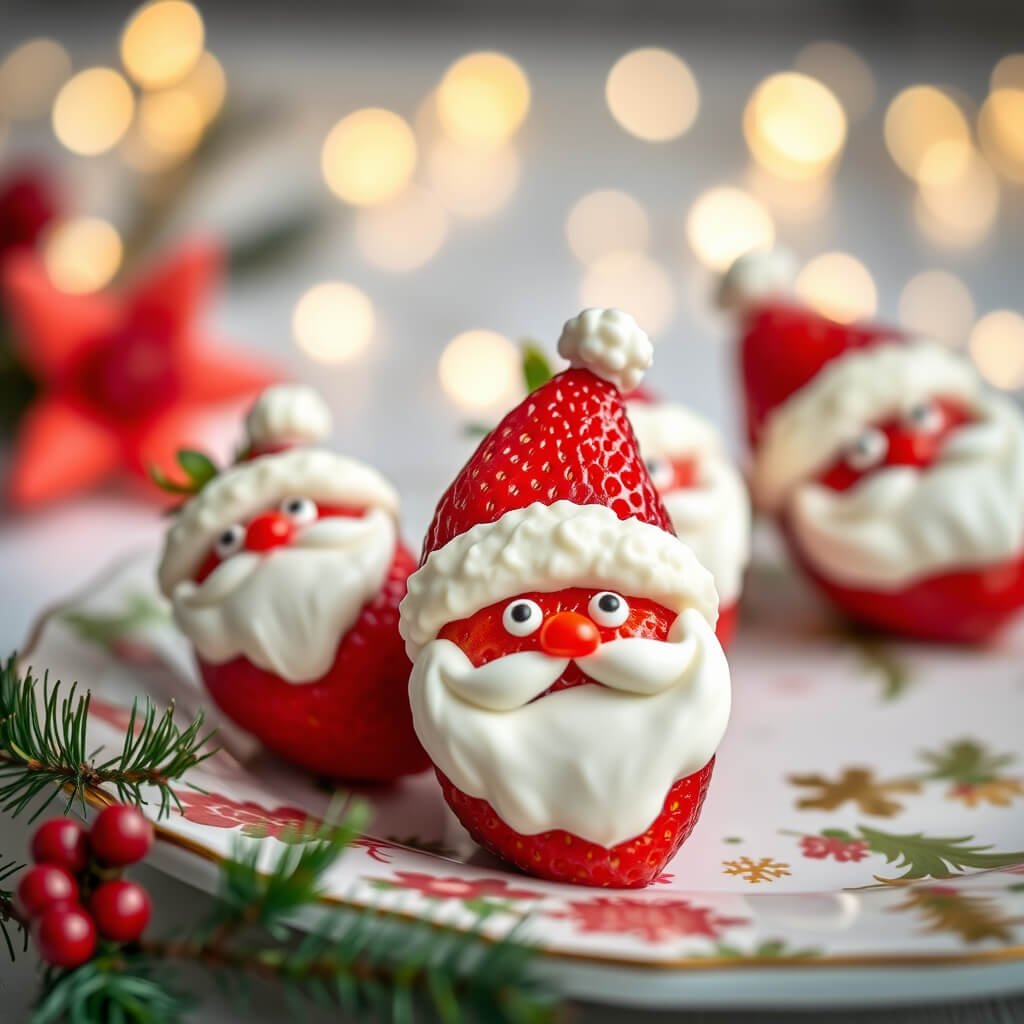
These little guys are adorable, require no baking, and come together in minutes. They’re a fresh, light, and elegant way to end a heavy Christmas meal.
Why You’ll Love Them: They’re a healthy-ish dessert that feels totally special. The combination of juicy strawberry, creamy filling, and sweet white chocolate is surprisingly sophisticated.
The Lowdown:
- Prep Time: 25 minutes
- Cook Time: 0 minutes
- Servings: 12-15 Santas
Ingredients:
- 1 lb fresh strawberries, with leaves
- 4 oz cream cheese, softened
- 1/2 cup powdered sugar
- 1 tsp vanilla extract
- 1 cup white chocolate chips
- Mini chocolate chips for the eyes
Equipment Needed:
- Mixing bowl
- Piping bag with a small round tip
- Baking sheet lined with parchment
- Spatula
Instructions:
- Prep the Berries: Wash strawberries and pat completely dry. Cut off the stems so they can stand upright. Then, slice off the top third of each strawberry—this will be Santa’s hat.
- Make the Filling: Beat cream cheese, powdered sugar, and vanilla until smooth. Transfer to a piping bag.
- Assemble the Santas: Pipe a generous ball of filling onto the base of each strawberry. Place the “hat” (the top third) on the filling, slightly tilted. Pipe a tiny dot of filling on the tip of the hat for a pompom.
- Add the Details: Melt white chocolate. Use a toothpick to dot two eyes with melted chocolate, then quickly press in mini chocolate chips. Pipe a small dot for the nose. Drizzle or pipe a little white chocolate around the base for a “beard.”
- Chill: Refrigerate until set, at least 15 minutes.
Pro-Tip Notes: Moisture is the enemy here—dry those berries thoroughly! If your filling is too loose, chill it for 10 minutes before piping. Serve within a few hours for the best texture.
Read More: 10 Creamy Keto Dessert Recipes Perfect For Beginners
10. Gingerbread Cookie Christmas Dessert Platter
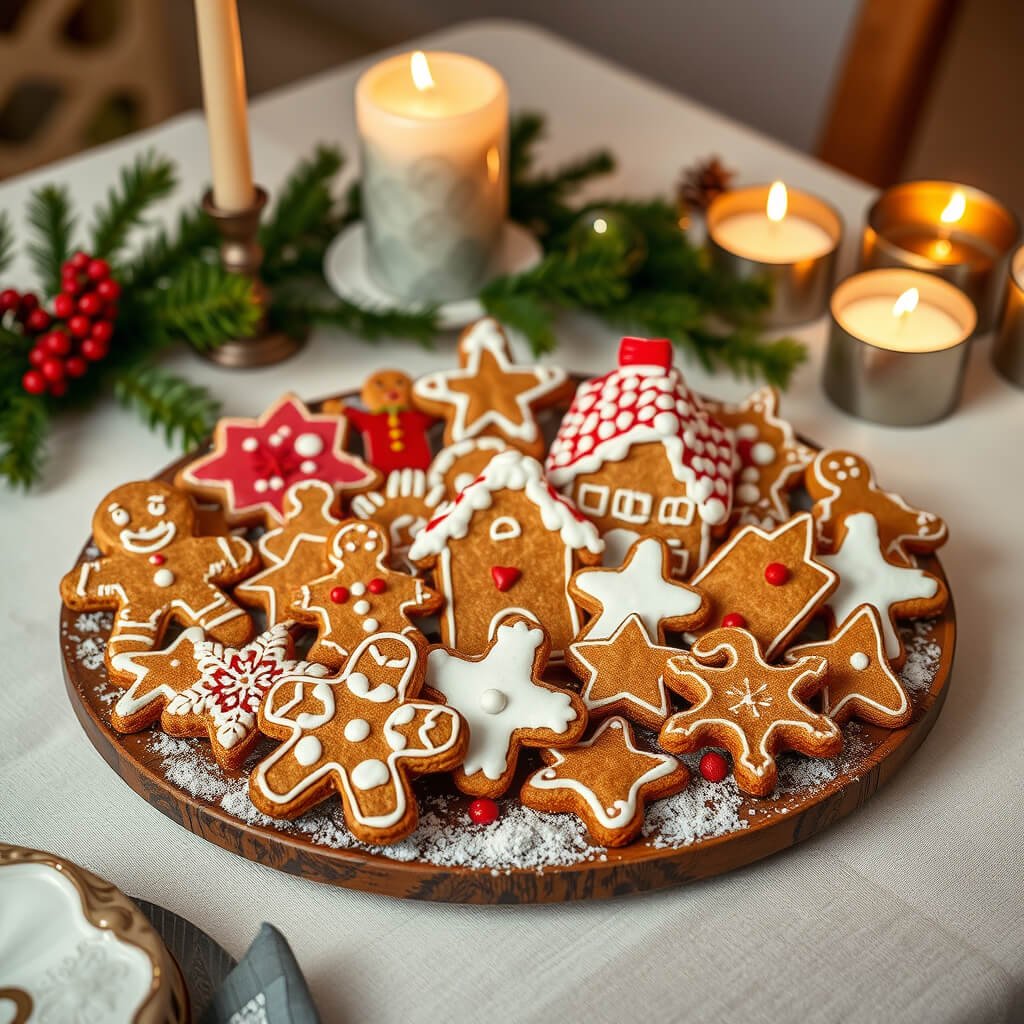
We’re ending with a classic. But this isn’t just about baking cookies—it’s about creating a gorgeous, fragrant platter that invites everyone to grab, dunk, and enjoy. The smell of gingerbread baking is the smell of Christmas.
Why You’ll Love It: The recipe itself is fantastic, but the real win is the presentation. A big, beautiful platter of assorted gingerbread shapes is a festive masterpiece.
The Lowdown:
- Prep Time: 40 minutes (plus 2 hours chilling)
- Cook Time: 10-12 minutes per batch
- Servings: 3-4 dozen cookies
Ingredients:
- 3 cups all-purpose flour
- 1 1/2 tsp baking soda
- 1/2 tsp salt
- 2 tsp ground ginger
- 1 1/2 tsp cinnamon
- 1/2 tsp ground cloves
- 1/2 tsp ground nutmeg
- 1/2 cup unsalted butter, softened
- 3/4 cup brown sugar, packed
- 1 large egg
- 1/2 cup unsulphured molasses
- For Royal Icing: (Same as the snowflake cookies above)
Equipment Needed:
- Rolling pin
- Assorted Christmas cookie cutters (gingerbread men, stars, trees, etc.)
- Baking sheets
- Piping bags and tips
Instructions:
- Mix the Dough: Whisk dry ingredients (flour through spices). In a separate bowl, cream butter and brown sugar. Beat in egg and molasses. Gradually add the dry mix. Divide dough, wrap, and chill for at least 2 hours.
- Bake: Preheat oven to 350°F (177°C). Roll dough to 1/4-inch thickness. Cut into shapes. Bake on parchment for 10-12 minutes. They’ll be soft but will firm up as they cool.
- Decorate: Let cool completely. Use royal icing to pipe details: faces, buttons, garlands on trees, etc.
- Create the Platter: Once icing is fully dry, arrange your cookies on a large platter or board. Add small bowls of icing for dipping, candy canes, and maybe some chocolate truffles for variety. It’s a dessert centerpiece!
Pro-Tip Notes: For cookies that hold their shape, chill the cut-outs for 10 minutes before baking. Don’t overbake! The spices will deepen in flavor after a day, so making the dough ahead is a great move.
Wrapping It All Up With a Bow (and a Sprinkle)
Phew! There you have it—a sleigh-full of festive Christmas dessert recipes to carry you through the entire season. From the no-bake lifesavers to the show-stopping centerpieces, the key is to have fun with it. Play some Christmas music, wear an ugly sweater, and embrace the happy chaos of a holiday kitchen.
Which one are you going to try first? Whether it’s the creamy eggnog squares or the adorable strawberry Santas, just remember: the best ingredient in any Christmas dessert is the joy you put into making (and eating) it.
Now go forth, preheat that oven, and make some delicious memories! Merry Christmas and happy baking! 🎄