
Let’s be real for a second. When you hear “healthy chicken breast recipes,” does a little part of your soul sigh? You picture a dry, bland, rubbery puck of protein you have to choke down while dreaming of pizza. I get it. I’ve been there, staring at a sad, steamed chicken breast wondering where I went wrong in life.
But what if I told you it doesn’t have to be that way? That chicken breast can be the juicy, flavorful, and incredibly versatile hero of your healthy eating journey? That’s right, it’s time to banish the blandness.
I’ve spent years in my kitchen turning this lean protein into meals I genuinely get excited about. And no, you don’t need to be a gourmet chef or own a restaurant-grade kitchen. You just need a few killer recipes and a bit of enthusiasm.
This isn’t just another list. This is your new playbook. We’re going to cover everything from lightning-fast air fryer tricks to epic meal-prep saviors. So, grab your apron (or don’t, I won’t judge), and let’s transform that humble chicken breast into something spectacular. Ready to never look at chicken the same way again?
First Things First: The Golden Rules of Juicy Chicken
Before we dive into the recipes, let’s get the basics down. Because even the best recipe in the world can’t save a poorly cooked chicken breast.
- Even Thickness is Your Best Friend: Pound that chicken or slice it horizontally. A uniform thickness means it cooks evenly, so you don’t have one dry end and one raw end.
- Don’t Fear the Marinade: Even 15 minutes in something acidic (like lemon juice or yogurt) or salty (like soy sauce) makes a world of difference. It’s not just about flavor—it’s about tenderness.
- Let It Rest! I know, the temptation to slice into it immediately is real. But let it rest for 5-10 minutes after cooking. This lets the juices redistribute, so every bite is moist.
- Use a Thermometer: Seriously. It’s the only way to know for sure you’ve hit the safe internal temp of 165°F (74°C) without overcooking.
Got it? Good. Now, let’s get to the fun part.
1. The “I Need Dinner in 20 Minutes” Hero: Lemon Garlic Chicken Breast with Asparagus
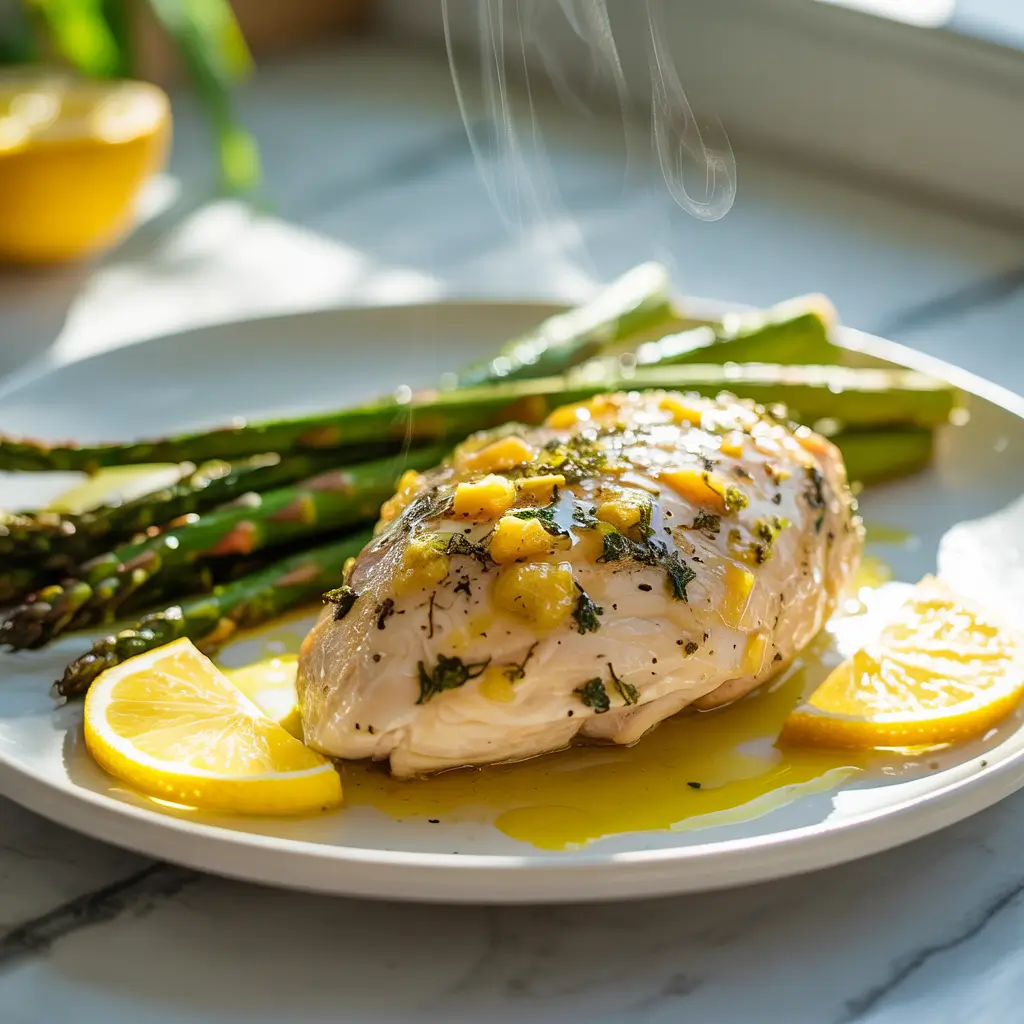
This is my absolute go-to on a busy weeknight. It’s a one-pan wonder that looks and tastes like you put in way more effort than you did. The lemon and garlic are a classic combo that brightens everything up, and the asparagus cooks right alongside the chicken. Minimal cleanup, maximum flavor. What’s not to love?
- Prep Time: 10 minutes
- Cook Time: 15-20 minutes
- Serves: 2
What You’ll Need:
Ingredients:
- 2 boneless, skinless chicken breasts (about 6 oz each)
- 1 bunch of asparagus, tough ends snapped off
- 3 tbsp olive oil, divided
- 4 cloves garlic, minced
- Zest and juice of 1 lemon
- 1 tsp dried oregano
- Salt and freshly ground black pepper to taste
- Lemon slices for garnish (optional)
Equipment:
- Large oven-safe skillet or baking sheet
- Small bowl
- Tongs
Let’s Make It:
- Preheat & Prep: Crank your oven to 400°F (200°C). Pat the chicken breasts dry with a paper towel. This helps them get a nice sear.
- Make the Magic Sauce: In a small bowl, whisk together 2 tbsp of olive oil, minced garlic, lemon zest, lemon juice, oregano, a good pinch of salt, and pepper.
- Get Everything Cozy: On your skillet or baking sheet, toss the asparagus with the remaining 1 tbsp of olive oil, salt, and pepper. Push them to the sides. Place the chicken breasts in the center and pour that glorious lemon-garlic sauce all over everything.
- Bake to Perfection: Pop it in the oven and bake for 15-20 minutes, or until the chicken reaches an internal temperature of 165°F and the asparagus is tender-crisp.
- Rest & Devour: Let the chicken rest for a few minutes before slicing. Garnish with extra lemon slices if you’re feeling fancy. Dinner is served!
Pro-Tip / Note: For an extra flavor boost, let the chicken sit in the lemon-garlic sauce for 30 minutes before baking. And FYI, this sauce is incredible on fish too! 🙂
2. The Sweet & Tangy Crowd-Pleaser: Honey Mustard Baked Chicken Breast Bowl
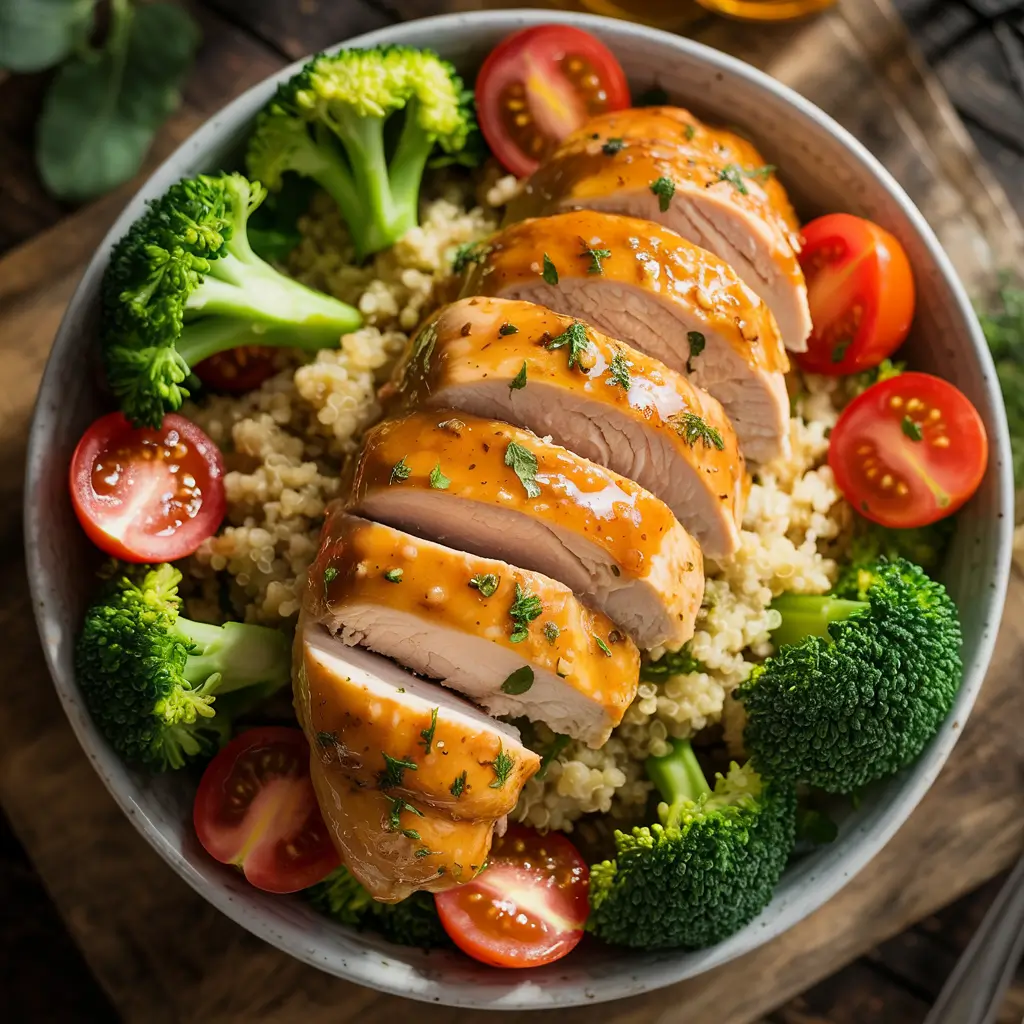
This recipe is for those days when you’re craving something a little sweet, a little tangy, and totally satisfying. The honey mustard glaze caramelizes in the oven, creating this incredible sticky, flavorful crust. I like to serve it over a bowl of quinoa or brown rice with some roasted veggies for a complete, power-packed meal.
- Prep Time: 10 minutes
- Cook Time: 25 minutes
- Serves: 2
What You’ll Need:
Ingredients:
- 2 boneless, skinless chicken breasts
- 3 tbsp Dijon mustard
- 2 tbsp honey
- 1 tbsp olive oil
- 1 tbsp apple cider vinegar
- 1 clove garlic, minced
- ½ tsp paprika
- Salt and pepper to taste
- For the bowl: Cooked quinoa, roasted sweet potatoes, steamed broccoli, avocado slices.
Equipment:
- Baking dish
- Small bowl
- Whisk
Let’s Make It:
- Whisk It Good: Preheat your oven to 375°F (190°C). In a small bowl, whisk together the Dijon mustard, honey, olive oil, apple cider vinegar, minced garlic, paprika, salt, and pepper until it’s a smooth, glorious glaze.
- Coat the Chicken: Place the chicken breasts in your baking dish. Pour about 2/3 of the honey mustard mixture over them, using a brush or the back of a spoon to coat them evenly.
- Bake & Glaze: Bake for 20-25 minutes. Halfway through, baste the chicken with the remaining glaze from the pan. You want it to get all sticky and delicious.
- Assemble Your Masterpiece: Once the chicken is cooked through, let it rest for a few minutes, then slice it. Build your bowl with a base of quinoa, add your roasted veggies, fan the chicken on top, and add any extras like avocado.
Pro-Tip / Note: IMO, the better the Dijon mustard, the better the sauce. Don’t skimp here! This glaze also works wonders on pork chops.
3. The No-Cook, Creamy Dream: Greek Yogurt Chicken Breast Salad
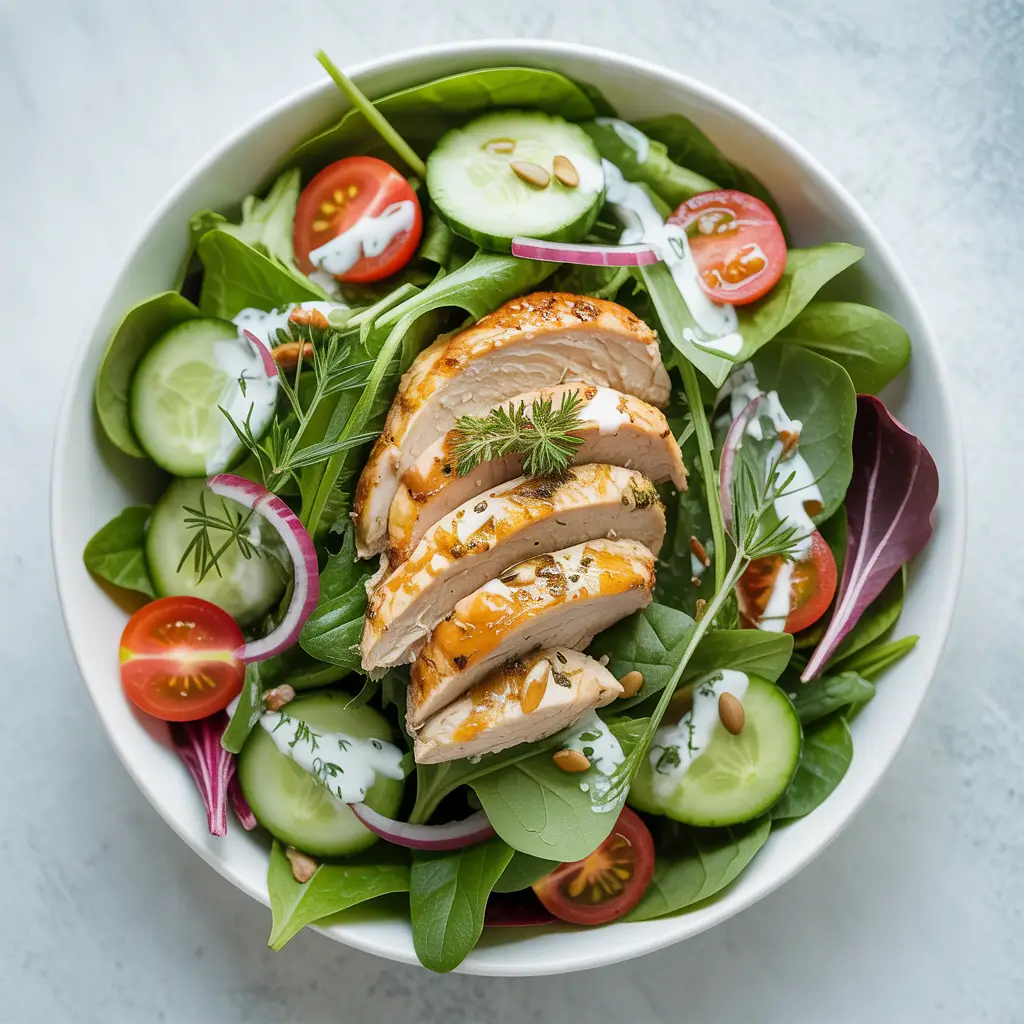
Hold the mayo! This chicken salad is creamy, tangy, and packed with protein, thanks to the Greek yogurt base. It’s my secret weapon for using up leftover chicken. Throw it on a bed of greens, stuff it in a pita, or just eat it with a fork straight from the bowl. No judgment here.
- Prep Time: 15 minutes (using pre-cooked chicken)
- Cook Time: 0 minutes (if using leftover chicken)
- Serves: 4
What You’ll Need:
Ingredients:
- 2 cups cooked, shredded chicken breast (rotisserie chicken works great!)
- ½ cup plain Greek yogurt (full-fat for extra creaminess)
- 1 tbsp lemon juice
- 1 tsp Dijon mustard
- ¼ cup finely diced celery
- 2 tbsp finely diced red onion
- 2 tbsp chopped fresh dill or parsley
- Salt and pepper to taste
Equipment:
- Medium mixing bowl
- Fork or spatula
Let’s Make It:
- Shred It: If you haven’t already, shred or chop your cooked chicken breast and place it in the mixing bowl.
- Mix the Wet Stuff: In a separate small bowl, mix the Greek yogurt, lemon juice, Dijon mustard, salt, and pepper until smooth.
- Combine Everything: Pour the yogurt mixture over the chicken. Add the celery, red onion, and fresh herbs. Fold everything together until the chicken is evenly coated.
- Chill & Serve: For the best flavor, let it chill in the fridge for at least 30 minutes. This lets all the flavors get to know each other.
Pro-Tip / Note: This salad gets even better the next day, making it perfect for meal prep. Add a handful of chopped walnuts or grapes for a sweet and crunchy twist!
Also Read: 10 Easy Boneless Chicken Breast Recipes For Busy Nights
4. The Crispy-Without-the-Guilt Fix: Spicy Air Fryer Chicken Breast Strips
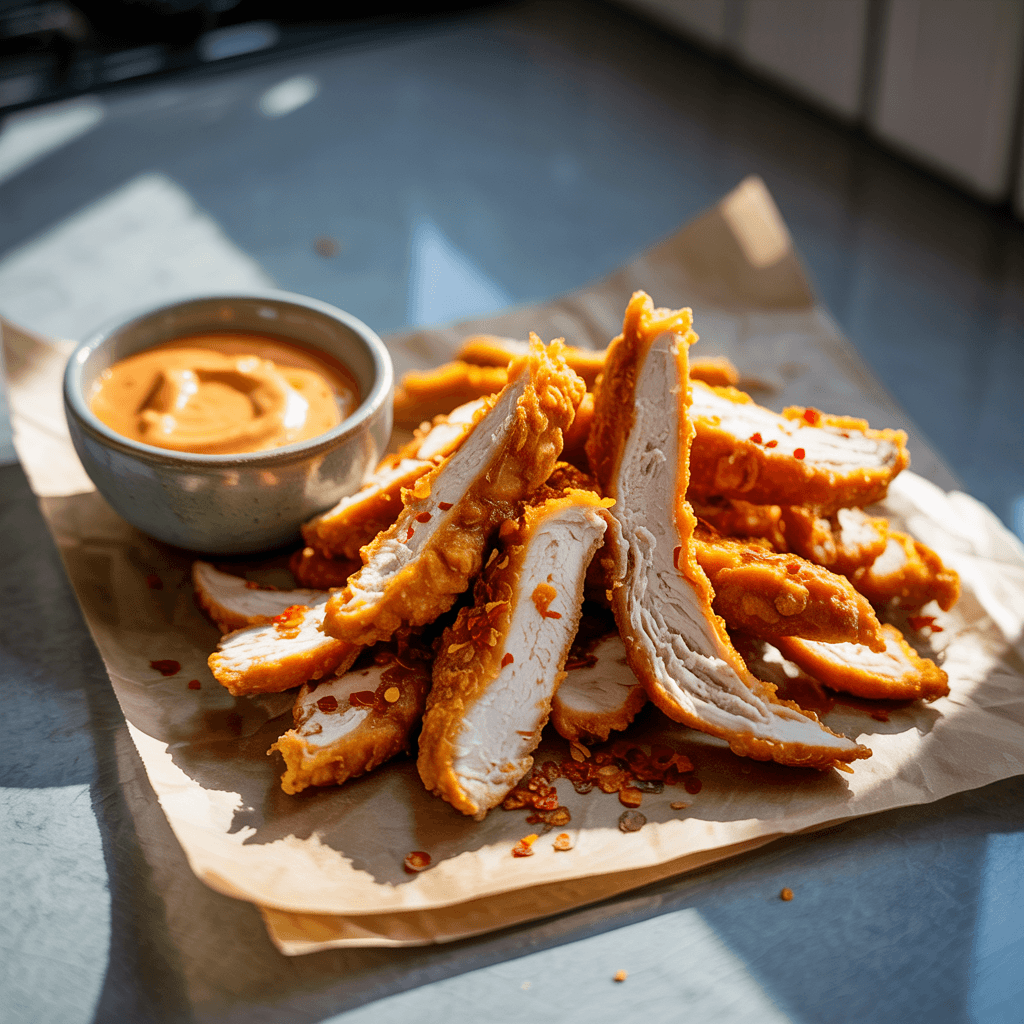
If you have an air fryer and you’re not using it for chicken, we need to talk. It gives you that incredible crispy, crunchy exterior without all the oil from deep-frying. These spicy strips are my answer to fast-food cravings. They’re ready in under 15 minutes and are perfect for dipping, tossing on a salad, or stuffing into a wrap.
- Prep Time: 10 minutes
- Cook Time: 10-12 minutes
- Serves: 2-3
What You’ll Need:
Ingredients:
- 1 lb chicken breast, cut into 1-inch strips
- 1 tbsp olive oil
- 1 tsp smoked paprika
- 1 tsp garlic powder
- ½ tsp onion powder
- ½ tsp cayenne pepper (adjust to your heat preference)
- Salt and black pepper to taste
- Your favorite dipping sauce (ranch, honey mustard, BBQ)
Equipment:
- Air fryer
- Medium bowl
Let’s Make It:
- Coat the Strips: In a medium bowl, toss the chicken strips with olive oil. In a separate small bowl, mix together the smoked paprika, garlic powder, onion powder, cayenne, salt, and pepper. Sprinkle this spice mix over the chicken and toss until every strip is well-coated.
- Air Fry to Crispy Perfection: Preheat your air fryer to 380°F (190°C). Place the chicken strips in a single layer in the basket (don’t overcrowd—work in batches if needed). Air fry for 10-12 minutes, flipping halfway through, until they’re golden brown and cooked through.
- Serve Immediately: These are best enjoyed hot and crispy right out of the fryer.
Pro-Tip / Note: For an extra-crispy coating, you can lightly spray the strips with cooking oil before air frying. And remember, every air fryer is a bit different, so keep an eye on them the first time you make these!
5. The Ultimate Power Lunch: Chicken Quinoa Power Bowl
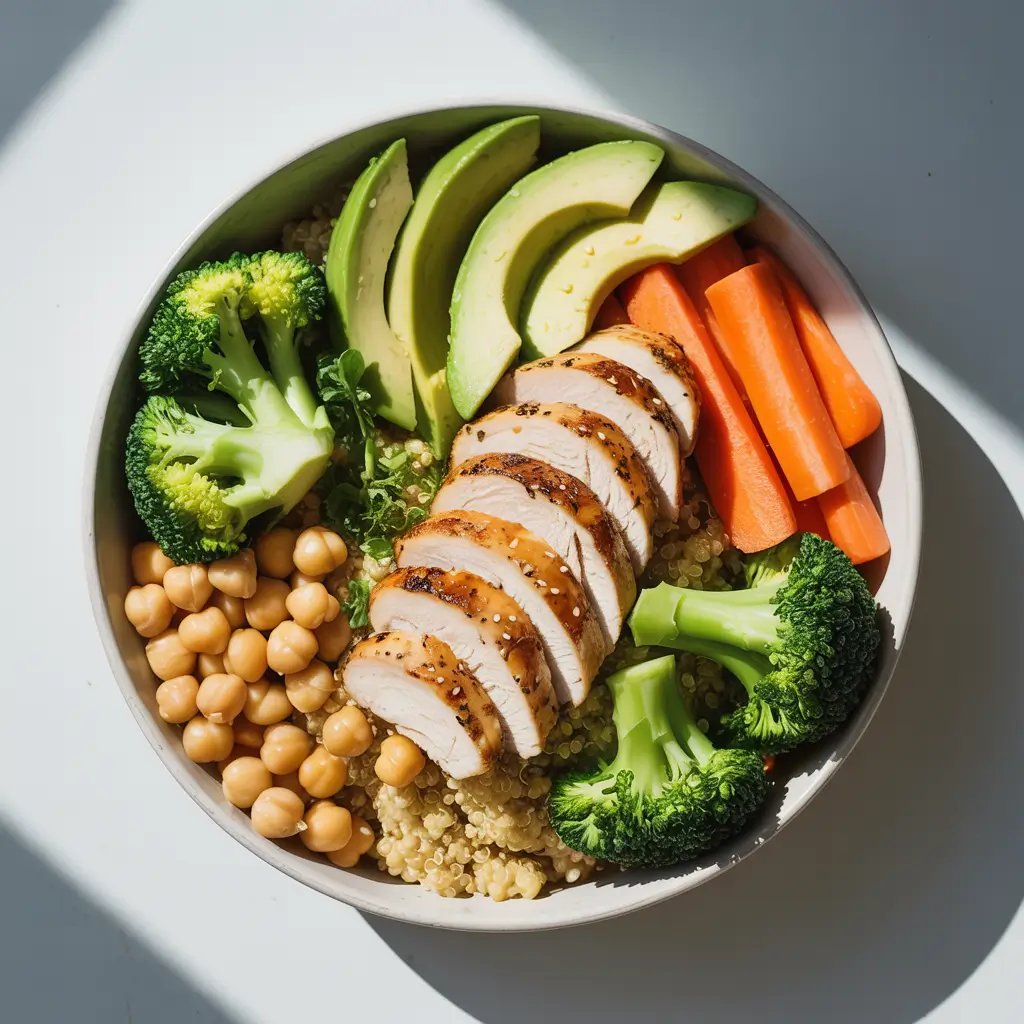
This is the bowl you eat when you want to feel like a superhero. It’s got everything: lean protein, complex carbs, healthy fats, and a rainbow of veggies. It’s not a recipe so much as a formula, and once you learn it, you can mix and match ingredients forever. It’s my meal-prep MVP.
- Prep Time: 20 minutes
- Cook Time: 20 minutes
- Serves: 2
What You’ll Need:
The Formula:
- Base: 1 cup cooked quinoa
- Protein: 2 grilled or baked chicken breasts, sliced
- Veggies: A mix of your favorites! Try roasted sweet potato cubes, steamed broccoli, shredded red cabbage, and sliced cucumber.
- Healthy Fat: ½ an avocado, sliced
- Crunch: A sprinkle of pumpkin seeds or toasted almonds
- Dressing: A simple lemon-tahini dressing (2 tbsp tahini, 1 tbsp lemon juice, 1 tsp maple syrup, 2-3 tbsp water to thin, salt)
Equipment:
- Bowls
- Pots/pans for cooking components
Let’s Make It:
- Cook Your Components: Get your quinoa going according to package directions. While it cooks, season and cook your chicken using any method you like (grill, bake, or pan-sear). Roast or steam your veggies.
- Make the Dressing: Whisk all the dressing ingredients together in a small bowl until smooth. Add water a tablespoon at a time until it reaches a pourable consistency.
- Assemble Your Power: In two bowls, create a bed of quinoa. Artfully (or not-so-artfully) arrange your chicken, veggies, and avocado on top.
- Drizzle & Enjoy: Sprinkle with your chosen crunch and generously drizzle with that creamy tahini dressing.
Pro-Tip / Note: The key to great meal prep is to store components separately. Keep the dressing, the quinoa, and the toppings in different containers so nothing gets soggy. Assemble fresh each day!
6. The Set-It-and-Forget-It Classic: Herb Roasted Chicken Breast with Veggies
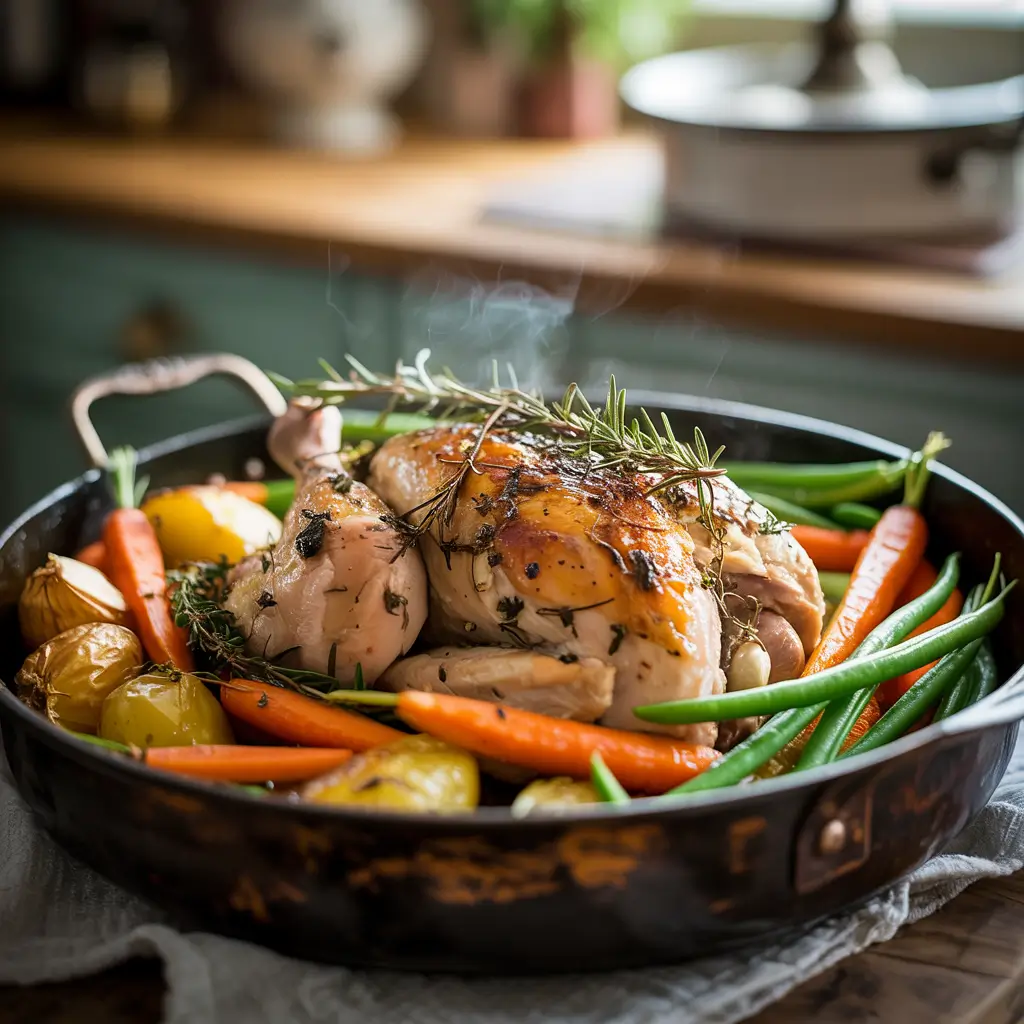
This is comfort food that happens to be good for you. The chicken roasts on a bed of hearty vegetables, and everything cooks together in one pan. The herbs infuse the entire dish with amazing aroma and flavor. It feels like a Sunday dinner but is easy enough for a Tuesday.
- Prep Time: 15 minutes
- Cook Time: 30-35 minutes
- Serves: 2-3
What You’ll Need:
Ingredients:
- 2 chicken breasts
- 1 lb baby potatoes, halved
- 2 large carrots, peeled and chopped
- 1 red onion, cut into wedges
- 3 tbsp olive oil
- 1 tbsp fresh rosemary, chopped
- 1 tbsp fresh thyme leaves
- 4 garlic cloves, smashed
- Salt and pepper
Equipment:
- Large rimmed baking sheet
- Large bowl
Let’s Make It:
- Prep & Preheat: Preheat oven to 425°F (220°C). In a large bowl, toss the potatoes, carrots, and red onion with 2 tbsp of olive oil, half the herbs, salt, and pepper. Spread them out on your baking sheet.
- Season the Chicken: Rub the chicken breasts with the remaining 1 tbsp of olive oil, the rest of the herbs, salt, and pepper. Nestle them in between the veggies on the baking sheet. Toss the smashed garlic cloves around the pan.
- Roast Until Golden: Roast for 30-35 minutes, or until the chicken is cooked through and the veggies are tender and slightly caramelized at the edges.
- Serve Family-Style: Bring the whole baking sheet to the table and serve directly from it. It’s rustic and fun!
Pro-Tip / Note: Don’t be shy with the herbs! Fresh herbs make a huge difference here, but in a pinch, you can use 1 tsp each of dried rosemary and thyme.
Also Read: 10 Amazing Crockpot Chicken Breast Ideas for Busy Night
7. The 15-Minute Flavor Bomb: Low-Calorie Chicken Stir Fry
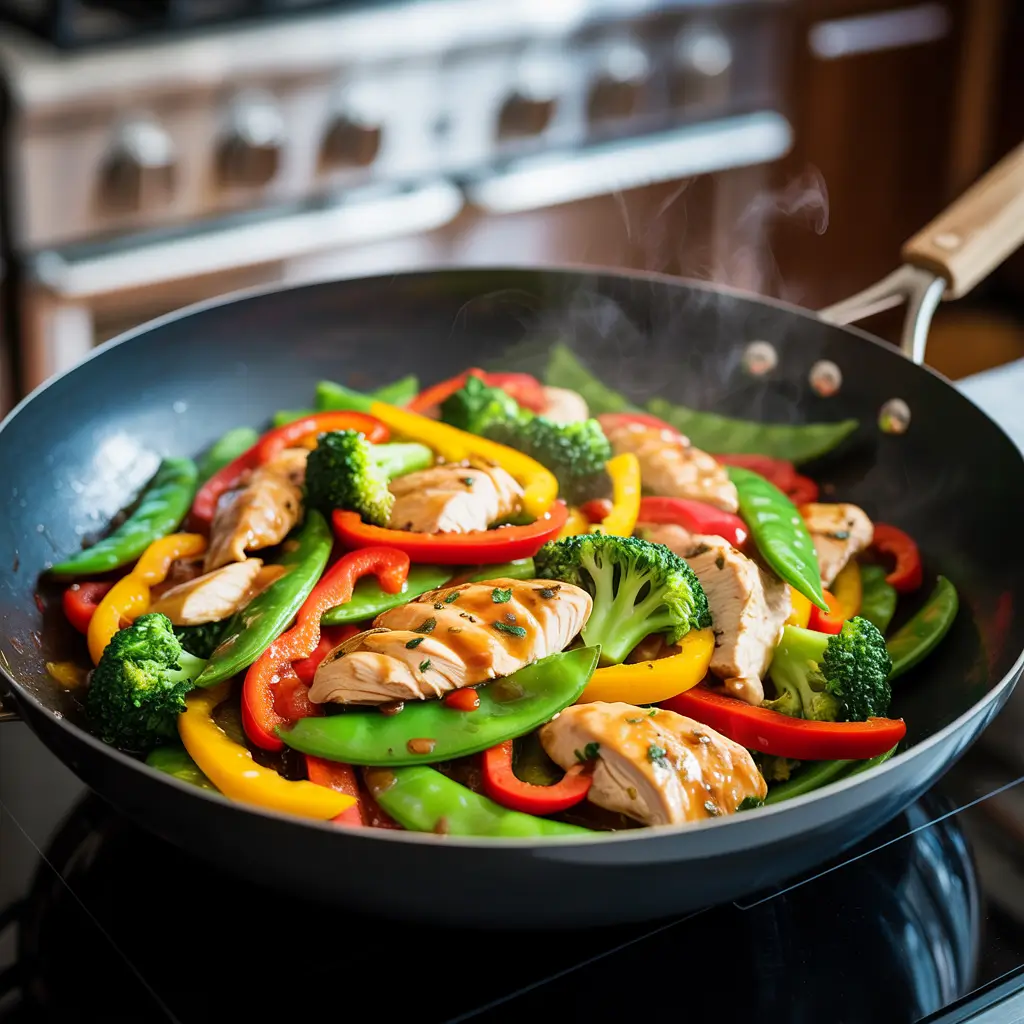
Stir-frying is a genius technique for healthy cooking—it’s fast, uses minimal oil, and locks in the vibrant color and crunch of vegetables. This recipe is my clean-out-the-fridge special. Use whatever veggies you have on hand!
- Prep Time: 15 minutes (includes chopping)
- Cook Time: 10 minutes
- Serves: 2
What You’ll Need:
Ingredients:
- 2 chicken breasts, thinly sliced against the grain
- 4 cups mixed vegetables (bell peppers, snap peas, broccoli florets, mushrooms)
- 2 tbsp low-sodium soy sauce or tamari
- 1 tbsp honey or maple syrup
- 1 tbsp rice vinegar
- 1 tsp sesame oil
- 1 tsp freshly grated ginger
- 2 cloves garlic, minced
- 1 tbsp avocado or olive oil
- Optional: Sesame seeds, green onions for garnish
Equipment:
- Wok or large skillet
- Small bowl
Let’s Make It:
- Mix the Sauce: In a small bowl, whisk together the soy sauce, honey, rice vinegar, sesame oil, grated ginger, and minced garlic. Set aside.
- Sear the Chicken: Heat the avocado oil in your wok over high heat until it’s shimmering. Add the sliced chicken in a single layer and let it sear for 1-2 minutes per side, until just cooked through. Remove it from the wok and set aside.
- Stir-Fry the Veggies: Add a tiny bit more oil if needed. Toss in your hardest vegetables first (like broccoli and carrots) and stir-fry for 2-3 minutes. Then add softer veggies (like peppers and snap peas) and cook for another 2 minutes. You want them crisp-tender.
- Combine & Sauce: Add the chicken back to the wok. Pour the sauce over everything and toss vigorously for 1-2 minutes until the sauce thickens slightly and coats everything beautifully.
- Garnish & Serve: Sprinkle with sesame seeds and sliced green onions. Serve immediately over cauliflower rice or brown rice.
Pro-Tip / Note: The secret to a good stir-fry is having everything prepped and ready to go before you start cooking. The process moves fast!
8. The Fresh & Zesty Handheld: Avocado Lime Grilled Chicken Wrap
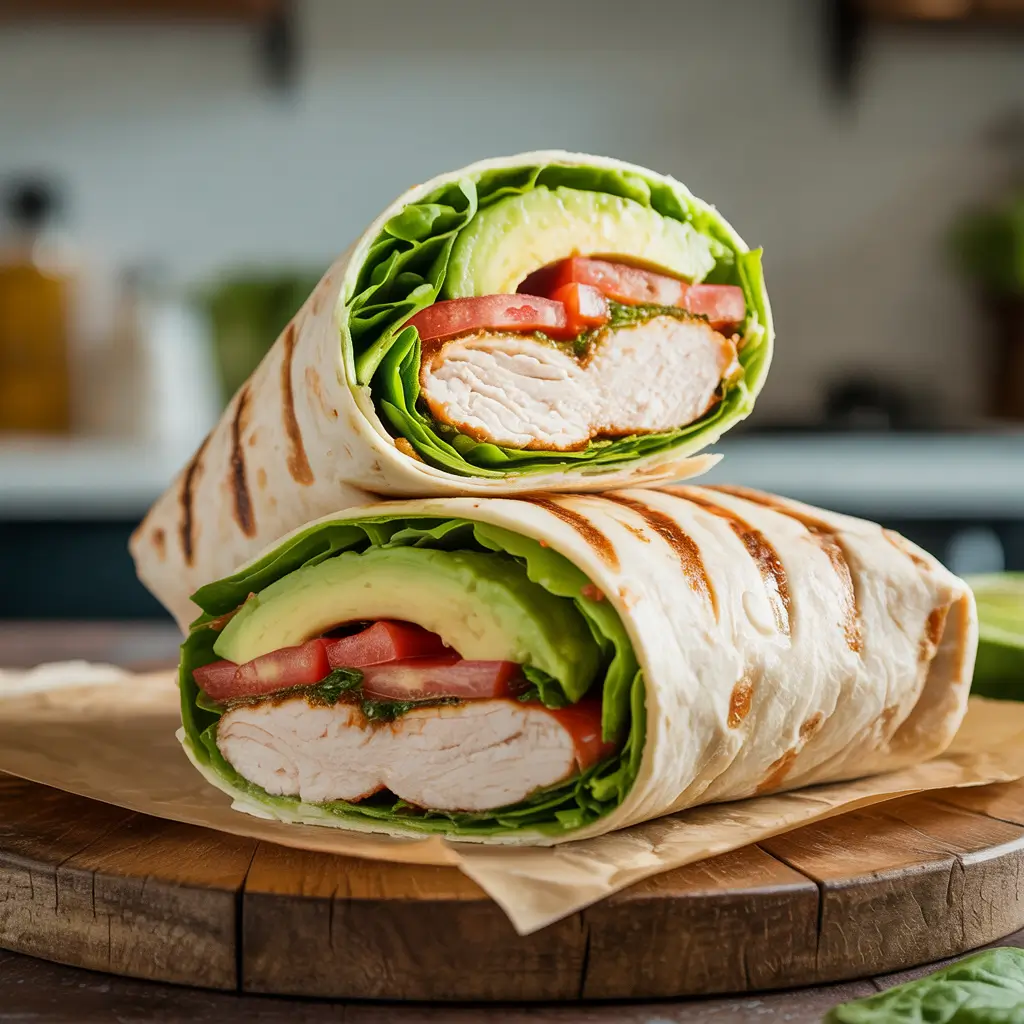
This wrap is like a burst of sunshine. It’s fresh, creamy from the avocado, zesty from the lime, and satisfyingly hearty from the grilled chicken. It’s my favorite packed lunch because it doesn’t get soggy if you assemble it right.
- Prep Time: 15 minutes
- Cook Time: 10 minutes (for chicken)
- Serves: 2
What You’ll Need:
Ingredients:
- 2 grilled chicken breasts, sliced
- 2 large whole-wheat tortillas or wraps
- 1 ripe avocado, mashed
- Juice of 1 lime
- ½ cup cherry tomatoes, quartered
- ¼ cup red onion, finely diced
- A handful of fresh cilantro, chopped
- Salt and pepper
- Optional: Lettuce, black beans, corn
Equipment:
- Grill pan or outdoor grill
- Bowl for avocado mix
Let’s Make It:
- Make the Avocado Smash: In a bowl, mash the avocado with the lime juice, salt, and pepper. Stir in the diced red onion, cherry tomatoes, and cilantro.
- Warm the Tortillas: Quickly warm your tortillas in a dry pan or for a few seconds in the microwave to make them pliable.
- Assemble the Wrap: Spread a generous amount of the avocado mixture down the center of each tortilla. Top with sliced grilled chicken and any extra fillings like lettuce or beans.
- Roll It Tight: Fold in the sides of the tortilla, then roll it up tightly from the bottom. Slice in half diagonally for that perfect cross-section.
Pro-Tip / Note: To prevent sogginess, place your lettuce (if using) as a barrier between the wet avocado mix and the tortilla. This wrap is also amazing pressed in a panini maker for a warm, crispy version!
9. The Meal-Prep Game Changer: Healthy Teriyaki Chicken Meal Prep
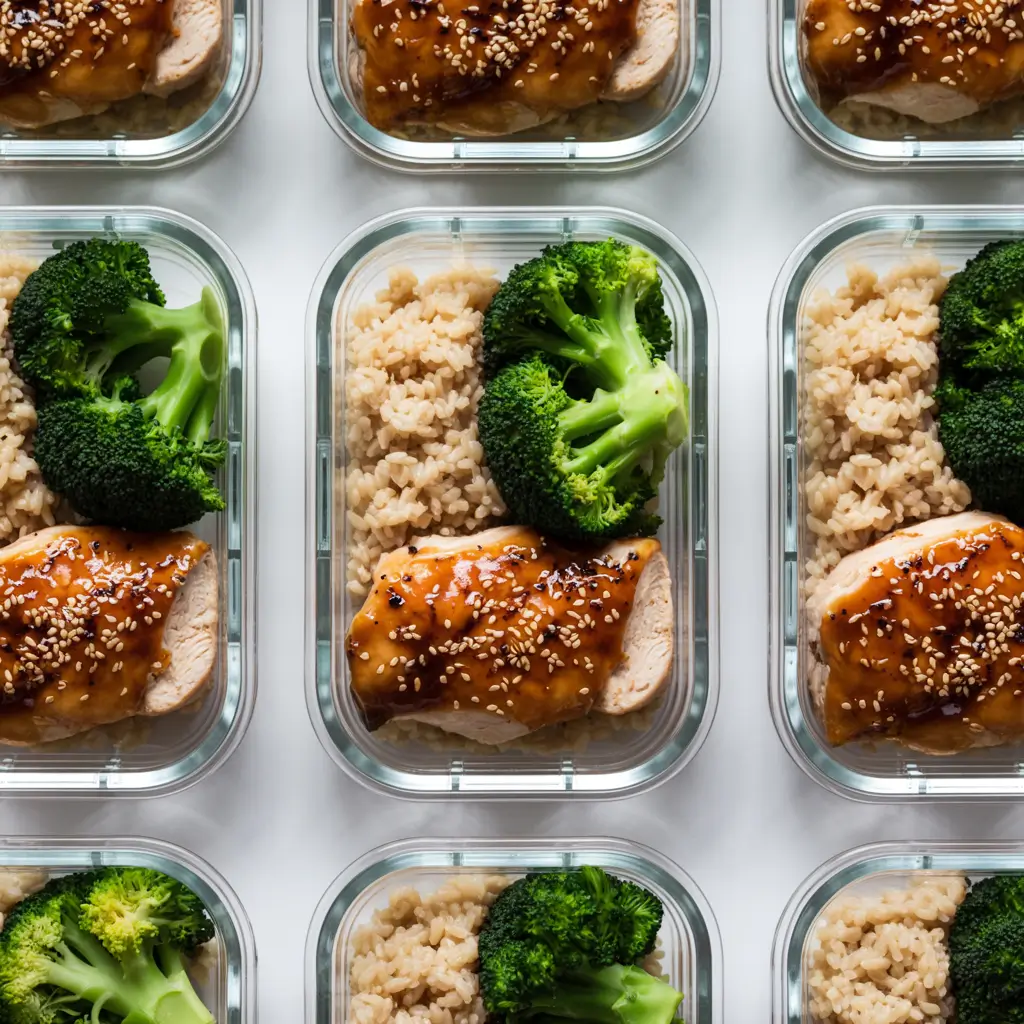
Store-bought teriyaki sauce is often loaded with sugar and sodium. This homemade version is ridiculously easy, way healthier, and tastes a million times better. Cook once, eat delicious, stress-free lunches all week. You’re welcome.
- Prep Time: 15 minutes
- Cook Time: 20 minutes
- Serves: 4 (for meal prep)
What You’ll Need:
Ingredients:
- 4 chicken breasts
- For the Sauce: ½ cup low-sodium soy sauce, ¼ cup water, 2 tbsp honey, 1 tbsp rice vinegar, 1 tsp sesame oil, 1 clove garlic (minced), 1 tsp fresh ginger (grated), 1 tbsp cornstarch mixed with 2 tbsp water (slurry)
- For serving: Steamed broccoli, brown rice, sesame seeds
Equipment:
- Saucepan
- Baking dish or skillet
Let’s Make It:
- Simmer the Sauce: In a small saucepan, combine all sauce ingredients except the cornstarch slurry. Bring to a simmer over medium heat. Once simmering, whisk in the cornstarch slurry and cook for 1-2 minutes until the sauce thickens. Remove from heat.
- Cook the Chicken: You can bake or pan-sear the chicken. For baking: place chicken in a dish, pour half the sauce over, and bake at 375°F for 20-25 mins. For pan-searing: cook chicken in a skillet, then pour the sauce in at the end to glaze.
- Portion It Out: Let the chicken rest, then slice. Divide brown rice, steamed broccoli, and sliced chicken into your meal prep containers. Drizzle extra teriyaki sauce over the chicken.
- Store & Reheat: Let everything cool before sealing the containers. They’ll stay good in the fridge for 4 days. Reheat in the microwave, and you’ve got a gourmet-tasting lunch.
Pro-Tip / Note: This sauce is amazing on salmon, tofu, or beef too. Make a double batch and keep it in a jar in the fridge for up to two weeks. It’s a lifesaver!
Also Read; 10 Delicious Easy Chicken Breast Recipes You’ll Love
10. The Smoky One-Pan Wonder: Oven Baked Paprika Chicken with Broccoli
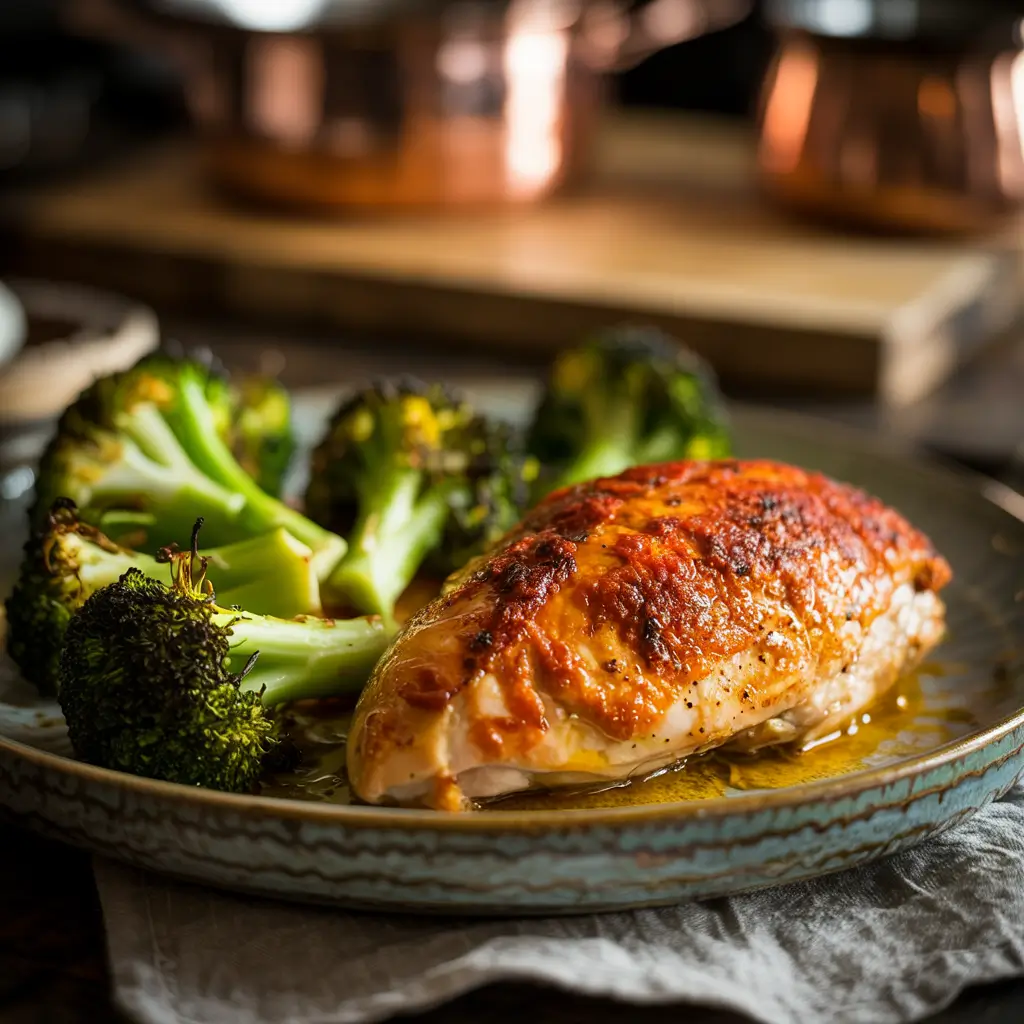
We’re ending with a simple, bold, and deeply flavorful recipe. Smoked paprika is the star here, giving the chicken and broccoli a gorgeous red hue and a warm, smoky flavor that’s incredibly addictive. It’s another one-pan cleanup dream.
- Prep Time: 10 minutes
- Cook Time: 25 minutes
- Serves: 2
What You’ll Need:
Ingredients:
- 2 chicken breasts
- 4 cups broccoli florets
- 3 tbsp olive oil
- 2 tsp smoked paprika
- 1 tsp garlic powder
- ½ tsp onion powder
- Salt and pepper
- Lemon wedges for serving
Equipment:
- Large baking sheet
- Bowl
Let’s Make It:
- Preheat & Season: Preheat oven to 425°F (220°C). In a large bowl, mix the olive oil, smoked paprika, garlic powder, onion powder, salt, and pepper.
- Coat Everything: Add the chicken breasts and broccoli florets to the bowl and toss until everything is evenly coated in that beautiful red spice mixture.
- Bake: Spread the broccoli and chicken in a single layer on the baking sheet. Bake for 20-25 minutes, until the chicken is done and the broccoli is tender with crispy, charred edges.
- Serve with a Squeeze: A fresh squeeze of lemon juice right before eating really makes all the flavors pop.
Pro-Tip / Note: Feel free to add other veggies to the pan—chickpeas, bell peppers, or zucchini would all be fantastic. For extra smoky heat, add a pinch of cayenne pepper to the spice mix.
Your Chicken, Your Rules
There you have it—ten paths away from bland, boring chicken and towards meals that are actually exciting. Remember, these recipes are just starting points. Don’t be afraid to swap veggies, adjust spices, or throw in whatever needs to be used up in your fridge. Cooking should be fun, not a rigid set of rules.
The humble chicken breast is a blank canvas. With the right techniques and a little flavor inspiration, you can turn it into a masterpiece that supports your health goals without sacrificing an ounce of enjoyment. So, which recipe are you going to try first? Your taste buds (and your future self who’s happily eating leftovers) will thank you. Now go get cooking