Let’s be real for a second — when that dessert craving hits at 10 PM on a random Tuesday, you don’t want a 47-step recipe that requires you to source obscure ingredients from three different grocery stores. You want something now. Something creamy, chocolatey, fruity, or all three at once. And honestly? You deserve it.
I’ve been in that exact spot more times than I care to admit. Standing in my kitchen, staring at the fridge like it owes me money, desperately wishing for something sweet that doesn’t require turning on an oven for 35 minutes. That frustration is exactly why I put together this list.
These 10 yummy quick dessert recipes ideas for 5 minute treats will save your sanity, satisfy your sweet tooth, and genuinely impress anyone who walks into your kitchen. Whether you’re a college student working with limited ingredients, a busy parent who needs a dessert fix between school pickups, or just someone who values efficiency — I’ve got you covered.
Every single recipe on this list takes 5 minutes or less to prepare. Most of them need zero cooking. A few require a quick microwave zap. All of them taste absolutely incredible.
So grab a spoon, maybe a mixing bowl, and let’s get into it. Your taste buds will thank you. 🙂
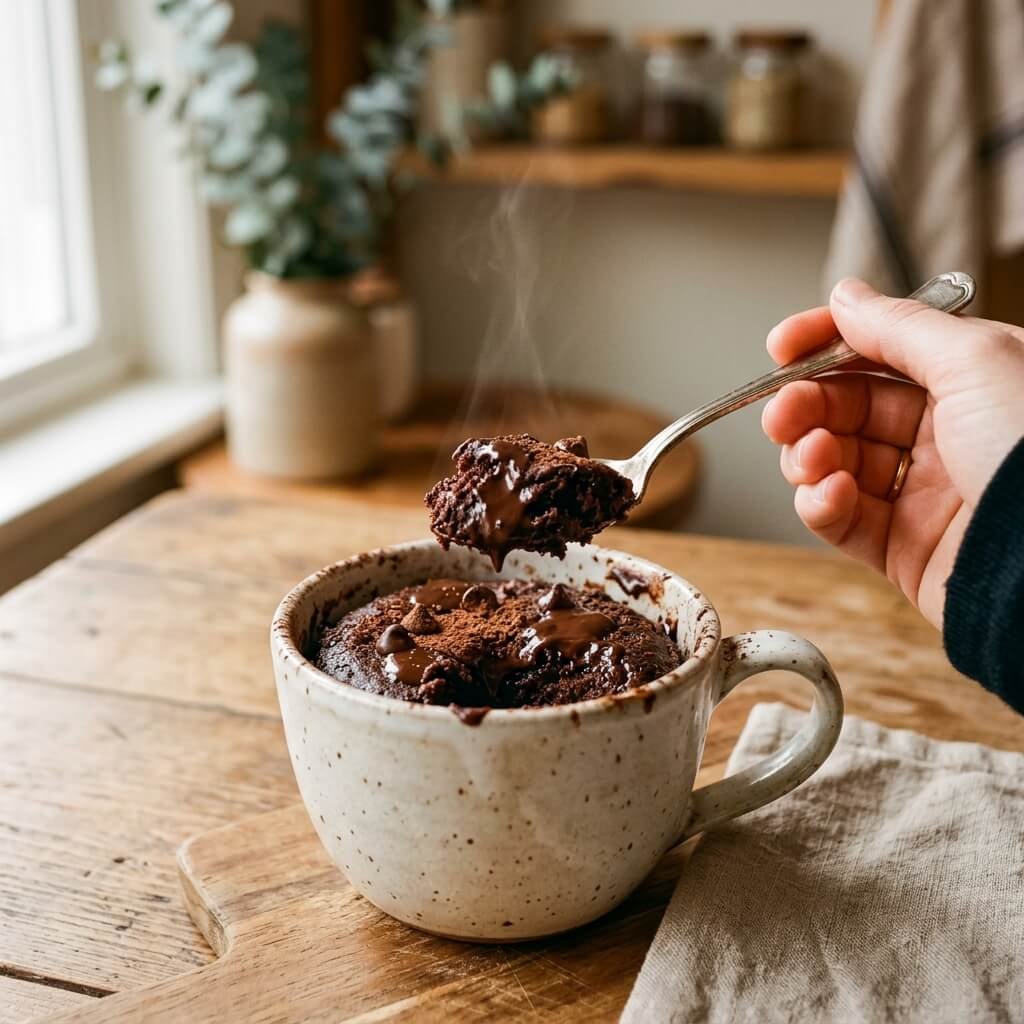
1. 5-Minute Chocolate Mug Cake Fix
Why You’ll Love This One
Okay, mug cakes are basically the superhero of lazy desserts. You throw everything into a mug, microwave it for 90 seconds, and suddenly you’re holding a warm, fluffy, chocolatey masterpiece in your hands. It’s almost too easy.
I remember the first time I made one of these during a late-night study session. My roommate walked in, took one look at what I was doing, and said, “Wait — that actually works?” Yes. Yes, it does. And it works beautifully.
Prep Time
2 minutes
Cook Time
90 seconds (microwave)
Ingredients
- 3 tablespoons all-purpose flour
- 3 tablespoons granulated sugar
- 2 tablespoons unsweetened cocoa powder
- 1 large egg
- 3 tablespoons milk
- 3 tablespoons vegetable oil
- 1 tablespoon chocolate chips (optional but highly recommended)
- Pinch of salt
Equipment
- 1 large microwave-safe mug
- Fork or small whisk
- Measuring spoons
Instructions
- Combine dry ingredients first. Add the flour, sugar, cocoa powder, and salt directly into your mug. Give them a quick stir with your fork.
- Crack the egg in and pour in the milk and oil. Mix everything thoroughly until you get a smooth, lump-free batter.
- Toss in your chocolate chips if you’re using them. Push a few down into the center for a gooey surprise.
- Microwave on high for 70–90 seconds. Start with 70 and check — every microwave runs differently, and you don’t want a rubbery cake.
- Let it sit for 30 seconds before diving in. The mug will be hot.
Notes
- Don’t overmix the batter. A few small lumps are perfectly fine and actually help the texture.
- If your microwave is powerful (1000W+), start with 60 seconds and add time as needed.
- Top with whipped cream, a scoop of vanilla ice cream, or a dusting of powdered sugar if you’re feeling fancy.
- FYI, this recipe works with gluten-free flour too, though the texture comes out slightly denser.
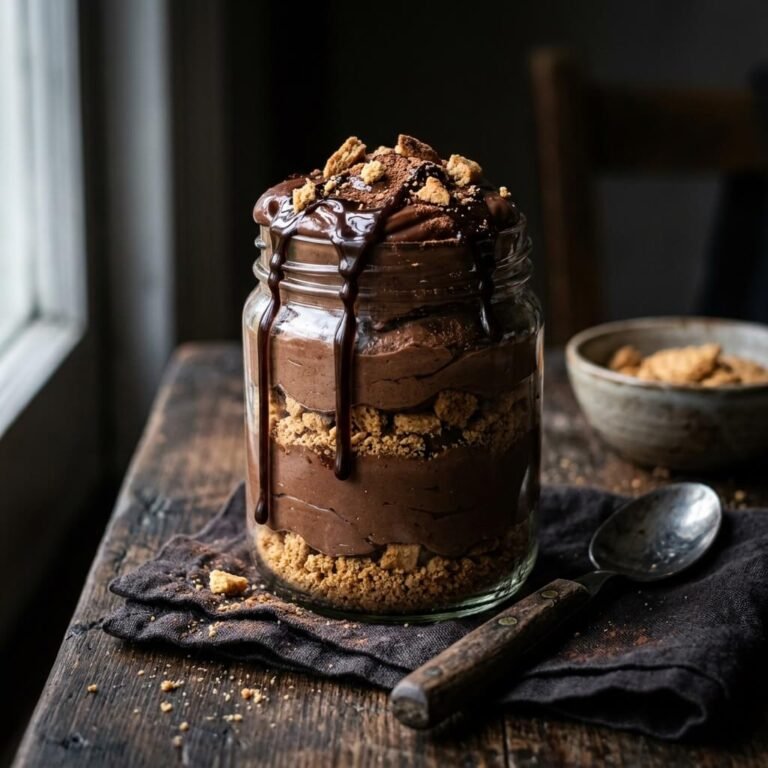
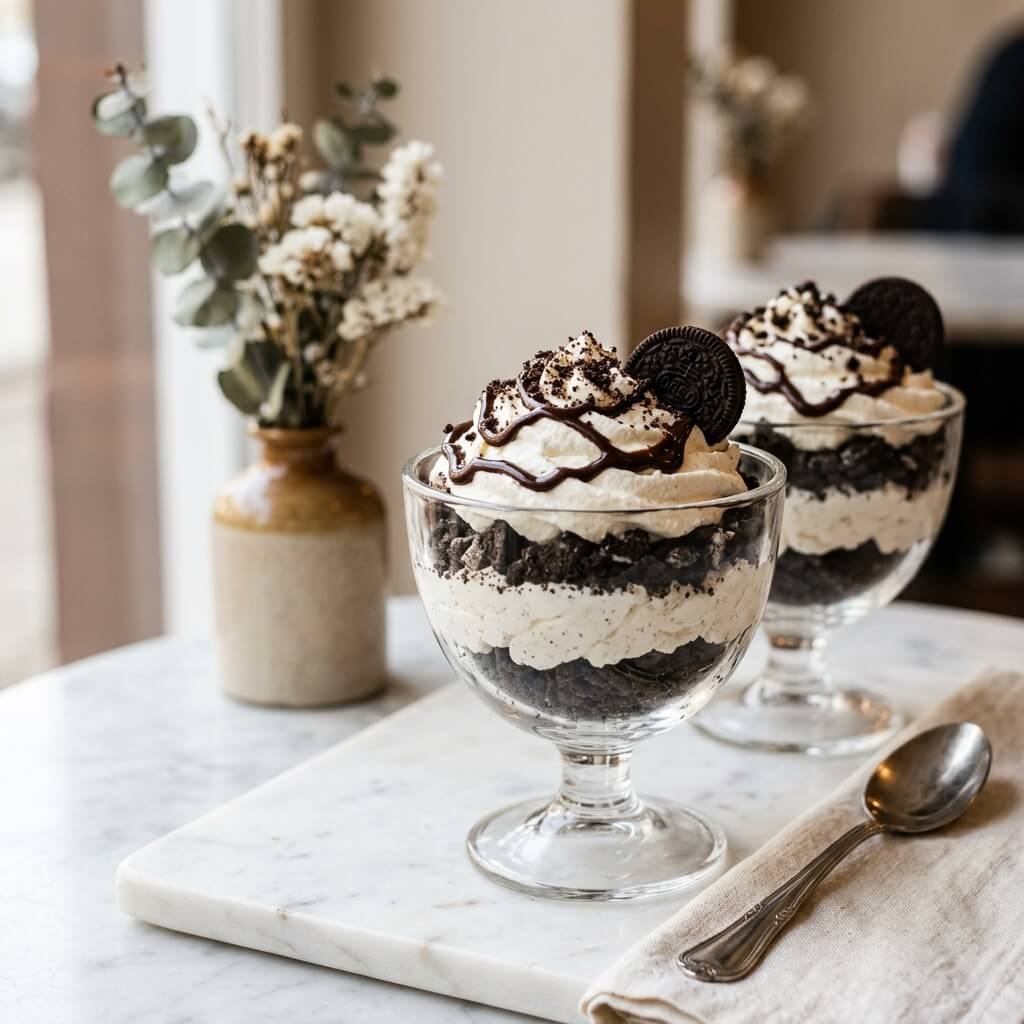
2. No-Bake Oreo Dessert Cups
Why You’ll Love This One
Two words: Oreo. Crumble. These little cups look like you spent an hour in the kitchen when really, you spent about four minutes crushing cookies and mixing cream cheese. They’re perfect for parties, movie nights, or honestly any random evening when you want something that feels a little bit special without any actual effort.
I made these for a potluck once and people genuinely thought I ordered them from a bakery. I didn’t correct them immediately. :/
Prep Time
5 minutes
Cook Time
0 minutes (no-bake)
Ingredients
- 10 Oreo cookies (regular, not Double Stuf — save those for snacking)
- 100 grams cream cheese, softened
- 2 tablespoons powdered sugar
- ½ teaspoon vanilla extract
- ½ cup heavy cream or whipped topping
- Extra crushed Oreos for garnish
Equipment
- Zip-lock bag or food processor
- Mixing bowl
- Hand mixer or whisk
- Small dessert cups or glasses (4–5 servings)
- Spoon
Instructions
- Crush the Oreos by placing them in a zip-lock bag and smashing them with a rolling pin. Alternatively, pulse them in a food processor. You want a mix of fine crumbs and slightly chunkier pieces for texture.
- Beat the cream cheese in a mixing bowl until smooth. Add the powdered sugar and vanilla extract, then mix until combined.
- Whip the heavy cream separately until stiff peaks form, then gently fold it into the cream cheese mixture. If you’re using whipped topping instead, just fold it straight in.
- Layer your cups. Start with a spoonful of crushed Oreos at the bottom, add a generous layer of the cream mixture, then repeat.
- Top with extra crushed Oreos and serve immediately or refrigerate until ready.
Notes
- These keep well in the fridge for up to 2 days — just cover the tops with plastic wrap.
- For a richer flavor, use chocolate cream cheese or add a tablespoon of cocoa powder to the filling.
- Want extra crunch? Add a thin layer of graham cracker crumbs between layers.
- IMO, the bigger the Oreo chunks, the better the texture contrast. Don’t pulverize them into dust.
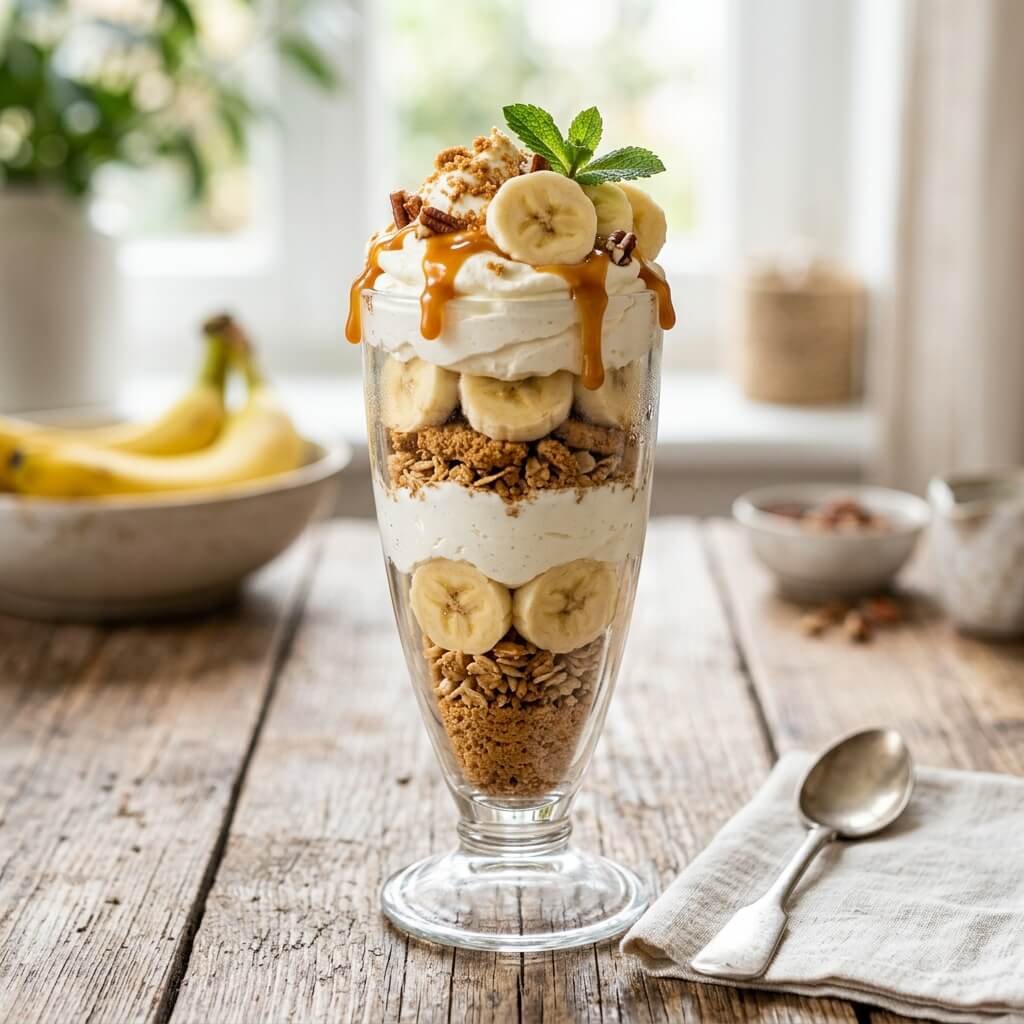
3. Quick Banana & Biscuit Cream Parfait
Why You’ll Love This One
This one screams “I have my life together” even when you absolutely don’t. It’s layered, it’s pretty, it uses ingredients you probably already have, and it tastes like something you’d order at a brunch spot for $14. The banana and biscuit combo is genuinely underrated.
Prep Time
5 minutes
Cook Time
0 minutes (no-bake)
Ingredients
- 2 ripe bananas, sliced into rounds
- 8–10 digestive biscuits or graham crackers, crushed
- 1 cup whipped cream or whipped topping
- 2 tablespoons honey or maple syrup
- ½ teaspoon cinnamon (optional)
- 1 teaspoon vanilla extract
Equipment
- Tall glasses or jars (2 servings)
- Mixing bowl
- Spoon for layering
- Knife and cutting board
Instructions
- Crush your biscuits into coarse crumbs. Set aside.
- Mix the whipped cream with honey, vanilla extract, and cinnamon if using.
- Start layering in your glasses: biscuit crumbs first, then a layer of sliced bananas, then a dollop of the cream mixture.
- Repeat the layers until you reach the top, finishing with cream and a sprinkle of biscuit crumbs.
- Drizzle a little extra honey on top and serve right away for the best crunch.
Notes
- Use ripe but firm bananas — overly soft ones will turn mushy and make the parfait soggy.
- This tastes even better after 15–20 minutes in the fridge because the biscuits soften slightly and meld with the cream.
- For a healthier twist, swap whipped cream for Greek yogurt mixed with a little honey.
- Add chocolate shavings or toasted coconut on top to elevate the presentation.
Also Read: 10 Yummy Simple Dessert Recipes Ideas for Stress-Free Baking
4. 10-Minute Strawberry Yogurt Delight
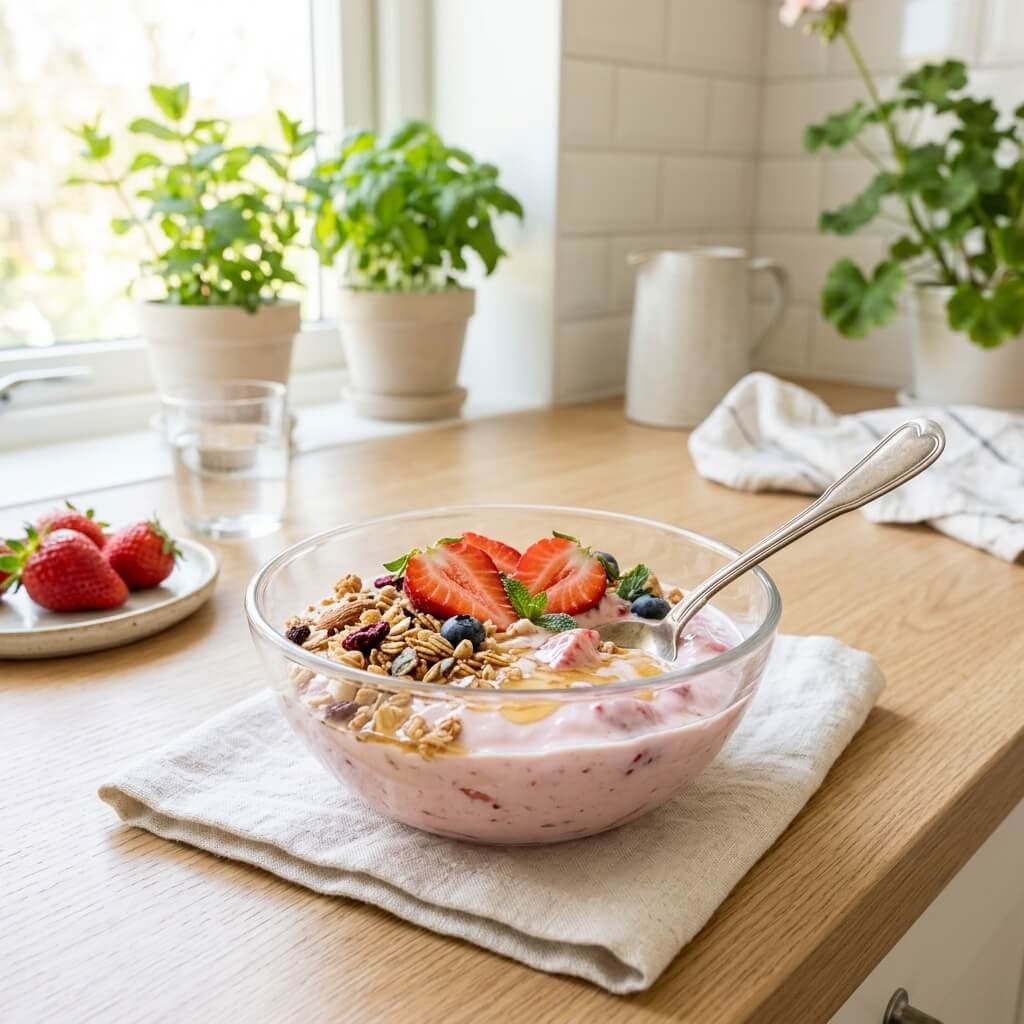
Why You’ll Love This One
Fresh, tangy, sweet, and absolutely gorgeous to look at — this dessert practically screams summer, regardless of what month it actually is. If you’re someone who wants dessert but doesn’t want to feel weighed down afterward, this is your new best friend.
Prep Time
5 minutes
Cook Time
0 minutes (no-bake)
Ingredients
- 1 cup fresh strawberries, hulled and diced
- 1½ cups Greek yogurt (plain or vanilla)
- 3 tablespoons honey
- ½ cup granola or crushed nuts
- 1 teaspoon lemon zest
- Fresh mint leaves for garnish (optional)
Equipment
- Serving bowls or jars (2 servings)
- Mixing bowl
- Spoon
Instructions
- Toss the diced strawberries with half the honey and the lemon zest in a small bowl. Let them sit for a minute so the juices start releasing.
- Spoon the yogurt into your serving bowls and smooth the top with the back of a spoon.
- Layer the honeyed strawberries generously over the yogurt.
- Sprinkle granola or crushed nuts on top for that essential crunch.
- Drizzle the remaining honey over everything and add a mint leaf if you want to feel like a five-star chef.
Notes
- Don’t skip the lemon zest. It brightens the entire flavor profile and makes the strawberries taste even fresher.
- Frozen strawberries work in a pinch, but thaw them first and drain excess liquid.
- For extra indulgence, swap Greek yogurt for mascarpone — it’s richer and creamier.
- This makes an excellent breakfast disguised as dessert, just saying. 🙂
5. Easy Chocolate Peanut Butter Bites

Why You’ll Love This One
Chocolate and peanut butter belong together. That’s not an opinion — that’s a universal truth. These little bites are dangerously addictive, require zero cooking, and you can make a big batch to store in the freezer for whenever cravings strike.
Prep Time
5 minutes
Cook Time
0 minutes (no-bake)
Ingredients
- ½ cup peanut butter (creamy works best)
- ¼ cup honey
- 1 cup rolled oats
- ¼ cup mini chocolate chips
- 1 tablespoon cocoa powder
- Pinch of salt
Equipment
- Mixing bowl
- Spoon or spatula
- Baking sheet lined with parchment paper
- Measuring cups
Instructions
- Mix peanut butter and honey together in the bowl until smooth and combined.
- Add the oats, cocoa powder, and salt. Stir until everything is evenly coated.
- Fold in the mini chocolate chips gently.
- Scoop tablespoon-sized portions and roll them into balls between your palms. Place them on the parchment-lined baking sheet.
- Pop them in the freezer for 10 minutes to firm up, or eat them immediately if you lack self-control (no judgment).
Notes
- Chill your hands under cold water before rolling — it prevents the mixture from sticking everywhere.
- These keep in the freezer for up to 3 months in an airtight container.
- Swap peanut butter for almond butter, cashew butter, or sunflower seed butter for variety or if you have allergies.
- Add shredded coconut or chia seeds for extra texture and nutrition.
6. Fast Milk Powder Barfi Squares

Why You’ll Love This One
If you’ve never tried barfi before, prepare to have your mind completely blown. This Indian-inspired milk fudge dessert comes together in the microwave and tastes like it required hours of patient stirring over a hot stove. It didn’t. That’s our little secret.
Prep Time
2 minutes
Cook Time
3 minutes (microwave)
Ingredients
- 1 cup milk powder
- ¼ cup powdered sugar
- 3 tablespoons melted butter or ghee
- 2 tablespoons milk
- ¼ teaspoon cardamom powder
- Chopped pistachios or almonds for topping
Equipment
- Microwave-safe bowl
- Microwave
- Spatula
- Small square tray or plate lined with parchment paper
- Knife
Instructions
- Combine milk powder, sugar, and cardamom in the microwave-safe bowl.
- Add melted butter and milk. Mix thoroughly until you get a thick, smooth paste.
- Microwave for 1 minute, then stir. Microwave for another 1–2 minutes, stirring every 30 seconds, until the mixture thickens and pulls away from the sides of the bowl.
- Transfer the mixture onto your parchment-lined tray and press it flat with a spatula. Aim for about ½-inch thickness.
- Sprinkle chopped nuts on top, pressing them in gently. Cut into squares while still warm, then let cool completely before serving.
Notes
- Work quickly when cutting — the barfi firms up fast as it cools and becomes harder to slice cleanly.
- Full-fat milk powder produces a richer, creamier result than skim.
- If the mixture feels too dry, add a teaspoon more milk. Too wet? Add a bit more milk powder.
- Store in an airtight container at room temperature for up to 5 days.
Also Read: 10 Tasty Mexican Dessert Recipes Ideas Flavor Explosion
7. Instant Ice Cream Sandwich Treats
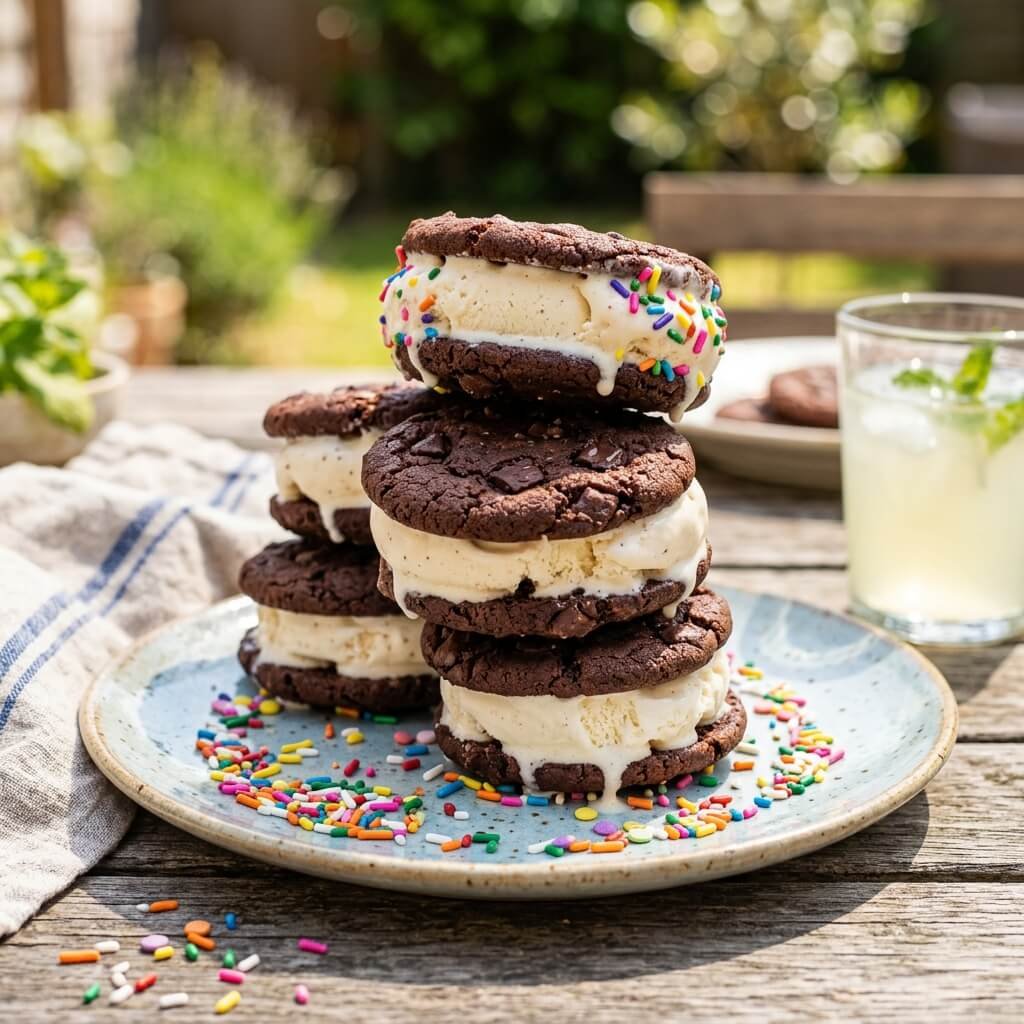
Why You’ll Love This One
Sometimes the best desserts are the simplest ones, and this is absolute proof. You literally take two cookies, slap some ice cream between them, and roll the edges in toppings. That’s it. That’s the recipe. And somehow, it’s always a crowd favorite.
Prep Time
3 minutes
Cook Time
0 minutes (no-cook)
Ingredients
- 8 soft cookies (chocolate chip, brownie, or snickerdoodle — your call)
- 1 cup softened ice cream (any flavor)
- Sprinkles, crushed nuts, mini chocolate chips, or crushed cookies for rolling
Equipment
- Cutting board
- Spoon
- Small plate or shallow bowl for toppings
- Freezer-safe plate
Instructions
- Lay out four cookies bottom-side up on your work surface.
- Scoop a generous portion of softened ice cream onto each cookie.
- Top with the remaining cookies and press down gently to spread the ice cream to the edges.
- Roll the exposed ice cream edges through your chosen toppings on a plate.
- Place on a freezer-safe plate and freeze for at least 10 minutes to set before serving.
Notes
- Soften ice cream for 5 minutes on the counter before assembling — rock-hard ice cream will crack your cookies.
- Double chocolate cookies with mint ice cream and crushed candy cane is an elite combination. Trust me.
- For a fancier look, use a piping bag to apply the ice cream in a neat swirl.
- These prep great for parties — make them a few hours ahead and just pull from the freezer when guests arrive.
8. No-Cook Biscuit Chocolate Pudding

Why You’ll Love This One
This tastes like something out of a chocolate dream. The biscuits soften into the creamy chocolate pudding and create this incredible layered texture that’s somewhere between a trifle and a mousse. Best part? You don’t cook a single thing.
Prep Time
5 minutes
Cook Time
0 minutes (no-cook)
Ingredients
- 1 cup cold milk
- 1 packet (85g) instant chocolate pudding mix
- 8–10 Marie biscuits or digestive biscuits
- ½ cup whipped cream
- Chocolate shavings for garnish
- 1 tablespoon cocoa powder (optional, for extra richness)
Equipment
- Mixing bowl
- Whisk
- Serving glasses or bowls (2–3 servings)
- Spoon
Instructions
- Whisk the pudding mix into cold milk for about 2 minutes until it thickens. If you want extra chocolate intensity, sift in the cocoa powder too.
- Dip each biscuit briefly in a little extra milk — just a quick dunk, don’t soak them.
- Layer biscuit pieces at the bottom of your serving glasses.
- Spoon chocolate pudding over the biscuits, then repeat with another layer.
- Top with whipped cream and chocolate shavings. Refrigerate for 5 minutes to let biscuits soften slightly, or eat immediately for crunch.
Notes
- Don’t over-dip the biscuits. A one-second dip gives you the perfect soft-not-soggy texture.
- Try alternating with vanilla pudding for a black-and-white effect.
- Crushed hazelnuts or almonds between layers add a lovely nutty contrast.
- This dessert gets better as it sits, so making it even an hour ahead is totally fine.
9. Quick Mango Cream Dessert Cups
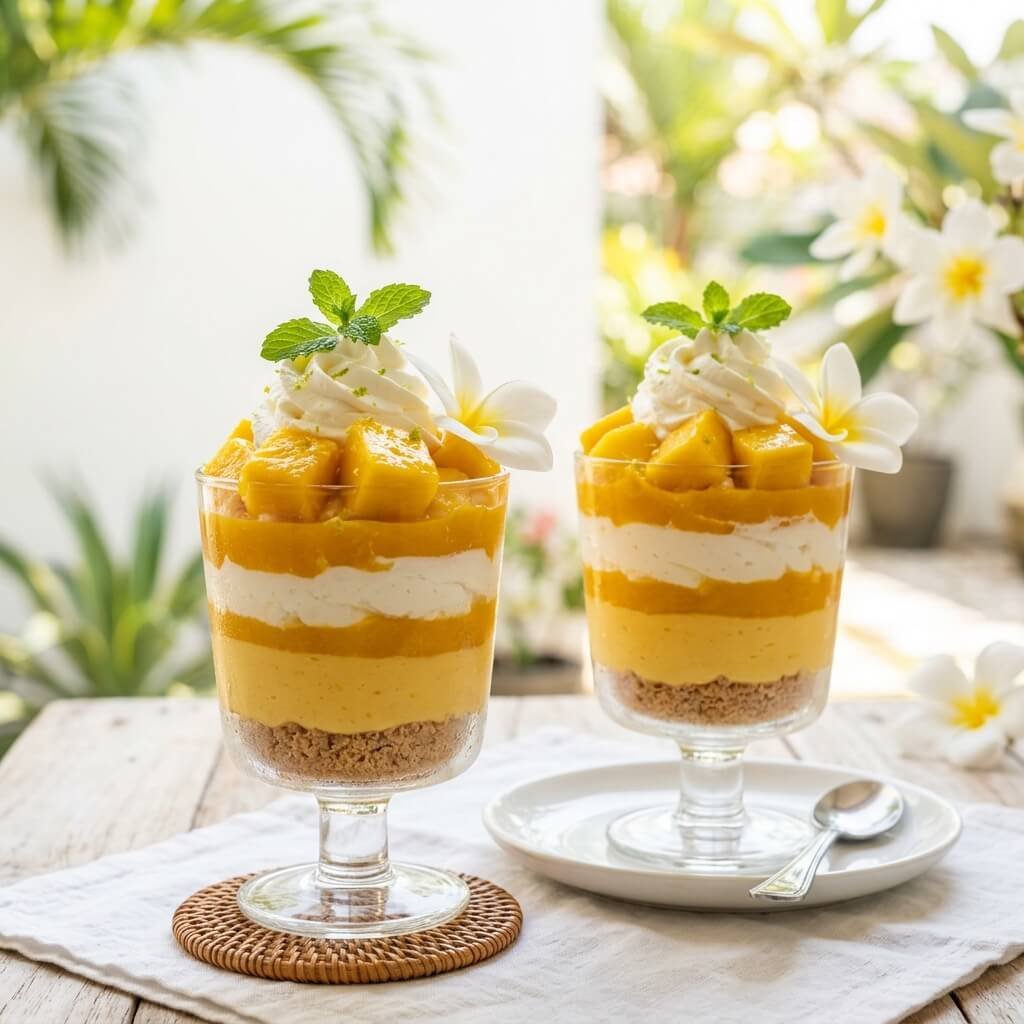
Why You’ll Love This One
Mango season or not, this dessert delivers pure tropical sunshine in every spoonful. The combination of fresh (or canned) mango with cream is honestly heavenly, and it looks absolutely stunning in a glass.
Prep Time
5 minutes
Cook Time
0 minutes (no-bake)
Ingredients
- 1 large ripe mango (or 1 cup canned mango pulp)
- ¾ cup heavy cream, chilled
- 3 tablespoons condensed milk
- ½ teaspoon cardamom powder
- Chopped pistachios for garnish
- Saffron strands (optional, for luxury vibes)
Equipment
- Blender or food processor
- Mixing bowl
- Electric hand mixer or whisk
- Serving cups (2–3 servings)
- Spoon
Instructions
- Blend the mango into a smooth puree. If using canned pulp, skip this step entirely.
- Whip the heavy cream with condensed milk until soft peaks form.
- Fold the mango puree into the whipped cream gently. Add cardamom powder and mix until just combined — you want a marbled look if possible, so don’t over-stir.
- Spoon into serving cups and smooth the tops.
- Garnish with chopped pistachios and a few saffron strands. Chill for a few minutes or serve immediately.
Notes
- Alphonso mangoes give the best flavor — they’re sweeter, more aromatic, and produce a gorgeous golden color.
- If your mango isn’t very sweet, add an extra tablespoon of condensed milk to compensate.
- This dessert can be frozen for a mango ice cream-like treat — just stir it every 30 minutes while freezing.
- For a lighter version, swap heavy cream for coconut cream. The tropical flavor gets even better.
Also Read: 10 Creamy Keto Dessert Recipes Perfect For Beginners
10. 3-Ingredient Nutella Dessert Wraps
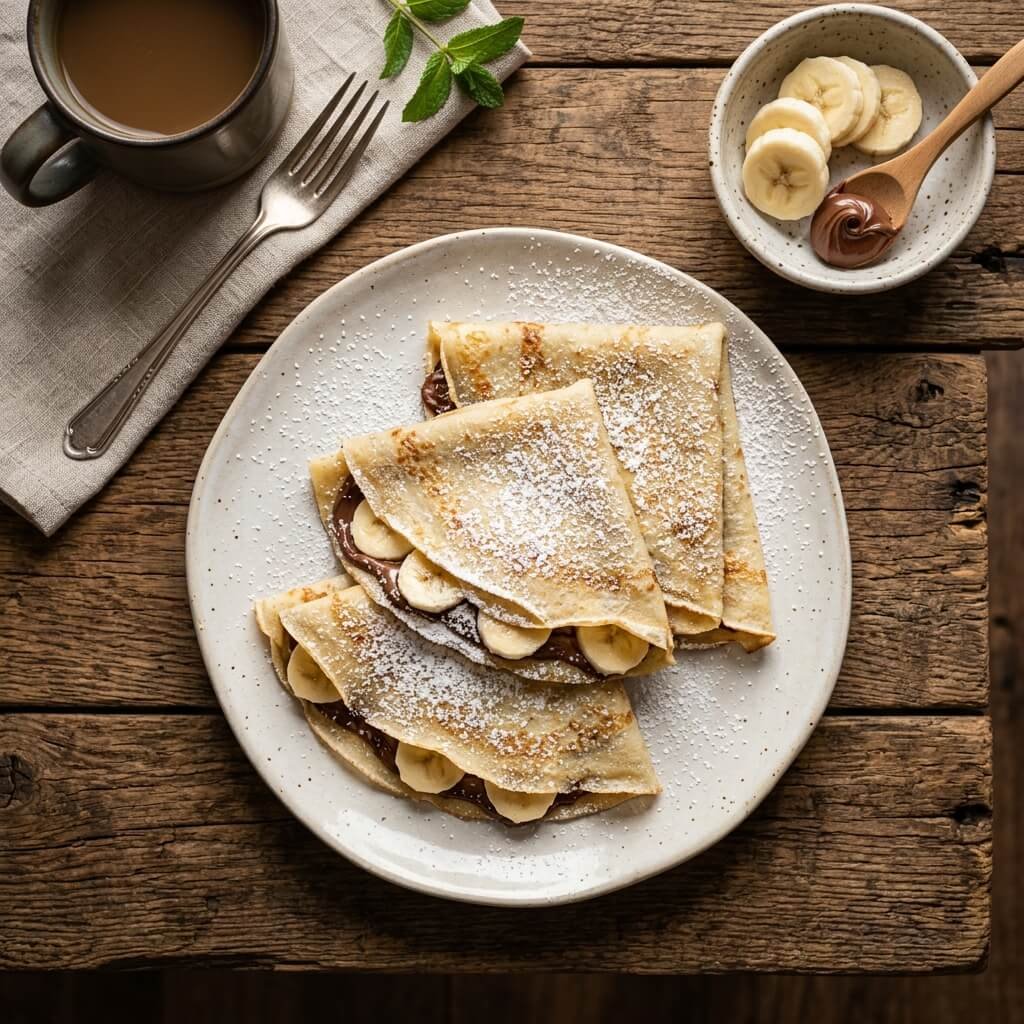
Why You’ll Love This One
Three ingredients. That’s literally all you need. These wraps taste like a warm, gooey, hazelnut-chocolate hug wrapped in a tortilla. They’re perfect for kids, adults, and everyone in between. And when someone asks for the recipe, you get to dramatically say “It’s three ingredients” and watch their face.
Prep Time
2 minutes
Cook Time
3 minutes (stovetop or microwave)
Ingredients
- 2 large flour tortillas
- 4 tablespoons Nutella (or any chocolate-hazelnut spread)
- 1 ripe banana, sliced into thin rounds
Equipment
- Non-stick pan or microwave
- Spatula
- Knife and cutting board
Instructions
- Spread Nutella generously over each tortilla, covering the entire surface edge to edge.
- Arrange banana slices over half of each tortilla.
- Fold the tortillas in half to create half-moon shapes, pressing down gently.
- Warm in a non-stick pan over medium heat for about 1–2 minutes per side until golden and the Nutella is melty. Or microwave for 30 seconds if you’re really in a hurry.
- Slice into triangles and serve warm. Watch them disappear within minutes.
Notes
- Don’t skip warming them. The heat transforms the Nutella from spreadable to gloriously molten.
- Add a sprinkle of cinnamon or sea salt on top after cooking for a flavor upgrade.
- Strawberries or marshmallows make excellent alternative or additional fillings.
- For a crispy version, butter the outside of the tortilla before pan-frying, like a quesadilla.
Final Thoughts: Your Dessert Cravings Don’t Stand a Chance
And there you have it — 10 yummy quick dessert recipes ideas for 5 minute treats that prove you don’t need hours, professional equipment, or culinary school training to make something absolutely delicious.
From the gooey warmth of a chocolate mug cake to the tropical paradise of mango cream cups, every recipe on this list brings something unique to your kitchen. They’re fast, forgiving, and genuinely fun to make. Some of them are even nutritious enough to justify eating for breakfast (I’m looking at you, banana parfait).
The real beauty of these recipes? You can customize nearly all of them. Swap ingredients, adjust sweetness, add toppings — make each one entirely your own. That’s the magic of simple desserts. They give you a foundation and then say, “Hey, go wild.”
So the next time your sweet tooth starts screaming at 10 PM on a Tuesday, you know exactly what to do. Grab a mug, a bowl, or a tortilla — and make something wonderful in five minutes flat.
Now if you’ll excuse me, I have a date with a mug cake. Happy dessert-making, friends! 😊