
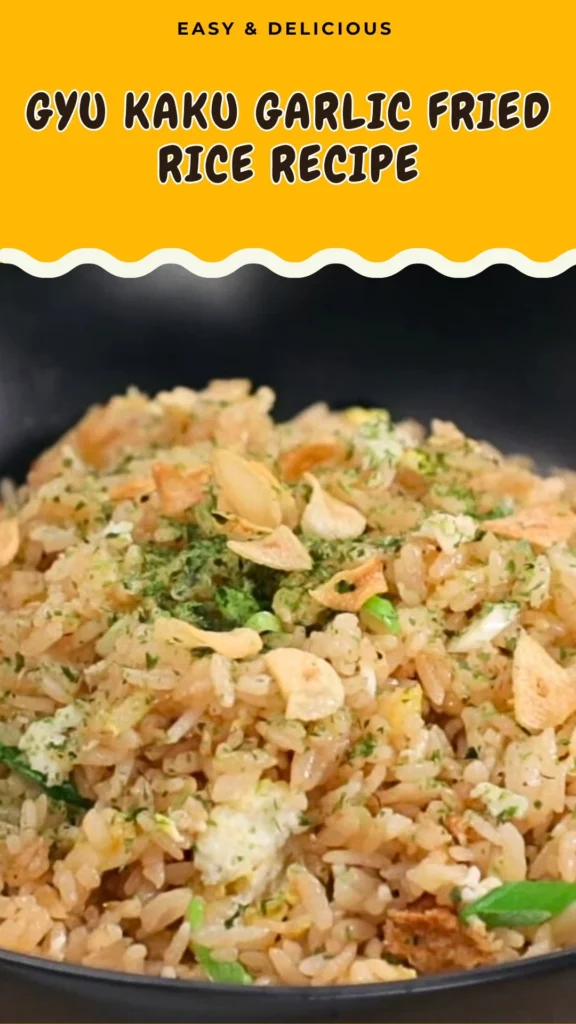
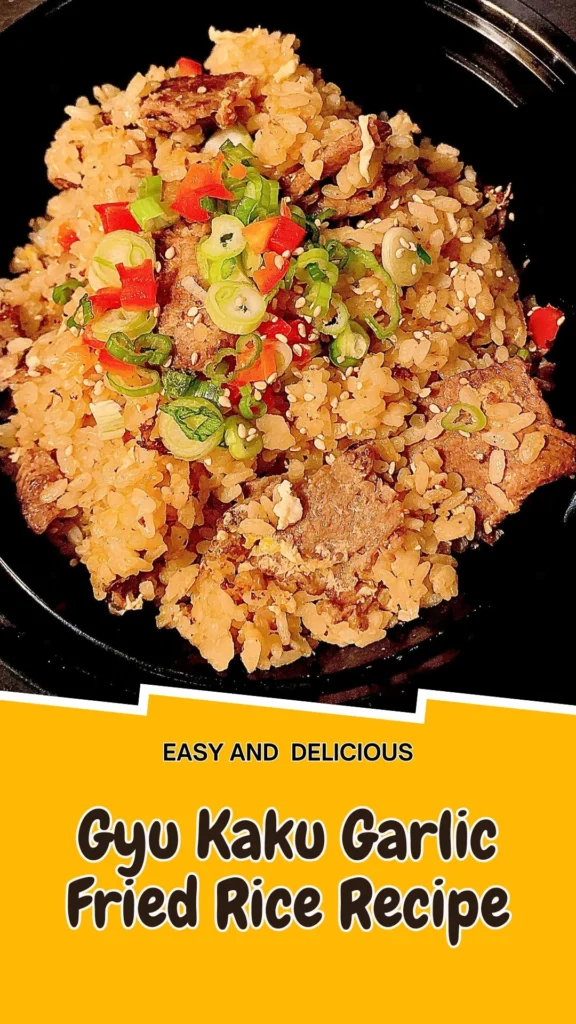
Craving that addictive gyu kaku garlic fried rice from your favorite Japanese steakhouse? This copycat gyu kaku garlic fried rice recipe brings the irresistible teppanyaki-style flavors straight to your kitchen.
Packed with buttery garlic goodness, crispy garlic chips, and umami-rich seasonings, this Japanese garlic fried rice delivers restaurant-quality results without the hefty price tag.
Whether you’re looking for the perfect side dish to complement your grilled meats or want a satisfying standalone meal, this garlic butter fried rice will become your new weeknight favorite.
What is Gyu Kaku Garlic Fried Rice and How Does It Taste?
Gyu Kaku garlic fried rice is a signature teppanyaki rice dish served at the popular Japanese yakiniku restaurant chain. This Japanese garlic fried rice features day-old short grain rice stir-fried with generous amounts of minced garlic, butter, soy sauce, and dashi for an umami bomb experience.
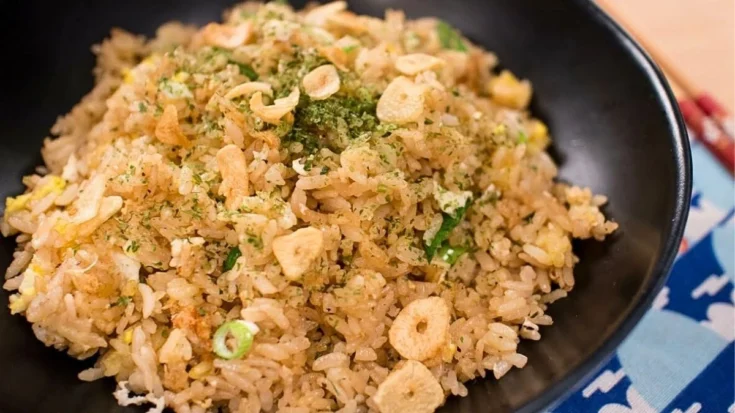
The texture combines fluffy separated rice grains with crispy edges, while garlic chips add an irresistible crunch. The taste profile is savory, garlicky, and slightly sweet with buttery richness balanced by the saltiness of soy sauce and the depth of dashi.
The addition of scrambled eggs creates pockets of creamy texture, while green onions and aonori seaweed provide fresh, aromatic finishing notes that make this garlic egg fried rice utterly crave-worthy.
Gyu Kaku Garlic Fried Rice Recipe Ingredients
- Neutral cooking oil, as needed
- 1 head garlic
- 2 Tbsp butter, unsalted
- ½ tsp ground black pepper, or to taste
- 650g cooked short grain Japanese rice (see note: day-old rice works best)
- 1 Tbsp + 1 tsp Japanese soy sauce
- ¼ tsp salt
- 1 tsp dashi powder (hondashi), dissolved in 2 tablespoons of water
- 2 eggs
- 2 green onions, chopped
- Crushed seaweed (aonori) for garnish (optional)
Kitchen Utensils
- Wok or large frying pan
- Small pan or pot for frying garlic
- Mandoline slicer (optional, for uniform garlic chips)
- Slotted spoon or tongs
- Paper towels
- Angled spatula or wok spatula
- Small whisk
- Knife and cutting board
- Measuring spoons
Preparation and Cooking Time
Prep Time: 15 minutes
Cook Time: 20 minutes
Total Time: 35 minutes
Servings: 3-4 servings
Copycat Gyu Kaku Garlic Fried Rice Recipe
Step 1: Prepare the Garlic
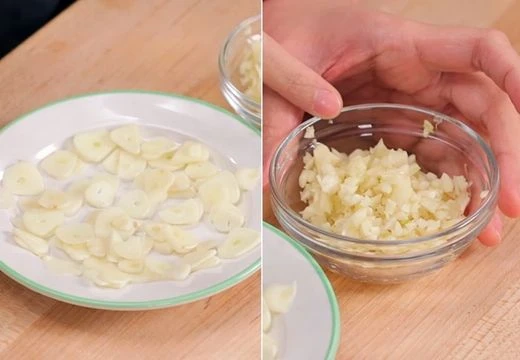
Separate the entire head of garlic into individual cloves and peel them all. Take approximately 40% of the cloves and slice them as thinly and evenly as possible into chips using a mandoline if available for uniform thickness. Alternatively, chop them into small bits for a Thai-style fried garlic approach. Finely mince the remaining 60% of garlic cloves and set aside separately.
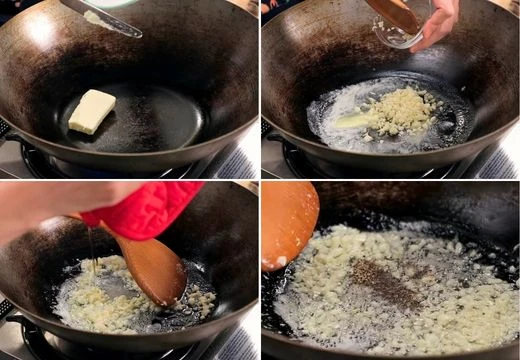
Step 2: Make the Crispy Garlic Chips
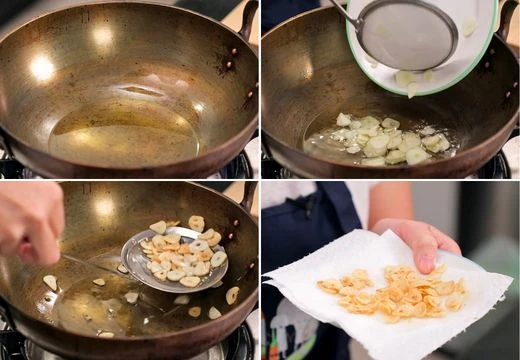
Heat neutral oil in a small pan over medium heat, using just enough to submerge the garlic slices. Test the temperature with one slice-when it starts bubbling gently, add all the sliced garlic. Immediately reduce heat to low or medium-low and fry gently, stirring occasionally, until the garlic turns lightly golden but not browned (browned garlic becomes bitter). The bubbling should slow almost to a stop when the chips are crispy. Remove the garlic chips with a slotted spoon as they finish cooking, as thinner pieces may brown faster. Drain on paper towels and allow to cool completely-they’ll crisp up as they cool. Reserve the garlic-infused oil for additional flavor if desired.
Step 3: Prepare the Dashi Mixture
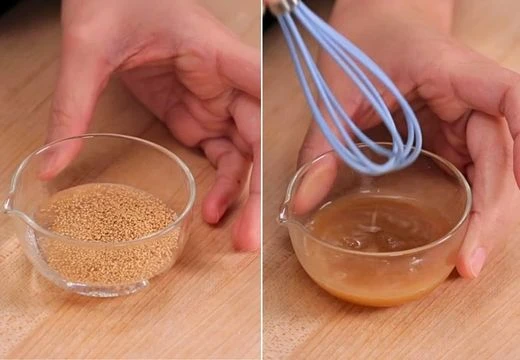
Dissolve 1 teaspoon of dashi powder in 2 tablespoons of water, stirring well with a mini whisk to ensure it’s fully incorporated. Set this umami-rich mixture aside for later use in the fried rice.
Step 4: Sauté the Garlic Base
In your wok or large pan, melt 2 tablespoons of butter over low heat. For extra depth of flavor, add 1-2 teaspoons of the reserved garlic-infused oil. Add the minced garlic and ½ teaspoon of black pepper immediately-adding pepper early allows it to infuse into the fat better. Sauté gently on low heat for a few minutes until the garlic softens, becomes wonderfully fragrant, and fully infuses the butter. Keep the heat low to prevent the butter or garlic from burning.
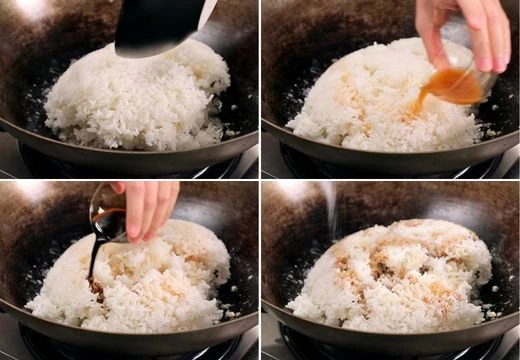
Step 5: Add and Fry the Rice
Add the cold cooked Japanese rice to the pan and break up any clumps with your spatula. Pour the soy sauce, prepared dashi mixture, and ¼ teaspoon of salt evenly over the rice to help distribute the seasonings and separate the grains. Increase the heat to medium and stir-fry constantly, flipping and pressing down on lumps with an angled spatula to break them up for even coating. For extra toasty teppanyaki flavor, let sections of rice sit briefly to brown slightly on the bottom, then flip. Continue this process until the rice is thoroughly heated, separated into individual grains, and lightly toasted in spots-about 5-7 minutes total.
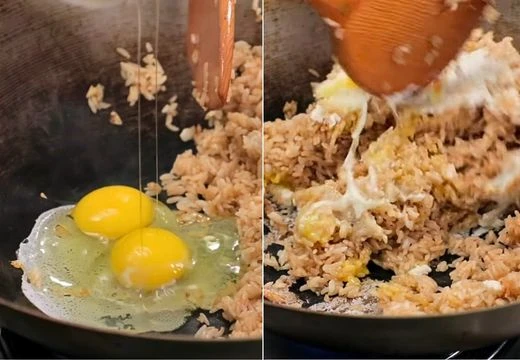
Step 6: Add the Eggs
Push the fried rice to the sides of the pan to create a well in the center. Crack the 2 eggs into this well and let them sit to set slightly. You can break the yolks if desired, though keeping the whites and yolks somewhat separate creates nice bits of color and texture. Gently fold the hot rice over the eggs to cover them briefly for about 30 seconds. Then toss everything together until the eggs are fully cooked through and coat the rice, which helps absorb any excess fat for a less greasy result.
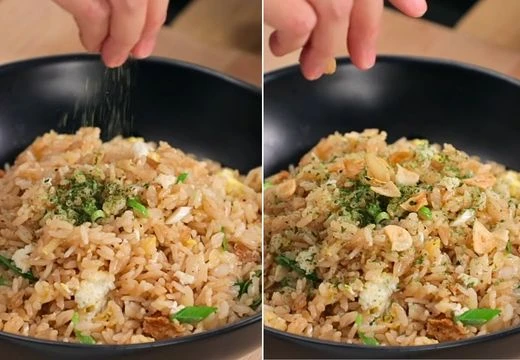
Step 7: Finish and Garnish
Turn off the heat and mix in most of the chopped green onions, reserving some for garnish. Taste your garlic butter fried rice and adjust seasoning as needed with additional soy sauce, salt, or pepper. Transfer to a serving plate or bowl. Top with crushed aonori seaweed, concentrating it in the center first, then spreading it out for visual appeal. Sprinkle generously with the crispy garlic chips you made earlier.
Add extra green onions or additional seaweed on the side if desired for that authentic gyu kaku presentation.
Customization and Pairing Ideas for Serving
1. Protein Additions for a Complete Meal:
Transform your Japanese garlic fried rice into a hearty main dish by adding diced grilled chicken, sliced beef, crispy bacon bits, or succulent shrimp. For an authentic yakiniku experience, top with thinly sliced grilled wagyu or Korean-style bulgogi beef. Vegetarians can add crispy tofu cubes or edamame for plant-based protein that complements the garlic butter flavors beautifully.
2. Vegetable Enhancements:
Boost nutrition and color by incorporating finely diced carrots, corn kernels, frozen peas, or chopped bell peppers during the stir-frying process. Shiitake mushrooms or enoki mushrooms add earthy umami depth that pairs wonderfully with the garlic and dashi. Add vegetables when you add the rice to ensure they cook through properly while maintaining some texture.
3. Spicy Garlic Fried Rice Variation:
Elevate the heat level by adding Japanese chili oil (rayu), Korean gochugaru flakes, or fresh sliced red chilies when sautéing the minced garlic. You can also drizzle sriracha or incorporate kimchi for a fusion twist that adds tangy spiciness to this teppanyaki rice creation.
4. Cheese Lover’s Version:
For an indulgent upgrade, fold in shredded mozzarella or parmesan cheese during the final tossing stage, allowing it to melt into the hot rice. This creates a creamy, restaurant-style garlic butter cheese fried rice that’s incredibly satisfying. Japanese Kewpie mayo drizzled on top adds extra richness.
5. Seafood Pairing Perfection:
Serve your gyu kaku garlic fried rice alongside grilled scallops, teriyaki salmon, miso-glazed black cod, or tempura shrimp. The garlic and butter notes complement seafood exceptionally well, making this an ideal side for Japanese-style seafood dinners or hibachi-themed meals at home.
6. Traditional Yakiniku Accompaniments:
Create an authentic Japanese steakhouse experience by pairing this garlic egg fried rice with grilled short ribs (kalbi), beef tongue, or assorted yakiniku cuts. Serve with traditional sides like kimchi, pickled radish, Japanese potato salad, and miso soup for a complete teppanyaki-style feast.
7. Breakfast or Brunch Transformation:
Repurpose leftover garlic fried rice into a delicious breakfast by topping it with a sunny-side-up egg, crispy spam slices, or Japanese natto for a fusion morning meal. The runny yolk mixing with the buttery rice creates an incredibly satisfying start to your day.
Essential Tips for Perfect Garlic Butter Fried Rice
1. Use Day-Old Rice for Best Results:
The secret to restaurant-quality fried rice texture is using cold, day-old cooked rice. Freshly cooked rice contains too much moisture and will turn mushy when stir-fried. Day-old rice from the refrigerator has dried out slightly, allowing the grains to separate easily and develop that characteristic crispy, toasted texture. If you must use fresh rice, spread it on a baking sheet and refrigerate uncovered for at least 2 hours before cooking.
2. Control Your Garlic Heat Carefully:
Garlic is the star of this gyu kaku garlic fried rice recipe, so preventing it from burning is crucial. When making crispy garlic chips, maintain low to medium-low heat and watch them like a hawk-they transition from golden to burnt in seconds. Similarly, when sautéing minced garlic in butter, keep the heat low and stir frequently. Burnt garlic introduces bitter, acrid flavors that will ruin your entire dish.
3. Master the Two-Texture Garlic Approach:
Using garlic two ways-crispy chips for crunch and minced for infused flavor-is what makes this Japanese garlic fried rice exceptional. The minced garlic cooked in butter permeates every grain of rice with aromatic flavor, while the crispy chips provide textural contrast and concentrated garlic taste. Don’t skip either preparation, as both contribute essential elements to the final dish.
4. Season in Layers for Depth:
Instead of adding all seasonings at once, layer them strategically. Black pepper goes in early with the butter to infuse its flavor. Soy sauce and dashi get added with the rice to help separate grains and distribute evenly. This technique ensures every component is properly seasoned rather than having pockets of bland rice and over-seasoned spots.
5. Keep Your Wok or Pan Hot Enough:
While you want low heat for garlic, you need medium to medium-high heat for the actual rice frying stage. A properly heated pan creates the “wok hei” or breath of the wok-that slightly charred, smoky flavor characteristic of teppanyaki rice. However, don’t go so hot that the rice burns before heating through. Find the sweet spot where you hear a gentle sizzle and can achieve light browning.
6. The Egg Technique Matters:
Adding eggs directly to the rice creates a different texture than the well method described in this recipe. By creating a well and letting eggs set slightly before folding the rice over them, you get distinct pieces of cooked egg throughout rather than a uniform coating. This mimics the authentic gyu kaku style where you can see and taste separate egg pieces. The eggs also absorb excess butter, preventing the finished dish from feeling greasy.
7. Don’t Overcrowd Your Pan:
If doubling this garlic fried rice recipe, use two pans or cook in batches. Overcrowding lowers the pan temperature, causes steaming instead of frying, and makes it nearly impossible to achieve that crispy, separated texture you want. Give the rice room to breathe and make proper contact with the hot surface for optimal results.
Storage and Reheating Guidance
Store leftover garlic butter fried rice in an airtight container in the refrigerator for up to 3 days. Reheat in a hot pan or wok with a small amount of oil or butter, stirring frequently until heated through. Alternatively, microwave in 30-second intervals, stirring between each. Add fresh crispy garlic chips after reheating for best texture.
Gyu Kaku Garlic Fried Rice Recipe
Craving that addictive gyu kaku garlic fried rice from your favorite Japanese steakhouse? This copycat gyu kaku garlic fried rice recipe brings the irresistible teppanyaki-style flavors straight to your kitchen.
Ingredients
- Neutral cooking oil, as needed
- 1 head garlic
- 2 Tbsp butter, unsalted
- ½ tsp ground black pepper, or to taste
- 650g cooked short grain Japanese rice (see note: day-old rice works best)
- 1 Tbsp + 1 tsp Japanese soy sauce
- ¼ tsp salt
- 1 tsp dashi powder (hondashi), dissolved in 2 tablespoons of water
- 2 eggs
- 2 green onions, chopped
- Crushed seaweed (aonori) for garnish (optional)
Instructions
Step 1: Prepare the Garlic
Separate the entire head of garlic into individual cloves and peel them all. Take approximately 40% of the cloves and slice them as thinly and evenly as possible into chips using a mandoline if available for uniform thickness. Alternatively, chop them into small bits for a Thai-style fried garlic approach. Finely mince the remaining 60% of garlic cloves and set aside separately.
Step 2: Make the Crispy Garlic Chips
Heat neutral oil in a small pan over medium heat, using just enough to submerge the garlic slices. Test the temperature with one slice-when it starts bubbling gently, add all the sliced garlic. Immediately reduce heat to low or medium-low and fry gently, stirring occasionally, until the garlic turns lightly golden but not browned (browned garlic becomes bitter). The bubbling should slow almost to a stop when the chips are crispy. Remove the garlic chips with a slotted spoon as they finish cooking, as thinner pieces may brown faster. Drain on paper towels and allow to cool completely-they’ll crisp up as they cool. Reserve the garlic-infused oil for additional flavor if desired.
Step 3: Prepare the Dashi Mixture
Dissolve 1 teaspoon of dashi powder in 2 tablespoons of water, stirring well with a mini whisk to ensure it’s fully incorporated. Set this umami-rich mixture aside for later use in the fried rice.
Step 4: Sauté the Garlic Base
In your wok or large pan, melt 2 tablespoons of butter over low heat. For extra depth of flavor, add 1-2 teaspoons of the reserved garlic-infused oil. Add the minced garlic and ½ teaspoon of black pepper immediately-adding pepper early allows it to infuse into the fat better. Sauté gently on low heat for a few minutes until the garlic softens, becomes wonderfully fragrant, and fully infuses the butter. Keep the heat low to prevent the butter or garlic from burning.
Step 5: Add and Fry the Rice
Add the cold cooked Japanese rice to the pan and break up any clumps with your spatula. Pour the soy sauce, prepared dashi mixture, and ¼ teaspoon of salt evenly over the rice to help distribute the seasonings and separate the grains. Increase the heat to medium and stir-fry constantly, flipping and pressing down on lumps with an angled spatula to break them up for even coating. For extra toasty teppanyaki flavor, let sections of rice sit briefly to brown slightly on the bottom, then flip. Continue this process until the rice is thoroughly heated, separated into individual grains, and lightly toasted in spots-about 5-7 minutes total.
Step 6: Add the Eggs
Push the fried rice to the sides of the pan to create a well in the center. Crack the 2 eggs into this well and let them sit to set slightly. You can break the yolks if desired, though keeping the whites and yolks somewhat separate creates nice bits of color and texture. Gently fold the hot rice over the eggs to cover them briefly for about 30 seconds. Then toss everything together until the eggs are fully cooked through and coat the rice, which helps absorb any excess fat for a less greasy result.
Step 7: Finish and Garnish
Turn off the heat and mix in most of the chopped green onions, reserving some for garnish. Taste your garlic butter fried rice and adjust seasoning as needed with additional soy sauce, salt, or pepper. Transfer to a serving plate or bowl. Top with crushed aonori seaweed, concentrating it in the center first, then spreading it out for visual appeal. Sprinkle generously with the crispy garlic chips you made earlier. Add extra green onions or additional seaweed on the side if desired for that authentic gyu kaku presentation.
Notes
Store leftover garlic butter fried rice in an airtight container in the refrigerator for up to 3 days. Reheat in a hot pan or wok with a small amount of oil or butter, stirring frequently until heated through. Alternatively, microwave in 30-second intervals, stirring between each. Add fresh crispy garlic chips after reheating for best texture.
Nutrition Information:
Yield:
4Serving Size:
1Amount Per Serving: Calories: 630
Common Queries and FAQs
Can I use jasmine rice or other types instead of Japanese short grain rice?
While Japanese short grain rice provides the authentic sticky texture of gyu kaku garlic fried rice, you can substitute with jasmine rice, medium grain rice, or even brown rice. Just note that the texture will be less cohesive and more separated. Whatever rice type you choose, ensure it’s day-old and cold from the refrigerator for best frying results.
What can I substitute for dashi powder?
If you don’t have dashi powder, use chicken or vegetable stock, bonito flakes steeped in hot water, or a pinch of MSG with a bit of soy sauce for umami depth. While dashi provides authentic Japanese flavor, these substitutions will still create delicious garlic fried rice. You can also simply omit it and increase the soy sauce slightly.
How do I prevent my garlic from burning?
The key is low heat and constant attention. For crispy garlic chips, the oil should bubble gently but not vigorously. Remove chips when they’re light golden, not brown-they’ll continue darkening slightly off heat. For minced garlic sautéed in butter, use low heat and add the garlic to cold or barely melted butter rather than hot butter.
Can I make this copycat gyu kaku garlic fried rice ahead of time?
You can prepare the crispy garlic chips up to 2 days ahead and store them in an airtight container at room temperature. The rice itself is best cooked fresh, but you can prep all ingredients in advance for quick assembly. If making ahead completely, undercook slightly and reheat in a hot pan to restore texture.
Is this recipe suitable for meal prep?
Absolutely! This Japanese garlic fried rice works wonderfully for meal prep. Portion into individual containers and refrigerate. The flavors actually develop and meld overnight. Just store the crispy garlic chips separately and add them when reheating to maintain their crunch. This makes an excellent base for adding different proteins throughout the week.
What’s the best oil for frying the garlic chips?
Use neutral oils with high smoke points like vegetable oil, canola oil, grapeseed oil, or peanut oil. Avoid olive oil or butter for frying the chips as their low smoke points can burn and impart unwanted flavors. The neutral oil also allows you to taste the pure garlic flavor without interference.
Can I make this garlic egg fried rice without eggs?
Yes, the eggs are optional though highly recommended for authentic gyu kaku style. Simply skip step 6 and proceed directly to finishing with green onions. The dish will still be delicious and remain suitable for those avoiding eggs or wanting a lighter version of this teppanyaki rice.
This copycat gyu kaku garlic fried rice recipe delivers all the addictive flavors of your favorite Japanese steakhouse right in your home kitchen. With perfectly crispy garlic chips, buttery umami-rich rice, and that signature teppanyaki char, this Japanese garlic butter fried rice rivals any restaurant version.
The beauty of this garlic fried rice recipe lies in its versatility-enjoy it as a side dish with grilled meats or transform it into a complete meal with your favorite proteins and vegetables. Master this technique once, and you’ll find yourself craving this savory, garlicky comfort food again and again!
We’d love to hear how this recipe turns out for you! Give it a try, then drop a comment below to share your thoughts and tips with us.