
Let’s be real for a second. We’ve all been there. You spend hours—maybe even a whole afternoon—baking the perfect cake layers.
The house smells amazing, you’ve got flour in your hair and a dusting of cocoa on your favorite shirt. You stack those beautiful layers, take a proud step back, and… it’s just okay. It’s good. But it’s not that cake.
You know, the one that makes people’s eyes roll back in their heads and has them scraping their plates for every last bit?
More often than not, the secret weapon isn’t the cake itself. It’s the filling. A phenomenal filling transforms a simple cake from a pleasant dessert into a legendary experience. It’s the juicy center of the story, the plot twist that gets everyone talking.
So, if you’re ready to level up your baking game and stop settling for “just okay,” you’ve come to the right place. I’ve been on this exact quest, and after a fair share of kitchen successes (and a few spectacular fails), I’ve compiled my absolute favorites. These aren’t just recipes; they’re game-changers.
Grab your mixing bowl, and let’s get into it.
1. The Classic: Vanilla Bean Custard Cake Filling

If fillings were a wardrobe, this would be your perfect little black dress. It’s elegant, versatile, and never goes out of style. This vanilla bean custard is rich, creamy, and has a depth of flavor that the bottled stuff can’t touch. I use this for everything from a simple vanilla layer cake to the base for a Boston cream pie. It’s the quiet star of the show.
What You’ll Need
- Prep Time: 10 minutes
- Cook Time: 15 minutes
- Cooling Time: 3 hours (or overnight)
Ingredients:
- 2 cups whole milk
- 1/2 cup granulated sugar
- 1/4 cup cornstarch
- 4 large egg yolks
- 1 vanilla bean (or 2 tsp pure vanilla extract)
- Pinch of salt
- 2 tbsp unsalted butter, cold and cubed
Equipment:
- Medium saucepan
- Whisk
- Fine-mesh strainer
- Plastic wrap
Instructions:
- Split your vanilla bean lengthwise and scrape out those gorgeous seeds. Add both the seeds and the pod to a saucepan with the milk. Heat over medium until it just starts to steam and tiny bubbles form around the edge. Don’t let it boil!
- Whisk together the sugar, cornstarch, egg yolks, and salt in a medium bowl until it forms a smooth, pale yellow paste. Slowly—like, really slowly—pour about half of the hot milk into the egg mixture while whisking constantly. This tempers the eggs so they don’t scramble. Then, pour the whole mixture back into the saucepan.
- Cook over medium heat, whisking constantly, until the mixture thickens to the consistency of thick pudding and comes to a full bubble. This takes about 3-5 minutes. Let it bubble for one full minute to cook out the cornstarch taste.
- Remove from heat. Fish out the vanilla pod, then whisk in the cold butter until it’s completely melted and glossy.
- Strain the custard through a fine-mesh strainer into a clean bowl to catch any tiny lumps. Press plastic wrap directly onto the surface to prevent a skin from forming, and chill for at least 3 hours or overnight.
Pro-Tip Notes:
- FYI, that plastic wrap on the surface is non-negotiable. Trust me, you don’t want to pick off a weird rubbery skin.
- This custard sets firmly in the fridge, making it perfect for layering and stacking without squishing out the sides.
- For a lighter texture, you can fold in 1/2 cup of freshly whipped heavy cream after the custard has fully chilled.
2. The Decadent: Chocolate Ganache Silk Filling
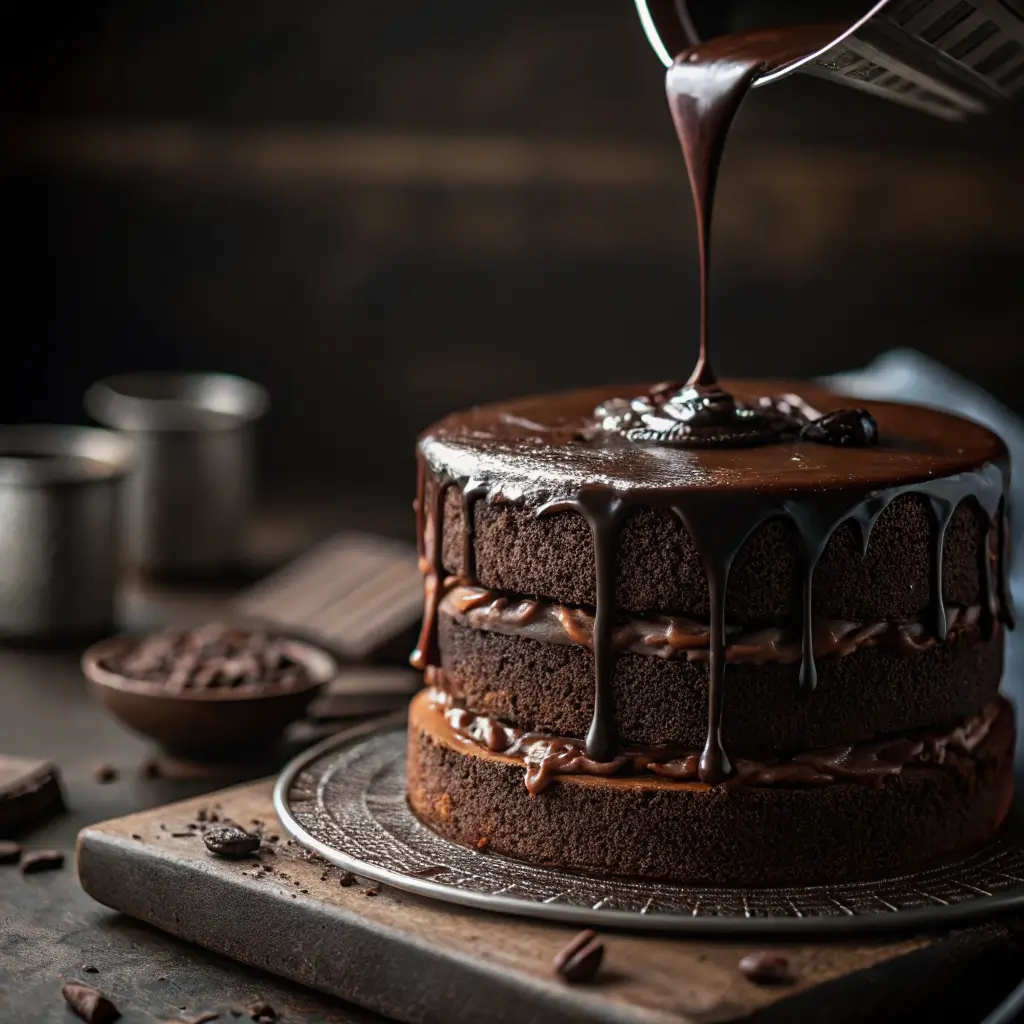
This isn’t just a filling; it’s a velvet robe for your cake. Chocolate ganache is the simplest way to get intense, professional-level chocolate flavor. It’s rich, smooth, and utterly luxurious. I once used this in a chocolate raspberry cake for a friend’s birthday, and they literally asked if I’d bought it from a fancy bakery. Best compliment ever.
What You’ll Need
- Prep Time: 5 minutes
- Setting Time: 2 hours
Ingredients:
- 12 oz high-quality semi-sweet chocolate, finely chopped
- 1 cup heavy cream
- Pinch of salt
Equipment:
- Heatproof bowl
- Saucepan
- Whisk
Instructions:
- Place the finely chopped chocolate and salt in a heatproof bowl. The finer you chop, the smoother your ganache.
- Heat the heavy cream in a saucepan over medium heat until it just begins to simmer—you’ll see little wisps of steam.
- Pour the hot cream directly over the chocolate. Let it sit, untouched, for 5 minutes. This is the hardest part—resist the urge to stir!
- Whisk the mixture gently from the center outward until it transforms into a smooth, shiny, dark pool of chocolate heaven.
- Cool at room temperature until it thickens to a spreadable consistency, about 2 hours. For faster results, you can pop it in the fridge, but give it a stir every 20 minutes.
Pro-Tip Notes:
- The ratio is everything. For a firm, truffle-like filling that holds its shape (perfect for layering), use the 2:1 chocolate-to-cream ratio listed. For a pourable glaze, use a 1:1 ratio (8 oz chocolate to 1 cup cream).
- IMO, using high-quality chocolate here makes all the difference. Grab a good bar from the baking aisle, not the candy aisle.
- If it gets too thick, gently rewarm it over a double boiler until it’s spreadable again.
3. The Fruity Favorite: Strawberry Cream Cheese Filling
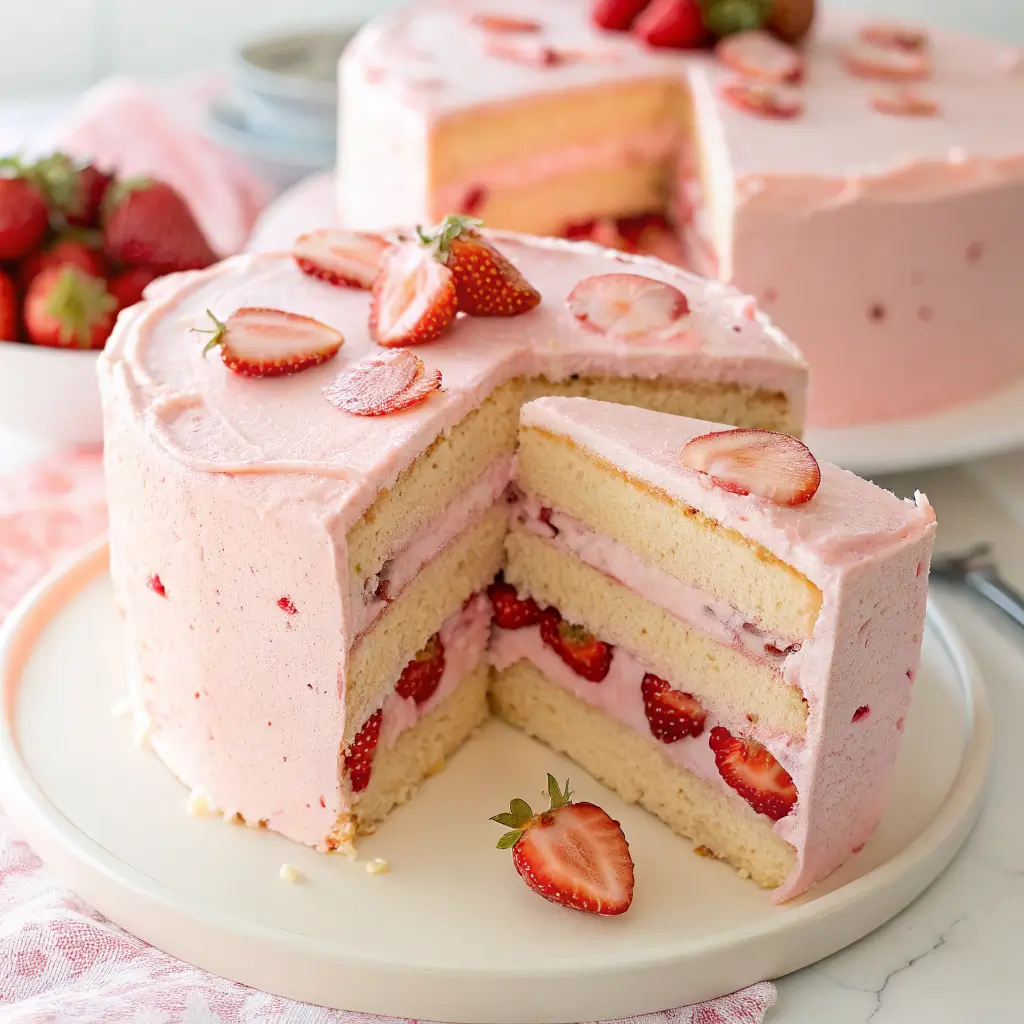
This tastes like a sunny day in a bowl. It’s the perfect balance of tangy cream cheese and sweet, fresh strawberries. I swear by this for spring and summer cakes. It’s stable enough to hold up between layers but still feels light and fresh. It’s a total crowd-pleaser, especially with kids.
What You’ll Need
- Prep Time: 20 minutes
Ingredients:
- 8 oz cream cheese, softened to room temperature
- 1/4 cup unsalted butter, softened
- 3-4 cups powdered sugar, sifted
- 1 tsp pure vanilla extract
- Pinch of salt
- 1/2 cup fresh strawberries, pureed and strained of seeds
Equipment:
- Stand mixer or hand mixer
- Blender or food processor
- Fine-mesh strainer
Instructions:
- Beat the softened cream cheese and butter together on medium-high speed until completely smooth and lump-free, about 2-3 minutes. Scrape down the bowl often.
- Add the vanilla and salt, mixing to combine.
- With the mixer on low, gradually add the powdered sugar, one cup at a time, beating until smooth after each addition.
- Puree your fresh strawberries, then press them through a fine-mesh strainer to remove all the seeds. You should have about 1/2 cup of smooth puree.
- Add the strawberry puree to the frosting and mix on low until just combined. Don’t overmix or it might get too runny.
Pro-Tip Notes:
- Pat the strawberries dry after washing them to avoid adding extra liquid.
- If the filling seems too soft, add more powdered sugar a few tablespoons at a time. If it’s too stiff, a tiny splash of milk or cream will fix it.
- This filling is best used the same day. The fresh strawberry juice can make it a bit weepy if it sits too long.
Also Read: 10 Amazing White Cake Mix Recipes for Easy Sweet Treats
4. The Zingy One: Lemon Curd Layer Filling
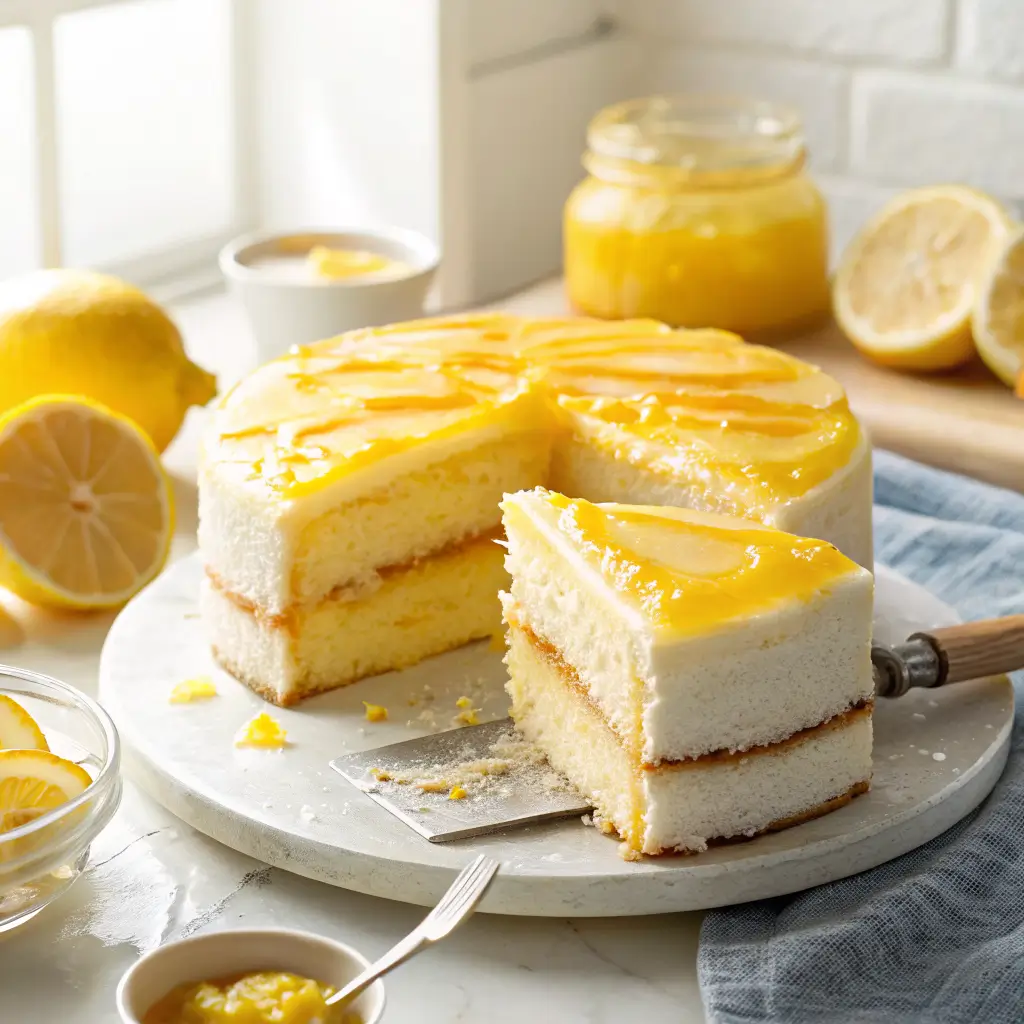
For those who love a sweet-tart punch, this is your holy grail. Lemon curd is bright, creamy, and cuts through rich cake flavors like a dream. I love it paired with a blueberry cake or a simple white cake. It’s like a burst of sunshine in every bite. Ever had a lemon meringue pie cake? This is the secret.
What You’ll Need
- Prep Time: 10 minutes
- Cook Time: 15 minutes
- Cooling Time: 4 hours
Ingredients:
- 3 large lemons, zested and juiced (about 1/2 cup juice)
- 1 1/4 cups granulated sugar
- 4 large eggs
- Pinch of salt
- 6 tbsp unsalted butter, cut into small pieces
Equipment:
- Medium saucepan
- Whisk
- Fine-mesh strainer
- Glass jar or bowl
Instructions:
- Whisk together the lemon juice, zest, sugar, eggs, and salt in a medium saucepan until smooth.
- Cook over medium-low heat, whisking constantly, until the mixture thickens enough to coat the back of a spoon and reaches 170°F (77°C). This takes about 10-15 minutes. Do not let it boil or the eggs will curdle.
- Remove from heat immediately. Add the butter pieces, one at a time, whisking until each is fully melted and incorporated.
- Strain the curd through a fine-mesh strainer into a clean jar or bowl to remove the zest and any cooked egg bits. This makes it silky smooth.
- Press plastic wrap directly onto the surface and chill until completely set, at least 4 hours.
Pro-Tip Notes:
- This recipe makes a fairly tart curd. If you prefer it sweeter, start with 1 cup of sugar and taste as you go.
- Lemon curd freezes beautifully. Make a double batch and keep some in the freezer for last-minute cake emergencies.
- For an even brighter flavor, add a teaspoon of finely grated lime zest along with the lemon.
5. The Jammy One: Raspberry Jam Buttercream Filling

This is my secret weapon for adding massive flavor with minimal effort. You get all the fruity punch of raspberry jam wrapped in a fluffy, stable buttercream. It’s perfect for when fresh berries aren’t in season or when you want a filling that won’t make your cake layers soggy.
What You’ll Need
- Prep Time: 15 minutes
Ingredients:
- 1 cup unsalted butter, softened
- 4 cups powdered sugar, sifted
- 1/2 cup high-quality seedless raspberry jam
- 1-3 tbsp heavy cream or milk
- Pinch of salt
Equipment:
- Stand mixer or hand mixer
Instructions:
- Beat the softened butter on medium speed until pale and creamy, about 3 minutes.
- Gradually add the powdered sugar, about a cup at a time, beating on low speed until incorporated, then increasing to medium-high for a minute to fluff it up.
- Add the raspberry jam and salt. Mix on low until combined, then increase speed to medium-high and beat for another 2 minutes until light and fluffy.
- Check the consistency. If it’s too stiff, add cream one tablespoon at a time until it’s perfectly spreadable.
Pro-Tip Notes:
- The quality of your jam matters! Look for one with a high fruit content and less sugar.
- For a more intense raspberry flavor, reduce 1/2 cup of fresh or frozen raspberries with a tablespoon of sugar into a thick syrup, strain out the seeds, and let it cool. Use that in place of the jam.
- This buttercream holds up great at room temperature for a few hours, making it ideal for decorated cakes.
6. The Crowd-Pleaser: Oreo Cookies and Cream Filling

Okay, be honest. If you put this in front of a kid (or, let’s be real, most adults), their eyes will light up. This is nostalgic, crunchy, creamy perfection. It tastes exactly like the cream from an Oreo, but better because you made it with love. And more cookies.
What You’ll Need
- Prep Time: 10 minutes
Ingredients:
- 1 cup unsalted butter, softened
- 3 cups powdered sugar, sifted
- 2-3 tbsp heavy cream
- 1 tsp vanilla extract
- 1 1/2 cups Oreo cookies, crushed into fine crumbs (about 15-18 cookies)
Equipment:
- Stand mixer or hand mixer
- Ziplock bag and rolling pin (or food processor)
Instructions:
- Crush your Oreos. You want them mostly fine crumbs with a few slightly larger pieces for texture. The easiest way is to toss them in a ziplock bag and whack them with a rolling pin. Very therapeutic.
- Beat the butter until smooth and creamy.
- Gradually add the powdered sugar, beating on low, then increasing to medium to fluff it up.
- Add the vanilla and 2 tablespoons of cream. Beat until smooth.
- Fold in the Oreo crumbs on low speed until just combined. If it’s too stiff, add the last tablespoon of cream.
Pro-Tip Notes:
- Don’t over-process the cookies if you want some texture. A few chunks are a good thing!
- This filling can be a bit thick. If you’re using it for a cake with very delicate layers, you might want to add an extra tablespoon of cream to make it more spreadable.
- For the ultimate experience, sprinkle extra crumbs on top of your frosted cake.
Also Read: 10 Heavenly Sheet Cake Recipes Perfect for Celebrations
7. The Showstopper: Salted Caramel Drip Filling
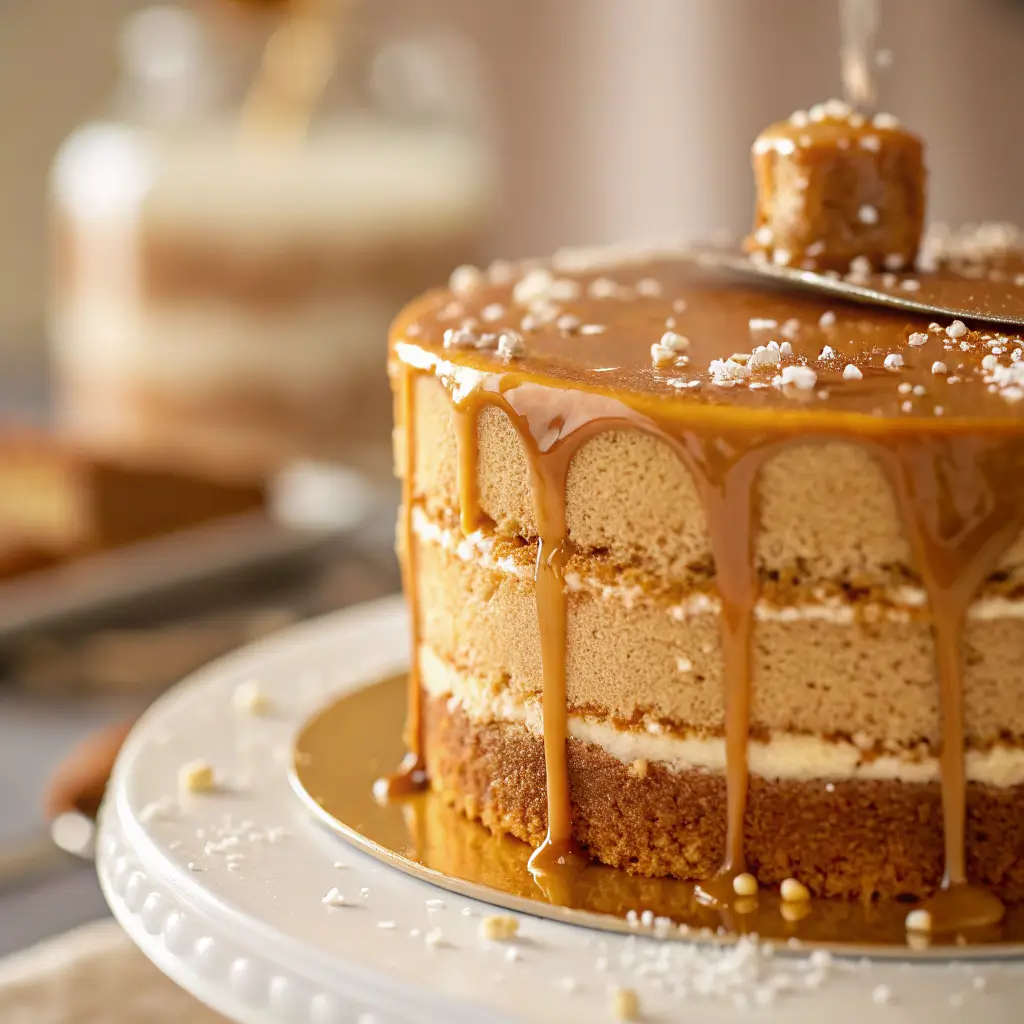
This one is pure indulgence. Sweet, buttery caramel with a hint of sea salt creates a filling that’s sophisticated and dangerously addictive. I made a salted caramel apple cake with this last fall, and it disappeared in record time. The “drip” in the name is just for fun—you’ll want to eat this with a spoon straight from the bowl.
What You’ll Need
- Prep Time: 15 minutes
- Cook Time: 20 minutes
- Cooling Time: 2 hours
Ingredients:
- 1 cup granulated sugar
- 1/4 cup water
- 1/2 cup heavy cream, warmed
- 4 tbsp unsalted butter, cubed
- 1 tsp flaky sea salt (like Maldon), plus more for garnish
- 8 oz cream cheese, softened
- 1 cup powdered sugar, sifted
Equipment:
- Medium saucepan (heavy-bottomed is best)
- Whisk
- Stand mixer or hand mixer
Instructions:
- Make the caramel. Combine sugar and water in a saucepan over medium heat. Swirl the pan gently (don’t stir!) until the sugar dissolves. Let it cook, undisturbed, until it turns a deep amber color, about 10-15 minutes. Watch it like a hawk—it can burn in seconds.
- Remove from heat and carefully pour in the warm heavy cream. It will bubble up violently. Whisk until smooth, then whisk in the butter and sea salt. Let this caramel sauce cool to room temperature (about 2 hours). It should be thick but still pourable.
- Beat the cream cheese until smooth. Add the powdered sugar and beat until combined.
- Pour in about 3/4 cup of the cooled caramel sauce (save the rest for drizzling). Beat until the filling is smooth and creamy.
Pro-Tip Notes:
- Safety first! Caramel is napalm-hot. Use a long-handled whisk and be extremely careful when adding the cream.
- The caramel must be cooled before adding to the cream cheese, or you’ll have a melted mess.
- This filling needs to stay refrigerated. Pull the cake out of the fridge about 30 minutes before serving to let it soften slightly.
8. The Tropical Escape: Mango Whipped Cream Filling
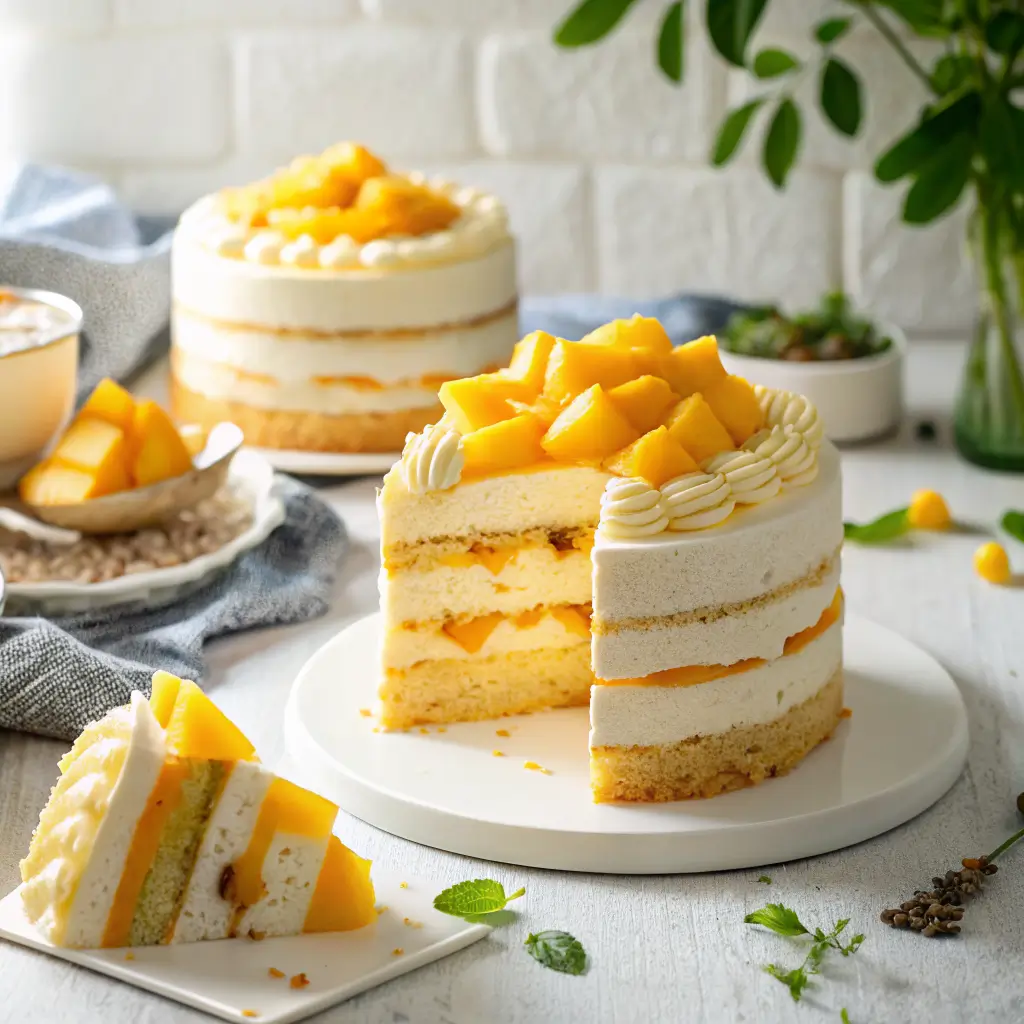
Close your eyes and take a bite. Where are you now? I’m on a beach, personally. This filling is light as air, naturally sweet, and bursting with fresh mango flavor. It’s the perfect companion to a coconut or vanilla cake. It’s not too sweet, which is sometimes exactly what you need.
What You’ll Need
- Prep Time: 20 minutes
Ingredients:
- 1 large ripe mango, peeled, pitted, and pureed (about 1 cup puree)
- 2 cups heavy whipping cream, very cold
- 1/2 cup powdered sugar, sifted
- 1 tsp vanilla extract
- 1 packet (about 2 tsp) powdered gelatin + 2 tbsp cold water (for stability)
Equipment:
- Blender or food processor
- Stand mixer or hand mixer with whisk attachment
- Small saucepan
Instructions:
- Bloom the gelatin by sprinkling it over the cold water in a small saucepan. Let it sit for 5 minutes until it looks like applesauce.
- Warm the gelatin mixture over very low heat for just 30-60 seconds until it turns completely liquid. Set aside to cool slightly.
- Puree your mango until completely smooth.
- Whip the cold heavy cream, powdered sugar, and vanilla in a large, chilled bowl until it holds soft peaks.
- Stream in the cooled liquid gelatin while beating on medium-high. Continue beating until the cream holds stiff peaks.
- Gently fold in the mango puree until you have beautiful, streak-free mango clouds.
Pro-Tip Notes:
- The gelatin is key. It stabilizes the whipped cream so it doesn’t weep or deflate between your cake layers.
- Make sure your mango is perfectly ripe—it should smell fragrant and give slightly when pressed.
- Use this filling immediately, as it will start to set from the gelatin.
9. The Nutty Dream: Nutella Hazelnut Cream Filling
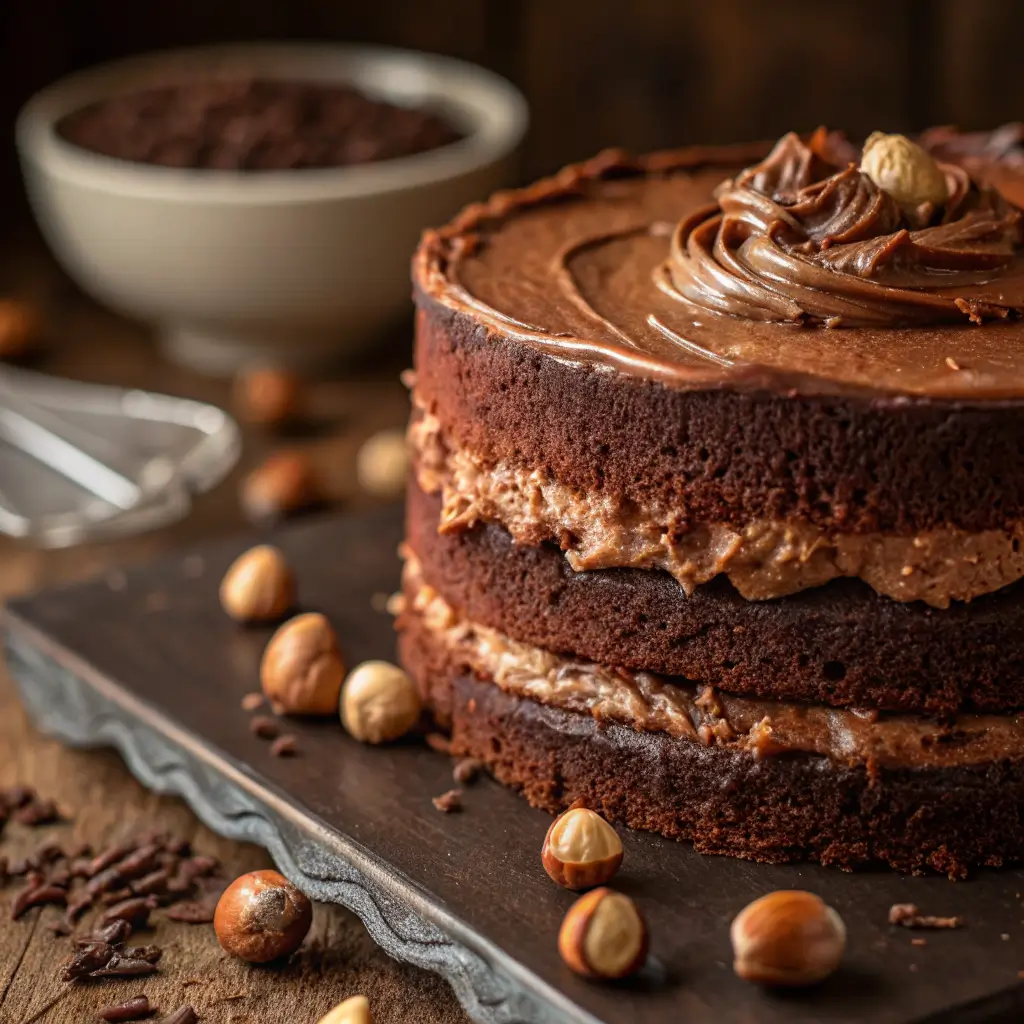
This one needs no introduction. If you love Nutella, you will lose your mind over this filling. It’s like the most luxurious, creamy, hazelnutty mousse you’ve ever tasted. It pairs brilliantly with chocolate, banana, or even plain vanilla cake. Fair warning: it’s hard not to eat it all with a spoon before it makes it onto the cake. :/
What You’ll Need
- Prep Time: 10 minutes
- Setting Time: 1 hour
Ingredients:
- 1 cup heavy whipping cream, cold
- 1/2 cup Nutella (or other chocolate-hazelnut spread)
- 1/4 cup mascarpone cheese, cold
- Pinch of salt
Equipment:
- Stand mixer or hand mixer with whisk attachment
- Large, chilled mixing bowl
Instructions:
- Place your mixer bowl and whisk in the freezer for 10 minutes. A cold bowl is your best friend for whipping cream.
- Whip the cold heavy cream in the chilled bowl until it forms stiff peaks.
- In a separate bowl, whisk the Nutella, mascarpone, and salt together until smooth and well-combined.
- Take about a third of the whipped cream and gently fold it into the Nutella mixture to lighten it. This makes it easier to fold in the rest without deflating the cream.
- Gently fold in the remaining whipped cream until just combined. No stirring! You want to keep all that lovely air in there.
- Chill for at least 1 hour to firm up before using.
Pro-Tip Notes:
- For the best flavor and texture, use full-fat Nutella and real mascarpone.
- This filling is delicate. It’s best for cakes that will be refrigerated until serving.
- For extra texture, fold in 1/3 cup of toasted, chopped hazelnuts at the end.
Also Read: 10 Easy Spice Cake Recipes Bakery Style Treats
10. The Cool One: Coconut Cream Pudding Filling
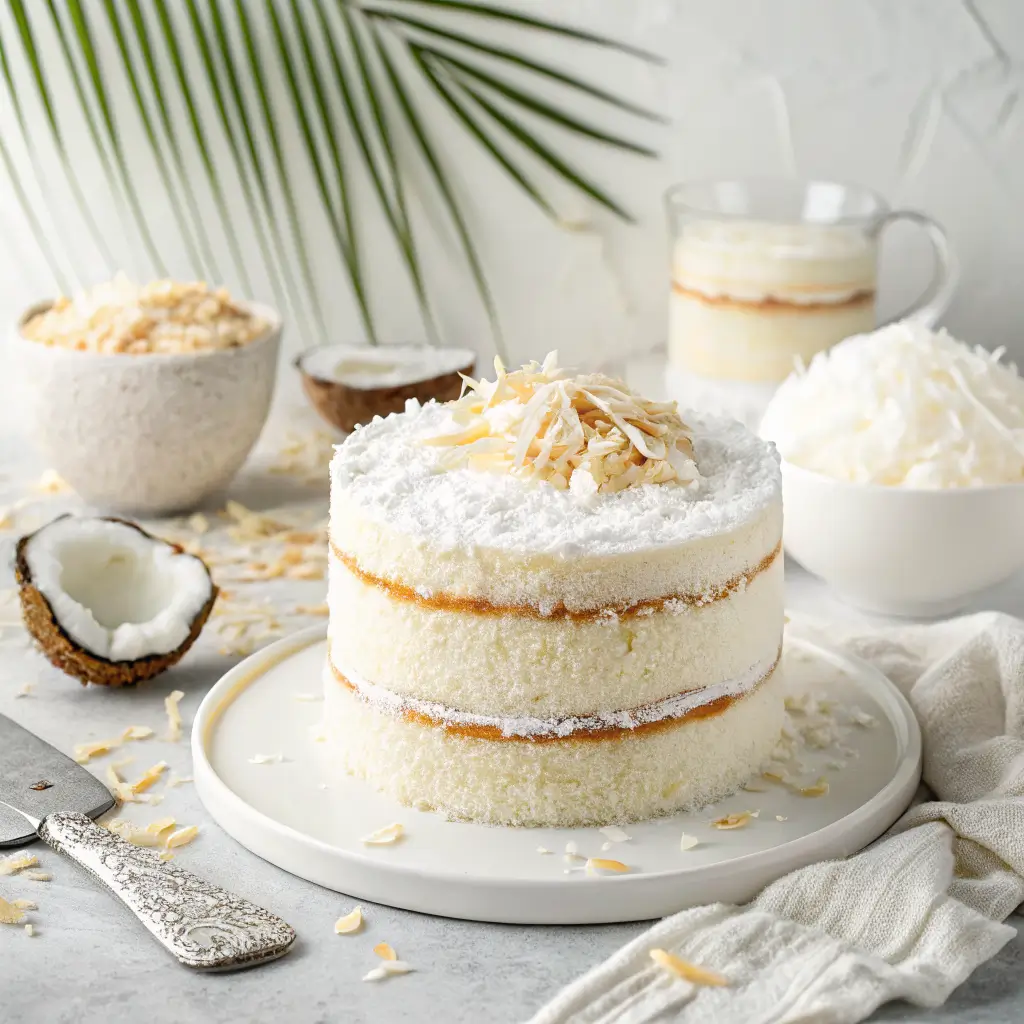
Last but not least, the one that tastes like a tropical vacation. This coconut cream pudding is thick, rich, and packed with authentic coconut flavor—not that artificial stuff. It’s the heart of a classic coconut cake, but don’t be afraid to pair it with pineapple, chocolate, or lemon. It’s a total surprise hit.
What You’ll Need
- Prep Time: 10 minutes
- Cook Time: 10 minutes
- Cooling Time: 3 hours
Ingredients:
- 1 (13.5 oz) can full-fat coconut milk, well shaken
- 1/2 cup granulated sugar
- 1/4 cup cornstarch
- 3 large egg yolks
- 1/4 tsp salt
- 1 cup sweetened shredded coconut, toasted (for folding in)
- 1 tsp coconut extract (optional, for extra punch)
Equipment:
- Medium saucepan
- Whisk
- Fine-mesh strainer
- Plastic wrap
Instructions:
- Whisk together the sugar, cornstarch, egg yolks, and salt in a medium saucepan until smooth.
- Gradually whisk in the can of coconut milk until fully combined.
- Cook over medium heat, whisking constantly, until the mixture thickens dramatically and comes to a full boil. Let it bubble for one minute to ensure the cornstarch is cooked.
- Remove from heat. Stir in the coconut extract if using.
- Strain through a fine-mesh strainer into a bowl. Press plastic wrap onto the surface and chill until firm, about 3 hours.
- Once chilled and set, fold in the toasted shredded coconut.
Pro-Tip Notes:
- Toast your coconut! It makes a world of difference. Spread it on a baking sheet and bake at 350°F (175°C) for 3-5 minutes, watching closely until it’s golden brown.
- For a smoother filling, you can use coconut cream instead of coconut milk for an even richer result.
- This sets up very firm, making it an excellent choice for layered cakes.
Conclusion
So there you have it—ten filling recipes that are guaranteed to take your cakes from “nice” to “I need this recipe!” The best part? Most of them are surprisingly simple. They just require a little patience and good ingredients.
The next time you bake, don’t just think about the cake. Think about the story you want your cake to tell. Will it be the rich, decadent tale of chocolate ganache? Or the bright, zingy adventure of lemon curd? Whatever you choose, bake with confidence, don’t be afraid to experiment, and most importantly, have fun. After all, the best cakes are made with love… and a killer filling.
Now, if you’ll excuse me, I have a serious decision to make about which one I’m making this weekend. The struggle is real. Happy baking