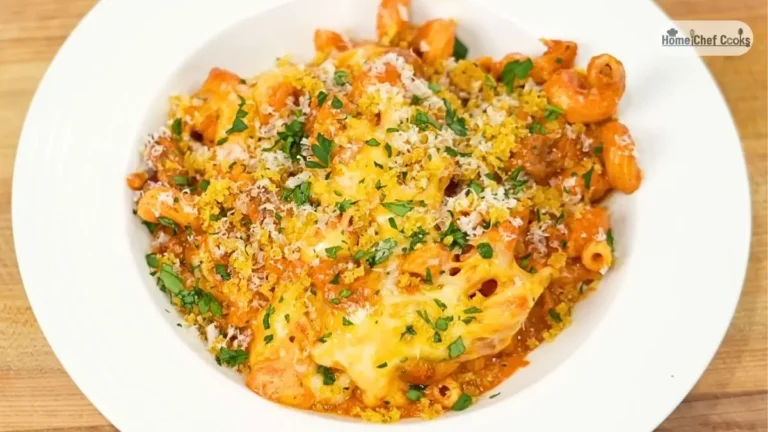
If you’ve ever craved the iconic chili’s mac and cheese at home, this chili’s mac and cheese recipe is exactly what you need. This irresistible copycat chili’s mac and cheese recipe captures the same creamy, savory comfort you get at the restaurant while bringing it straight to your kitchen.
By blending hearty, seasoned beef with rich cheese sauce and tender pasta, this chili mac recipe creates the perfect balance of spice and creaminess. Whether you love bold, comforting chili mac dishes or want something filling enough for family dinners and weekend cravings, this version truly delivers.
From classic chili mac recipes to indulgent chili mac and cheese and even variations of chilli mac, this homemade dish shows you exactly how to make mac and cheese with a flavorful twist. One bite and it will quickly become a go-to favorite in your recipe collection.
What is Chili’s Mac and Cheese and How Does It Taste?
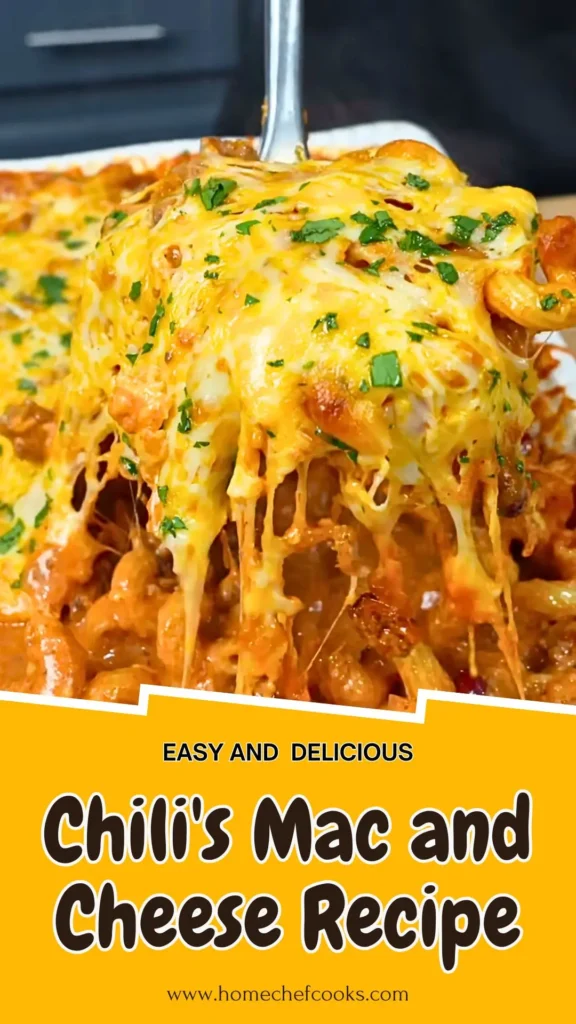
Chili’s mac and cheese is a hearty fusion dish that marries rich, beefy chili with luxuriously creamy macaroni and cheese. This chilli mac features tender pasta enveloped in a velvety cheese sauce made from sharp cheddar, Colby Jack, and Fontina, then folded into a perfectly seasoned beef chili with beans, tomatoes, and warming spices.

The result is an indulgent, savory casserole with layers of flavor-smoky, slightly spicy, tangy, and incredibly cheesy. Each bite delivers a satisfying combination of textures: creamy cheese sauce, hearty ground beef, soft beans, and al dente pasta.
The optional crispy panko topping adds a delightful crunch that contrasts beautifully with the rich, saucy interior, making this chili mac and cheese an unforgettable comfort food experience.
Chili’s Mac and Cheese Recipe Ingredients
Ingredients
For the Chili:
- 1.5 lbs (680g) ground beef (80/20 recommended)
- 1 tablespoon neutral oil (if needed)
- 1 large yellow onion, diced
- 1 bell pepper or 1–2 jalapeños, diced (adjust for spice level)
- 4–5 cloves garlic, minced
- 2 tablespoons tomato paste
- 1 (29–32 oz / 822–907g) can tomato sauce
- 1 (15 oz) can red kidney beans or pinto beans, drained and rinsed
- 1½–2 tablespoons chili powder (to taste)
- 1 tablespoon ancho chili powder (or regular chili powder)
- 1–1½ tablespoons ground cumin
- 1–2 teaspoons all-purpose seasoning
- 1–2 teaspoons garlic pepper or seasoned salt
- 1 tablespoon Worcestershire sauce
- 2 tablespoons honey
- 1–2 teaspoons garlic-infused hot sauce (or regular Tabasco), optional
- Salt and black pepper to taste
- Optional: 1 teaspoon smoked paprika
The Pasta:
- 1 lb (450g) cavatappi, elbow macaroni, or medium shells
- Heavily salted pasta water
For the Elevated Mac & Cheese Sauce:
- 2 tablespoons unsalted butter
- ¼ teaspoon chicken bouillon powder (or a pinch of MSG)
- ½ teaspoon garlic pepper seasoning
- 2 cups (480ml) heavy cream
- 8 oz (225g) sharp cheddar cheese, shredded
- 6 oz (170g) Colby Jack cheese, shredded
- 4–6 oz (115–170g) Fontina cheese, shredded (or substitute mozzarella/Monterey Jack)
- Reserved pasta water if needed to loosen
For Baking & Topping:
- Extra 8–10 oz Colby Jack or cheddar for the top
- Optional Crispy Panko Topping:
- 4 tablespoons unsalted butter
- 1½ cups panko breadcrumbs
- ⅓ cup grated Parmesan cheese
- ½ teaspoon chili powder
- ½ teaspoon garlic pepper seasoning
- Chopped fresh parsley or cilantro for garnish
Kitchen Utensils
- Large Dutch oven or deep skillet
- Large pot for boiling pasta
- Separate large pot for cheese sauce
- 9×13-inch baking dish
- Colander
- Wooden spoon or spatula
- Whisk
- Small skillet (for panko topping)
- Cheese grater
- Measuring cups and spoons
- Cutting board and knife
Preparation and Cooking Time
Prep Time: 20 minutes
Cook Time: 1 hour 10 minutes
Total Time: 1 hour 30 minutes
Servings: 10-12 servings
Copycat Chili’s Mac and Cheese Recipe
Step 1: Prepare Your Oven and Pasta Station
Preheat your oven to 350°F (175°C). Place a sheet pan or aluminum foil on the lower rack to catch any drips during baking. This simple step prevents oven cleanup later.

Step 2: Cook the Pasta
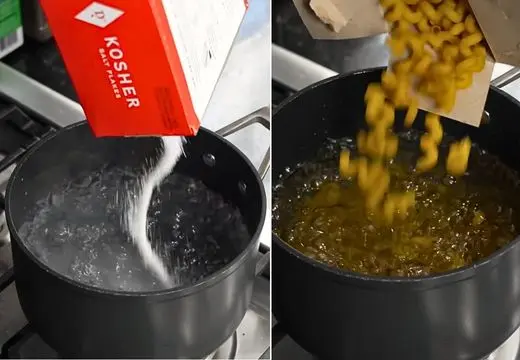
Bring a large pot of heavily salted water to a rolling boil. Add your cavatappi (or elbow macaroni) and cook 1–2 minutes shy of al dente according to package directions. The pasta will continue cooking during baking, so undercooking slightly prevents mushiness. Drain in a colander and set aside without rinsing-the starch helps the cheese sauce cling better.
Step 3: Build the Chili Base
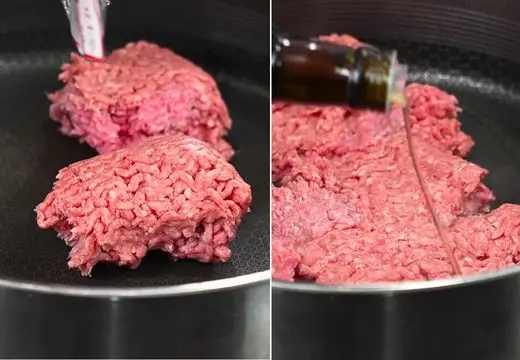
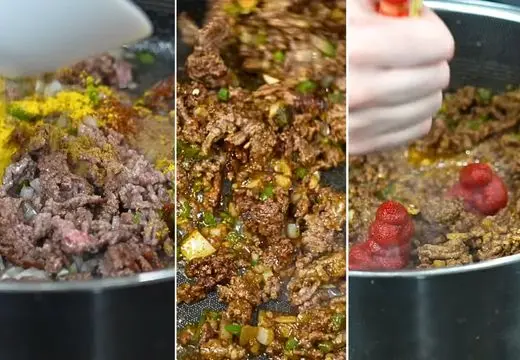
Heat your Dutch oven or deep skillet over medium-high heat. Add a small drizzle of neutral oil if needed. Add the ground beef in an even layer and resist the urge to stir immediately-let it develop a beautiful brown crust for 2–3 minutes before breaking it up with your spoon. This caramelization adds depth to your chili mac.
Step 4: Add Aromatics and Vegetables
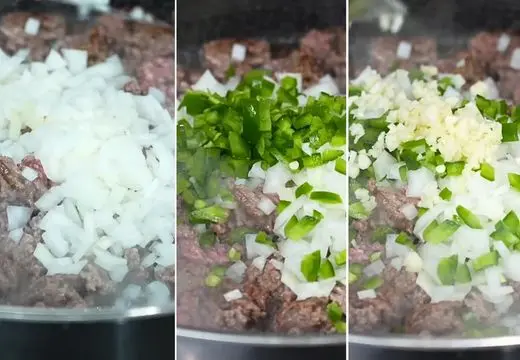
Once the beef is mostly browned, add the diced onion, bell pepper (or jalapeños for heat), and minced garlic. Cook for 3–4 minutes, stirring occasionally, until the vegetables soften and become fragrant.
Step 5: Toast the Spices
Stir in the tomato paste and cook for 1 minute to remove its raw flavor. Add all your spices: chili powder, ancho chili powder, ground cumin, all-purpose seasoning, and garlic pepper. Stir constantly for 30–60 seconds until the spices become aromatic-this blooming technique intensifies their flavors.
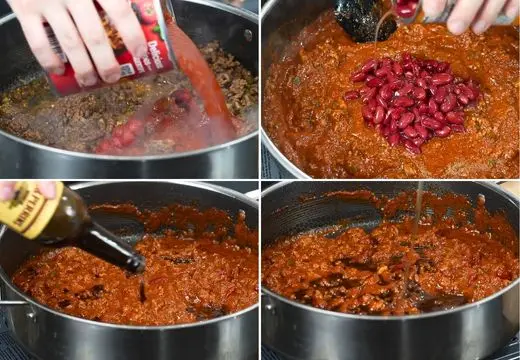
Step 6: Simmer the Chili
Pour in the tomato sauce, drained beans, Worcestershire sauce, honey, and hot sauce if using. Stir thoroughly, scraping up any flavorful browned bits from the bottom of the pot. Bring to a simmer, then reduce heat to low and let cook for 20–30 minutes, stirring occasionally. The chili should thicken and the flavors will meld beautifully. Taste and adjust salt and pepper as needed.
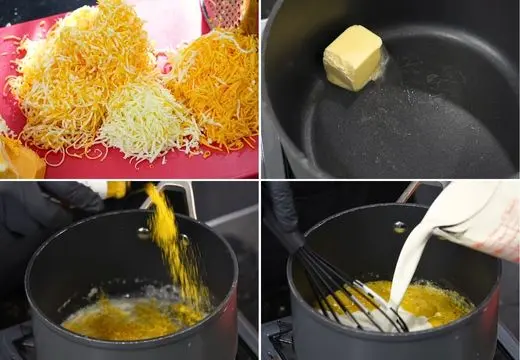
Step 7: Create the Cheese Sauce
While your chili simmers, prepare the cheese sauce in a separate large pot. Melt 2 tablespoons of butter over medium heat. Add the chicken bouillon powder and garlic pepper seasoning, stirring to combine. Pour in the heavy cream and bring to a gentle simmer. Let it reduce and thicken slightly for 8–12 minutes, stirring occasionally.
Step 8: Add the Cheese
Turn off the heat completely. Gradually whisk in all the shredded cheeses-sharp cheddar, Colby Jack, and Fontina-a handful at a time, stirring until each addition melts completely and the sauce is smooth and creamy. If the sauce seems too thick, add a splash of reserved pasta water to reach your desired consistency. Taste and adjust seasoning.
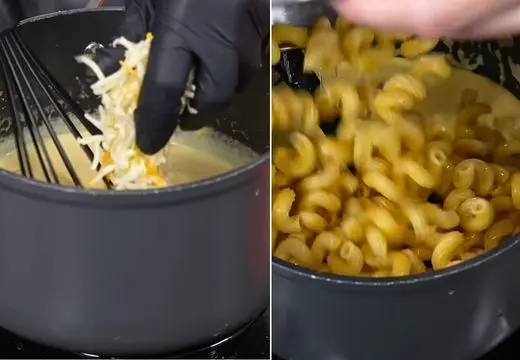
Step 9: Combine Pasta with Cheese Sauce
Add your cooked cavatappi to the cheese sauce and stir gently but thoroughly to coat every piece of pasta.

Step 10: Marry the Chili and Mac
Add about ¾ of the mac and cheese mixture into the chili pot. Reserve the remaining cheese sauce if your mixture looks too soupy-you can always add more. Stir everything together until beautifully combined and creamy, ensuring the chili and mac are fully incorporated.
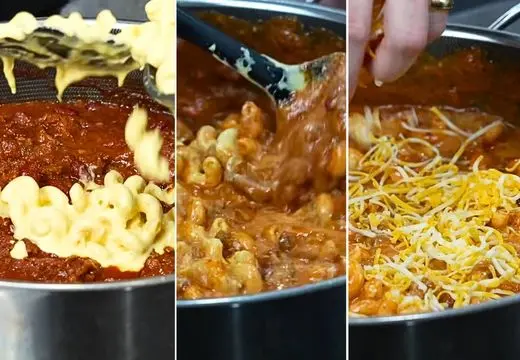
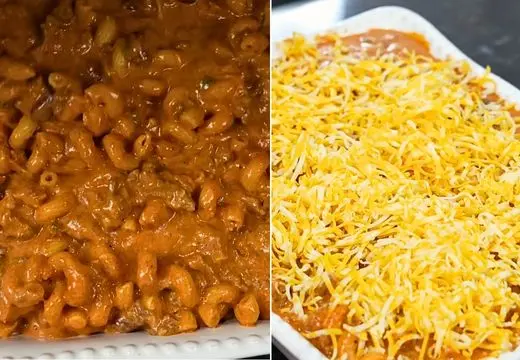
Step 11: Assemble for Baking
Transfer the entire chili mac mixture to a greased 9×13-inch baking dish, spreading it evenly. Top generously with the remaining 8–10 oz of shredded Colby Jack or cheddar cheese, covering the surface completely.
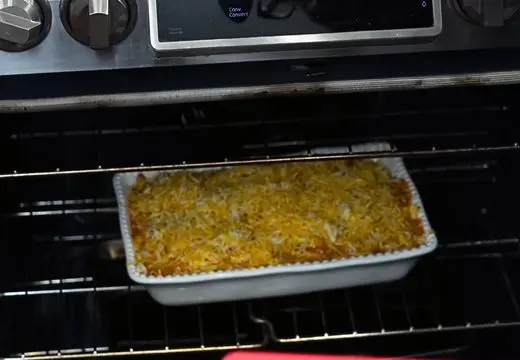
Step 12: Bake to Perfection
Place the dish in your preheated 350°F oven and bake for 25–30 minutes until the cheese on top is bubbly, melted, and golden brown in spots.
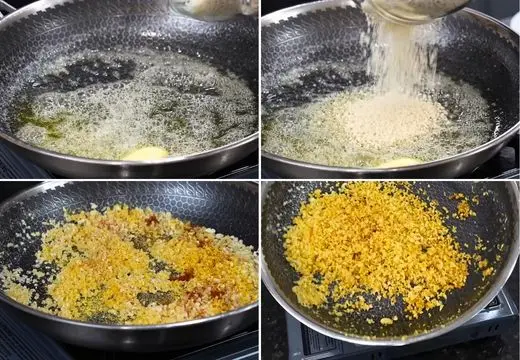
Step 13: Optional Crispy Panko Topping (Highly Recommended)
While your chili mac bakes, prepare the panko topping for added texture. Melt 4 tablespoons of butter in a skillet over medium heat. Add the panko breadcrumbs and toast, stirring frequently, until golden brown. Remove from heat and stir in the Parmesan cheese, chili powder, and garlic pepper seasoning. Once your baked dish comes out of the oven, immediately sprinkle this warm panko mixture over the top for an irresistible crunch.
Step 14: Rest and Serve
Let the dish rest for 10–15 minutes before serving. This resting period allows the sauce to set up properly, making it easier to serve neat portions. Garnish with chopped fresh parsley or cilantro for color and freshness. Serve hot with cornbread, crusty bread, or Cheddar Bay biscuits on the side.

7 Customization and Pairing Ideas for Serving
1. Spice Level Adjustments: Customize the heat in your copycat chili’s mac and cheese by adjusting the peppers and hot sauce. For a mild version, use only bell peppers and omit the jalapeños and hot sauce entirely. For medium heat, include one jalapeño with seeds removed. If you love serious spice, add 2–3 jalapeños with seeds, increase the hot sauce to 1 tablespoon, or incorporate diced serrano peppers. You can also offer hot sauce bottles tableside so guests can customize their own heat level.
2. Protein Variations: While ground beef creates an authentic chili mac, you can experiment with different proteins. Ground turkey or chicken makes a leaner version-just add an extra tablespoon of oil since these are less fatty. For a richer flavor, try ground pork or a 50/50 beef-pork blend. Vegetarians can substitute plant-based ground meat or add extra beans (black beans, pinto beans, or a three-bean mix work wonderfully). For a Tex-Mex twist, use seasoned taco meat or add cooked chorizo to the beef.
3. Cheese Combinations: The cheese blend significantly impacts your chili mac’s flavor profile. While the recipe uses sharp cheddar, Colby Jack, and Fontina, feel free to experiment. Smoked Gouda adds a campfire-like depth, pepper Jack brings heat and tang, or cream cheese stirred into the sauce creates extra creaminess. For a more sophisticated take, try Gruyère instead of Fontina. Mexican cheese blend (queso quesadilla, Chihuahua, or Oaxaca cheese) gives an authentic Tex-Mex flavor. Always shred cheese from blocks rather than using pre-shredded for the smoothest, creamiest sauce.
4. Pasta Shape Alternatives: Cavatappi (corkscrew pasta) is ideal for this chili mac recipe because its ridges and hollow center trap both chili and cheese sauce. However, elbow macaroni offers classic comfort, medium shells create little pockets for the sauce, penne rigate provides satisfying ridges, or rigatoni works for a heartier bite. Avoid delicate pastas like angel hair or long noodles like spaghetti-you want sturdy, short shapes that hold up to the thick, hearty sauce and multiple cooking stages.
5. Toppings Bar for Gatherings: Turn your chili’s mac and cheese into an interactive meal by setting up a toppings bar. Offer diced avocado or guacamole for creaminess, sour cream or Greek yogurt for tang, sliced green onions or chives for freshness, pickled jalapeños for acidity and heat, crumbled bacon for smokiness, diced tomatoes for brightness, crushed tortilla chips or Fritos for crunch, shredded lettuce for texture contrast, and fresh cilantro or parsley for herbaceous notes. This approach works wonderfully for parties and lets everyone customize their bowl.
6. Side Dish Pairings: Complete your chili mac meal with complementary sides. Cornbread or corn muffins with honey butter provide sweet contrast to the savory, spicy main dish. A crisp coleslaw or tangy vinegar-based slaw cuts through the richness. Simple green salad with lime vinaigrette adds freshness and lightness. Cheddar Bay biscuits echo the cheesy theme while adding garlic notes. Mexican street corn (elote) or roasted vegetables bring color and nutrition. For game day spreads, serve alongside other finger foods like wings, nachos, or jalapeño poppers.
7. Make-Ahead and Freezer-Friendly Modifications: This chili mac and cheese recipe is excellent for meal prep. Prepare the chili and cheese sauce separately up to 2 days ahead, refrigerate, then combine and bake when ready. For freezing, assemble the unbaked casserole, cover tightly with plastic wrap and aluminum foil, and freeze up to 3 months. Thaw overnight in the refrigerator, then bake as directed (add 10–15 minutes to baking time if still cold). Alternatively, freeze the chili and cheese sauce separately, then combine with fresh-cooked pasta when ready to serve for the best texture. Individual portions frozen in single-serving containers make perfect quick lunches.
7 Expert Tips for Perfect Chili Mac
1. Don’t Skimp on Browning the Beef: The foundation of flavorful chili mac starts with properly browned ground beef. When you add the meat to your hot pan, spread it in an even layer and resist touching it for 2–3 minutes. This allows the Maillard reaction to occur, creating deep, savory, caramelized flavors that permeate the entire dish. Breaking it up too early results in gray, steamed meat rather than rich, browned bits. Use 80/20 ground beef for the best balance of flavor and texture-leaner beef can become dry and crumbly. If excess fat pools in the pan after browning, drain some but leave about 2 tablespoons for flavor.
2. Layer Your Seasonings: Building complex flavor in your chili’s mac and cheese means seasoning at multiple stages. Season the beef while browning, bloom your spices in the hot pot before adding liquids (this releases their essential oils), taste and adjust after simmering the chili, check the cheese sauce for seasoning, and do a final taste test after combining everything. Remember that baking concentrates flavors slightly, so your pre-baked mixture should taste almost perfect. The chicken bouillon powder in the cheese sauce is a secret weapon-it adds umami depth that makes people wonder what makes your mac so special.
3. Undercook Your Pasta Intentionally: This is perhaps the most critical tip for avoiding mushy chili mac. Cook your cavatappi or elbow macaroni 1–2 minutes less than the package’s al dente instructions suggest. The pasta will absorb liquid from both the cheese sauce and chili, then continue cooking during the 25–30 minute baking time. Perfectly timed pasta will be tender but still have a pleasant bite in the finished dish. Overcooked pasta becomes mushy and waterlogged. Also, never rinse your pasta after draining-the surface starch helps the cheese sauce adhere properly.
4. Control Your Sauce Consistency: The texture of your final chili mac depends heavily on managing moisture levels. Your chili should be thick and hearty, not soupy-if it’s too liquidy after simmering, increase the heat slightly and cook uncovered for 5–10 more minutes. Your cheese sauce should coat the back of a spoon but still flow easily. When combining the mac and chili, start by adding ¾ of the mac mixture and assess the consistency. You want it creamy and cohesive, not swimming in liquid. Remember, you can always add more cheese sauce but can’t easily remove excess liquid. The dish will also thicken as it bakes and then as it rests.
5. Use Freshly Shredded Cheese: Pre-shredded cheese contains cellulose (an anti-caking agent) that prevents smooth melting and can make your sauce grainy or separated. Buying blocks of sharp cheddar, Colby Jack, and Fontina and shredding them yourself takes only 5 extra minutes but dramatically improves your cheese sauce’s texture. The sauce will be silkier, creamier, and more cohesive. If you must use pre-shredded cheese, choose a high-quality brand and add it very slowly while stirring constantly. Removing the pot from heat before adding cheese prevents the proteins from seizing up and creating a broken, greasy sauce.
6. Don’t Skip the Resting Period: After removing your bubbling, golden-topped chili mac from the oven, resist the urge to serve immediately. Let it rest uncovered for 10–15 minutes on a cooling rack or trivet. During this time, the starches continue to absorb excess moisture, the cheese sets up slightly, and the layers meld together. Cutting into it immediately results in a soupy, messy serving, while patience yields neat, cohesive portions that hold their shape beautifully on the plate. This resting period also prevents burned mouths from molten cheese sauce-an often-overlooked but important consideration.
7. The Panko Topping is a Game-Changer: While listed as optional, the crispy panko topping transforms this from excellent to extraordinary. The buttery, golden-brown breadcrumbs seasoned with Parmesan, chili powder, and garlic pepper provide textural contrast to the creamy, soft interior. The key is toasting the panko properly in butter until deeply golden-pale breadcrumbs won’t deliver that satisfying crunch. Adding it after baking rather than before keeps it maximally crispy. For even more texture variation, mix in some crushed corn chips or Fritos with the panko. This contrasting crunch is what makes people keep coming back for seconds and asking how to make mac and cheese this delicious.
Storage and Reheating Guidance
Store leftover chili mac and cheese in an airtight container in the refrigerator for up to 4 days. Reheat individual portions in the microwave for 2–3 minutes, stirring halfway through, or reheat the entire dish covered with foil at 350°F for 20–25 minutes until warmed through. Add a splash of milk or cream when reheating to restore creaminess.

Chili’s Mac and Cheese Recipe
Ingredients
Equipment
Method
- Preheat your oven to 350°F (175°C). Place a sheet pan or aluminum foil on the lower rack to catch any drips during baking. This simple step prevents oven cleanup later.
- Bring a large pot of heavily salted water to a rolling boil. Add your cavatappi (or elbow macaroni) and cook 1–2 minutes shy of al dente according to package directions. The pasta will continue cooking during baking, so undercooking slightly prevents mushiness. Drain in a colander and set aside without rinsing-the starch helps the cheese sauce cling better.
- Heat your Dutch oven or deep skillet over medium-high heat. Add a small drizzle of neutral oil if needed. Add the ground beef in an even layer and resist the urge to stir immediately-let it develop a beautiful brown crust for 2–3 minutes before breaking it up with your spoon. This caramelization adds depth to your chili mac.
- Once the beef is mostly browned, add the diced onion, bell pepper (or jalapeños for heat), and minced garlic. Cook for 3–4 minutes, stirring occasionally, until the vegetables soften and become fragrant.
- Stir in the tomato paste and cook for 1 minute to remove its raw flavor. Add all your spices: chili powder, ancho chili powder, ground cumin, all-purpose seasoning, and garlic pepper. Stir constantly for 30–60 seconds until the spices become aromatic-this blooming technique intensifies their flavors.
- Pour in the tomato sauce, drained beans, Worcestershire sauce, honey, and hot sauce if using. Stir thoroughly, scraping up any flavorful browned bits from the bottom of the pot. Bring to a simmer, then reduce heat to low and let cook for 20–30 minutes, stirring occasionally. The chili should thicken and the flavors will meld beautifully. Taste and adjust salt and pepper as needed.
- While your chili simmers, prepare the cheese sauce in a separate large pot. Melt 2 tablespoons of butter over medium heat. Add the chicken bouillon powder and garlic pepper seasoning, stirring to combine. Pour in the heavy cream and bring to a gentle simmer. Let it reduce and thicken slightly for 8–12 minutes, stirring occasionally.
- Turn off the heat completely. Gradually whisk in all the shredded cheeses-sharp cheddar, Colby Jack, and Fontina-a handful at a time, stirring until each addition melts completely and the sauce is smooth and creamy. If the sauce seems too thick, add a splash of reserved pasta water to reach your desired consistency. Taste and adjust seasoning.
- Add your cooked cavatappi to the cheese sauce and stir gently but thoroughly to coat every piece of pasta.
- Add about ¾ of the mac and cheese mixture into the chili pot. Reserve the remaining cheese sauce if your mixture looks too soupy-you can always add more. Stir everything together until beautifully combined and creamy, ensuring the chili and mac are fully incorporated.
- Transfer the entire chili mac mixture to a greased 9×13-inch baking dish, spreading it evenly. Top generously with the remaining 8–10 oz of shredded Colby Jack or cheddar cheese, covering the surface completely.
- Place the dish in your preheated 350°F oven and bake for 25–30 minutes until the cheese on top is bubbly, melted, and golden brown in spots.
- While your chili mac bakes, prepare the panko topping for added texture. Melt 4 tablespoons of butter in a skillet over medium heat. Add the panko breadcrumbs and toast, stirring frequently, until golden brown. Remove from heat and stir in the Parmesan cheese, chili powder, and garlic pepper seasoning. Once your baked dish comes out of the oven, immediately sprinkle this warm panko mixture over the top for an irresistible crunch.
- Let the dish rest for 10–15 minutes before serving. This resting period allows the sauce to set up properly, making it easier to serve neat portions. Garnish with chopped fresh parsley or cilantro for color and freshness. Serve hot with cornbread, crusty bread, or Cheddar Bay biscuits on the side.
Video
Notes
Common Queries and FAQs
Q: Can I make this chili mac recipe ahead of time?
A: Absolutely! You can prepare the chili and cheese sauce separately up to 2 days in advance, store them in the refrigerator, then combine with freshly cooked pasta and bake when ready. Alternatively, assemble the entire casserole, cover tightly, and refrigerate unbaked for up to 24 hours before baking (add 10 extra minutes to the baking time if starting cold).
Q: What’s the best cheese combination for copycat chili’s mac and cheese?
A: The recipe’s trio of sharp cheddar (for tang and flavor), Colby Jack (for creaminess), and Fontina (for meltability) creates the most authentic, restaurant-quality result. Sharp cheddar alone can be grainy, while milder cheeses lack depth. This blend balances flavor, texture, and that coveted cheese pull.
Q: Can I make this chili mac and cheese without beans?
A: Yes! Simply omit the kidney or pinto beans if you prefer a bean-free version. You might want to increase the ground beef to 2 lbs to maintain heartiness. Some people also add diced bell peppers or corn for additional texture and vegetable content.
Q: How do I prevent my cheese sauce from breaking or becoming grainy?
A: Use freshly shredded cheese from blocks (pre-shredded contains anti-caking agents), remove the pot completely from heat before adding cheese, add cheese gradually in small handfuls while stirring constantly, and avoid overheating the sauce once cheese is added. If it does break, whisk in a tablespoon of cream or reserved pasta water to bring it back together.
Q: What type of pasta works best for chili mac recipes?
A: Cavatappi is ideal because its corkscrew shape and hollow center trap sauce beautifully, but elbow macaroni is the traditional choice for classic mac and cheese. Medium shells, penne rigate, or rigatoni also work well. Choose sturdy, short pasta shapes with ridges or hollows that can hold the thick, hearty sauce.
Q: Can I freeze this chili’s mac and cheese?
A: Yes! Assemble the unbaked casserole, cover tightly with plastic wrap and aluminum foil, and freeze for up to 3 months. Thaw overnight in the refrigerator, then bake as directed (you may need to add 10–15 minutes to the baking time). For best results, freeze the chili and cheese sauce separately, then combine with fresh pasta when ready to serve.
Q: How can I make this chilli mac spicier?
A: Increase the jalapeños to 2–3 with seeds included, add cayenne pepper or crushed red pepper flakes to the chili (start with ½ teaspoon), use pepper Jack cheese in place of Colby Jack, increase the hot sauce to 1 tablespoon, or offer additional hot sauce tableside. You can also top individual servings with fresh sliced jalapeños or hot sauce.
Q: What sides pair well with chili mac and cheese?
A: Complement the rich, hearty main dish with lighter, contrasting sides: cornbread or corn muffins with honey butter, crisp coleslaw or vinegar-based slaw, simple green salad with citrus vinaigrette, garlic bread or Cheddar Bay biscuits, roasted vegetables, or Mexican street corn. These provide textural contrast and freshness to balance the creamy, cheesy casserole.
This copycat chili’s mac and cheese recipe delivers everything you love about the restaurant version and more-rich, creamy, perfectly spiced, and endlessly satisfying. By mastering how to make mac and cheese with hearty beef chili, you’ve created a versatile crowd-pleaser that works equally well for weeknight family dinners, potluck contributions, or game day gatherings.
The combination of tender pasta, three-cheese sauce, seasoned ground beef, and optional crispy panko topping creates layers of flavor and texture that keep everyone coming back for seconds. Whether you follow the recipe exactly or customize it with your favorite variations, this chili mac will quickly become a beloved staple in your comfort food rotation.
We’d love to hear how this recipe turns out for you! Give it a try, then drop a comment below to share your thoughts and tips with us.
So creamy and delicious.
Thanks
Thanks for sharing the recipe
welcome